目次
Googleアカウントを確認してGoogleカレンダーの予定にタイトルを入力する
Googleカレンダー Android版に新しい予定を追加するには、右下の「+」アイコンをタップします。![google-calendar-new-schedule1](https://androidlover.net/wp-content/uploads/google-calendar-new-schedule1-281x500.png)
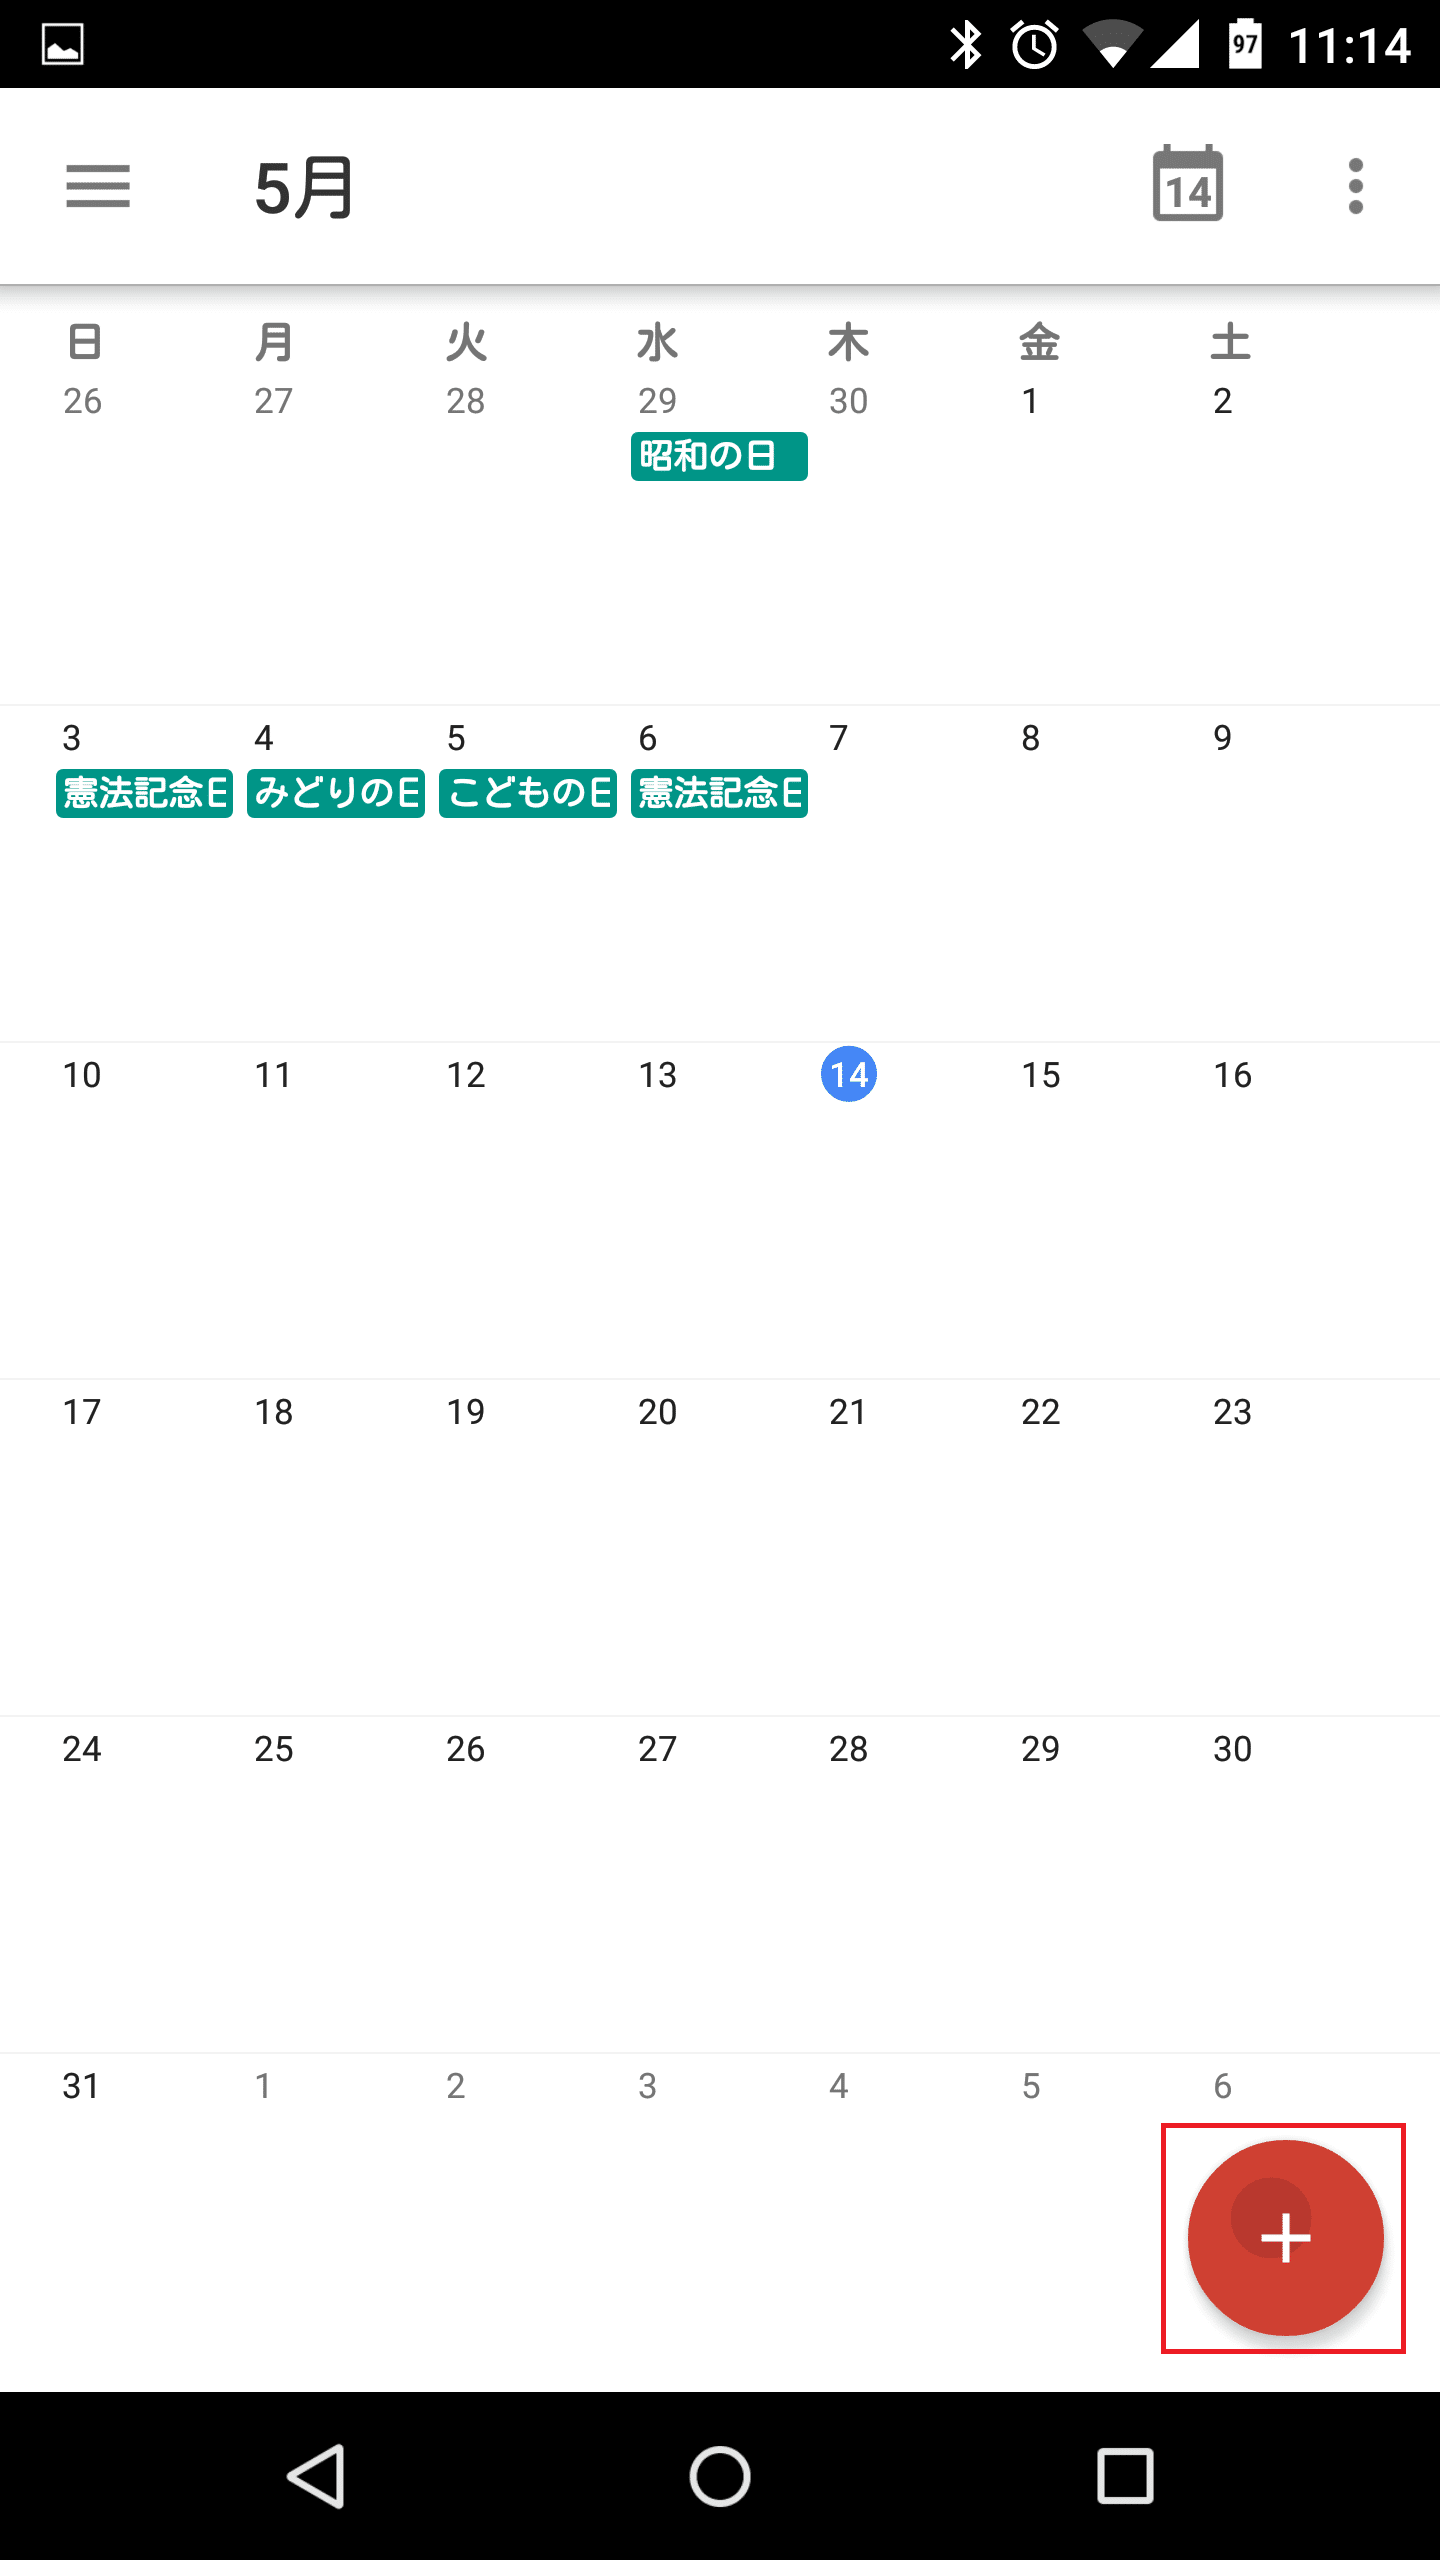
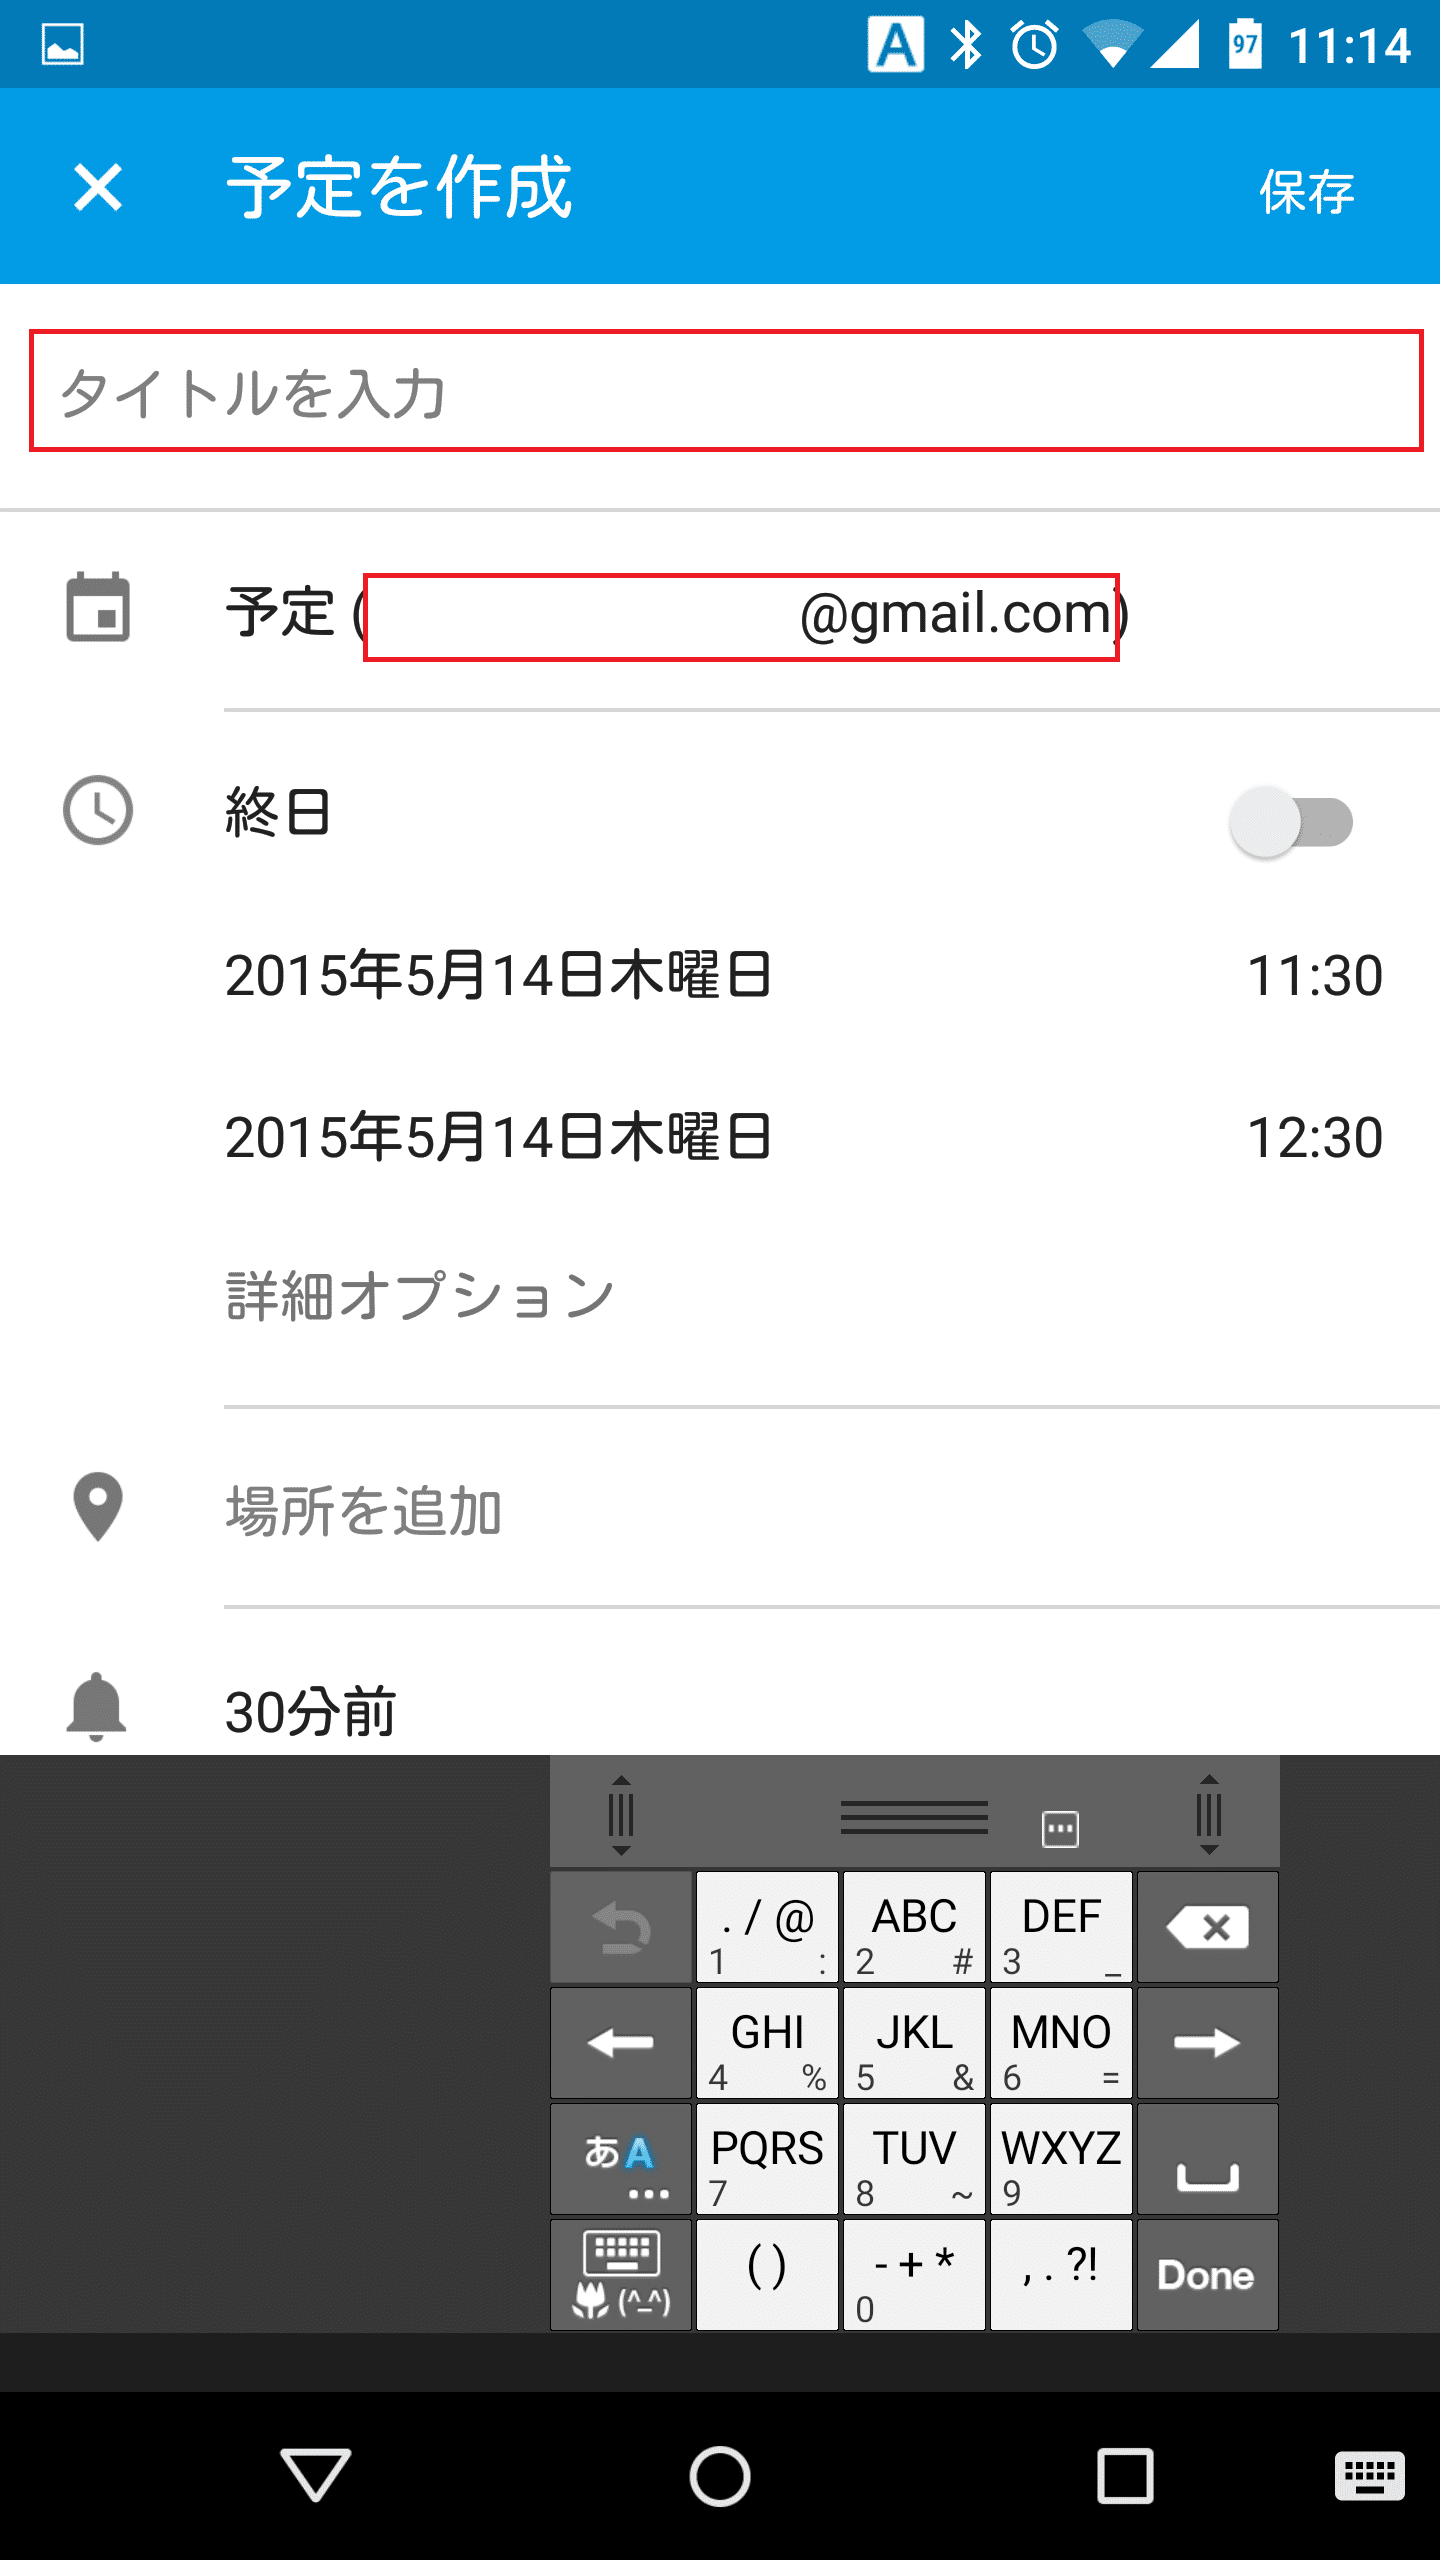
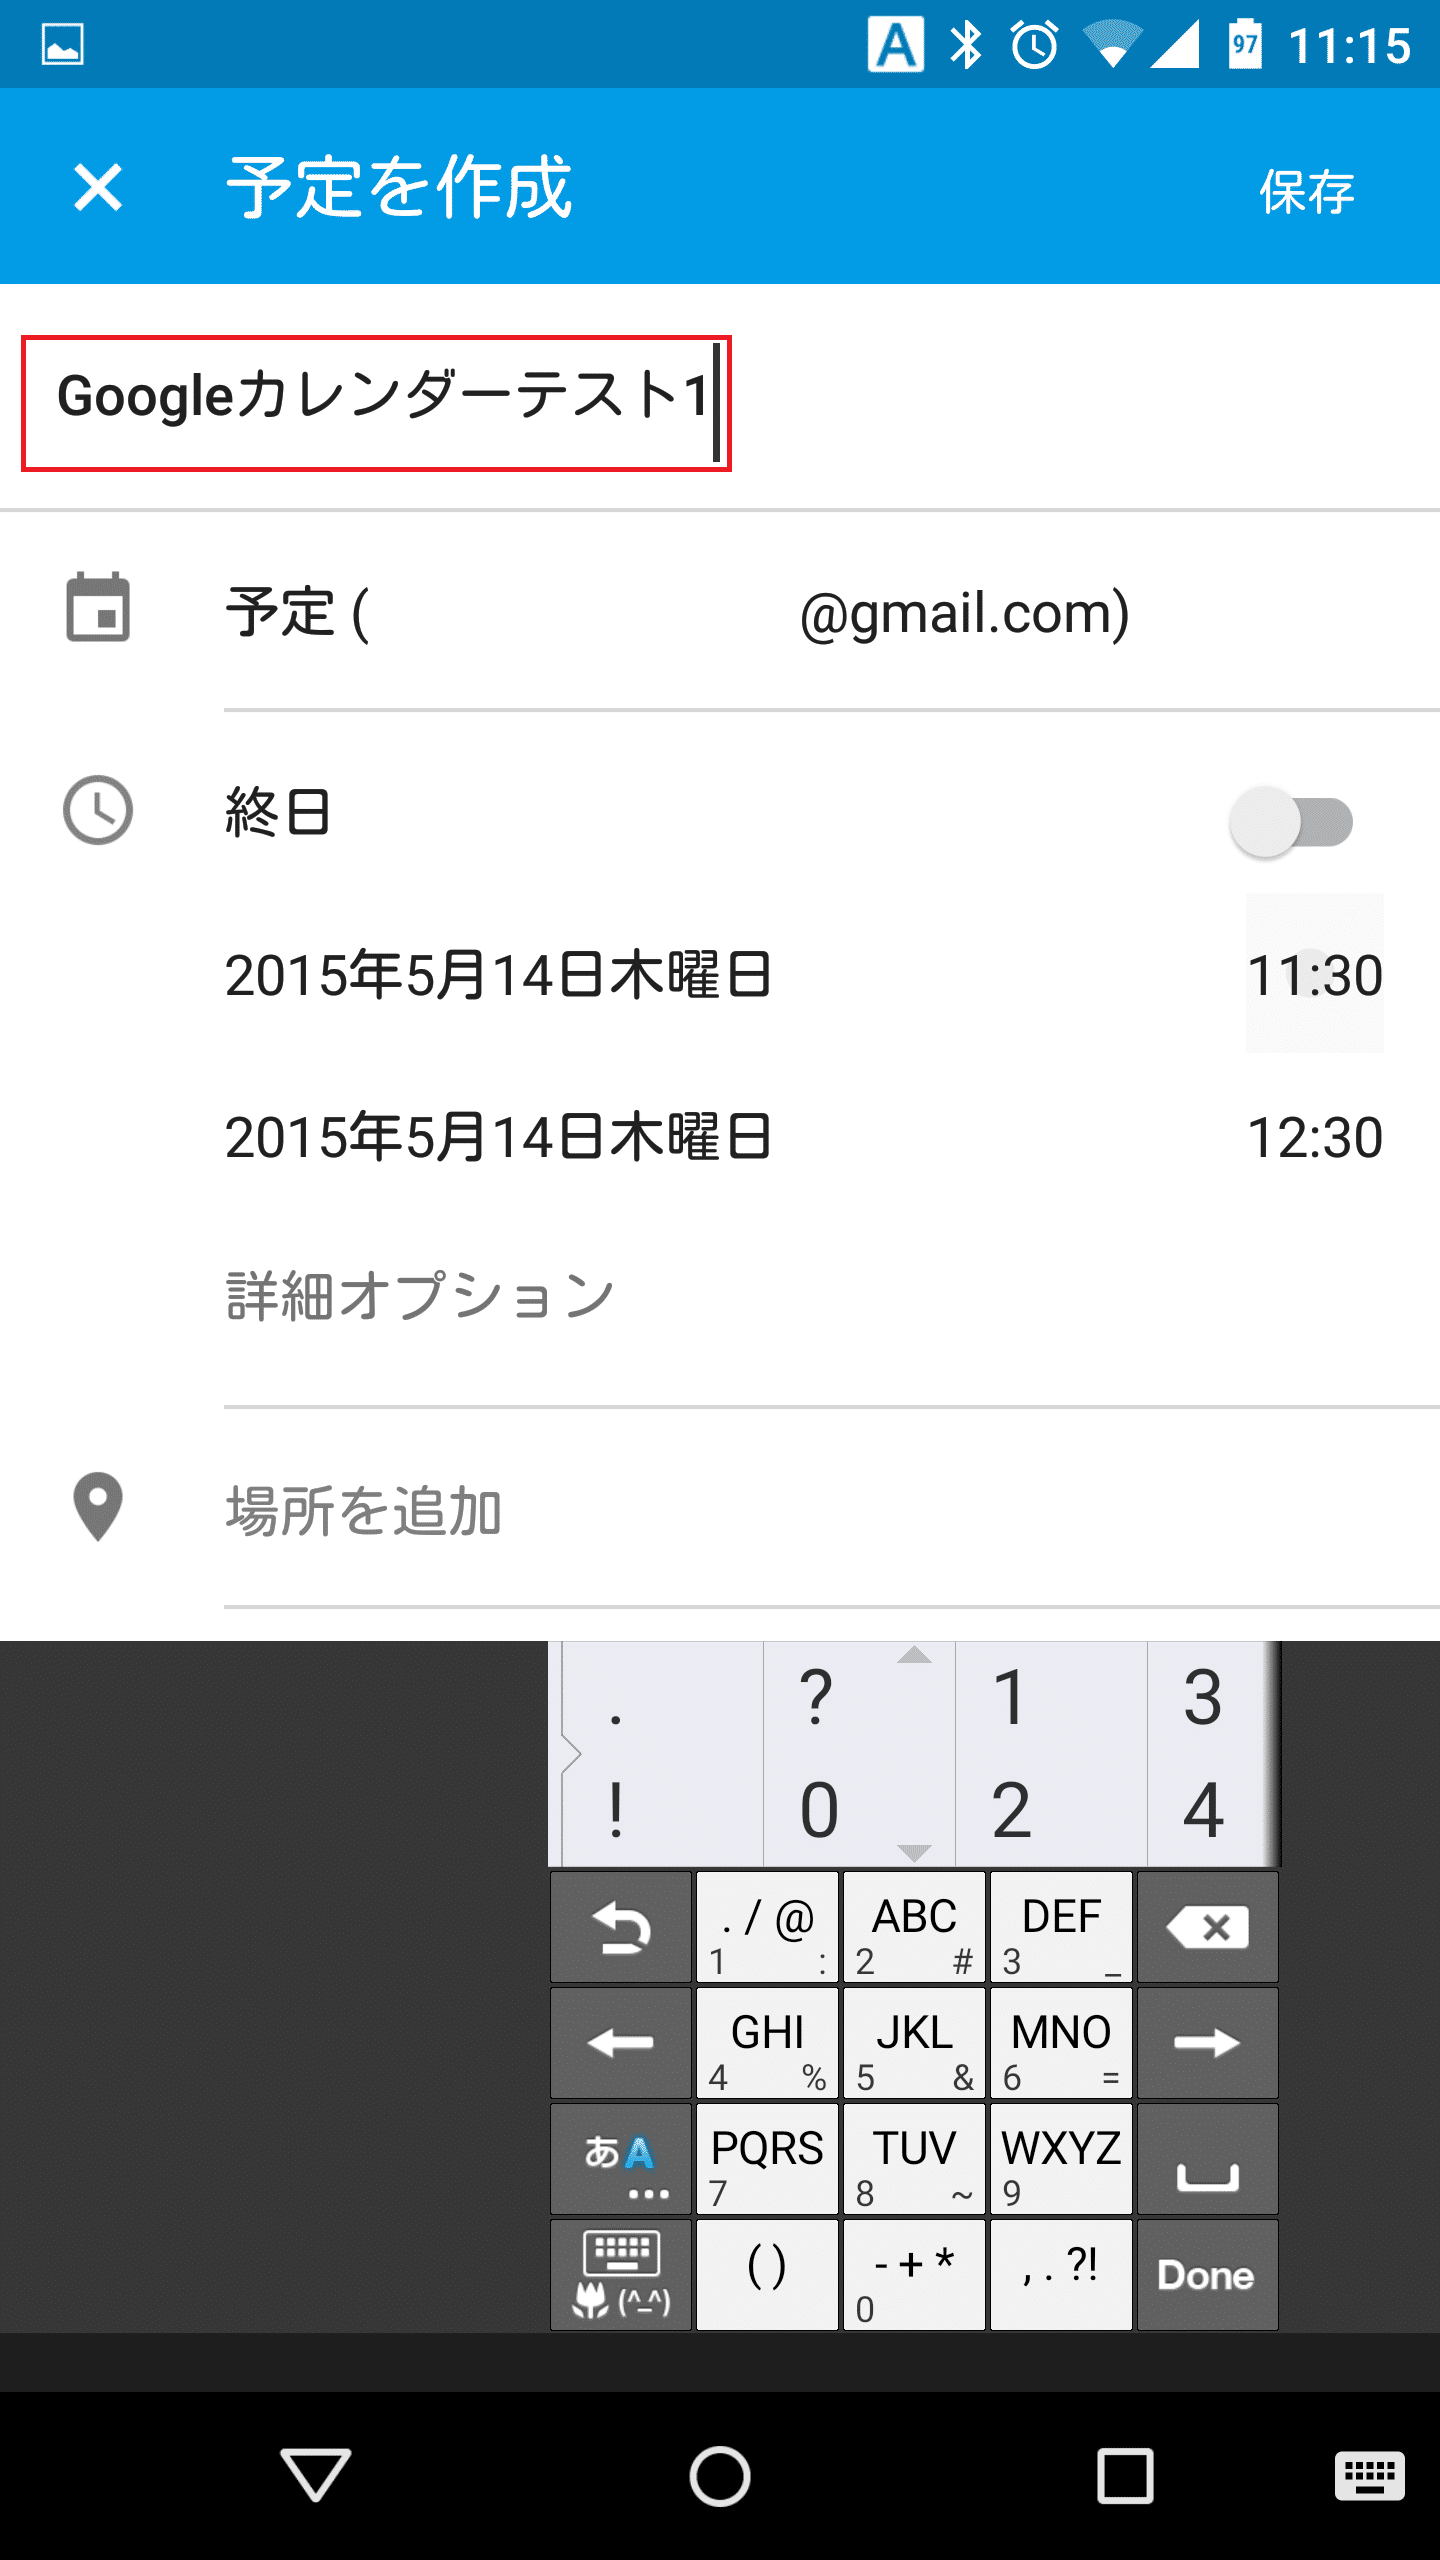
Googleカレンダーに追加した予定はGoogleアカウントに紐づけされます。予定を作成する前に、その予定を登録したいGoogleアカウントであるかどうかを確認しておきます。Googleアカウントを確認したら、「タイトルを入力」をタップして予定のタイトルを入力します。
![google-calendar-new-schedule2](https://androidlover.net/wp-content/uploads/google-calendar-new-schedule2-281x500.png)
タイトルの入力が終わったら、次の設定に進みます。
![google-calendar-new-schedule3](https://androidlover.net/wp-content/uploads/google-calendar-new-schedule3-281x500.png)
Googleカレンダー Android版で予定の日時を指定する
Googleカレンダー Android版で予定の日時を指定していきます。予定開始の日にちを指定する
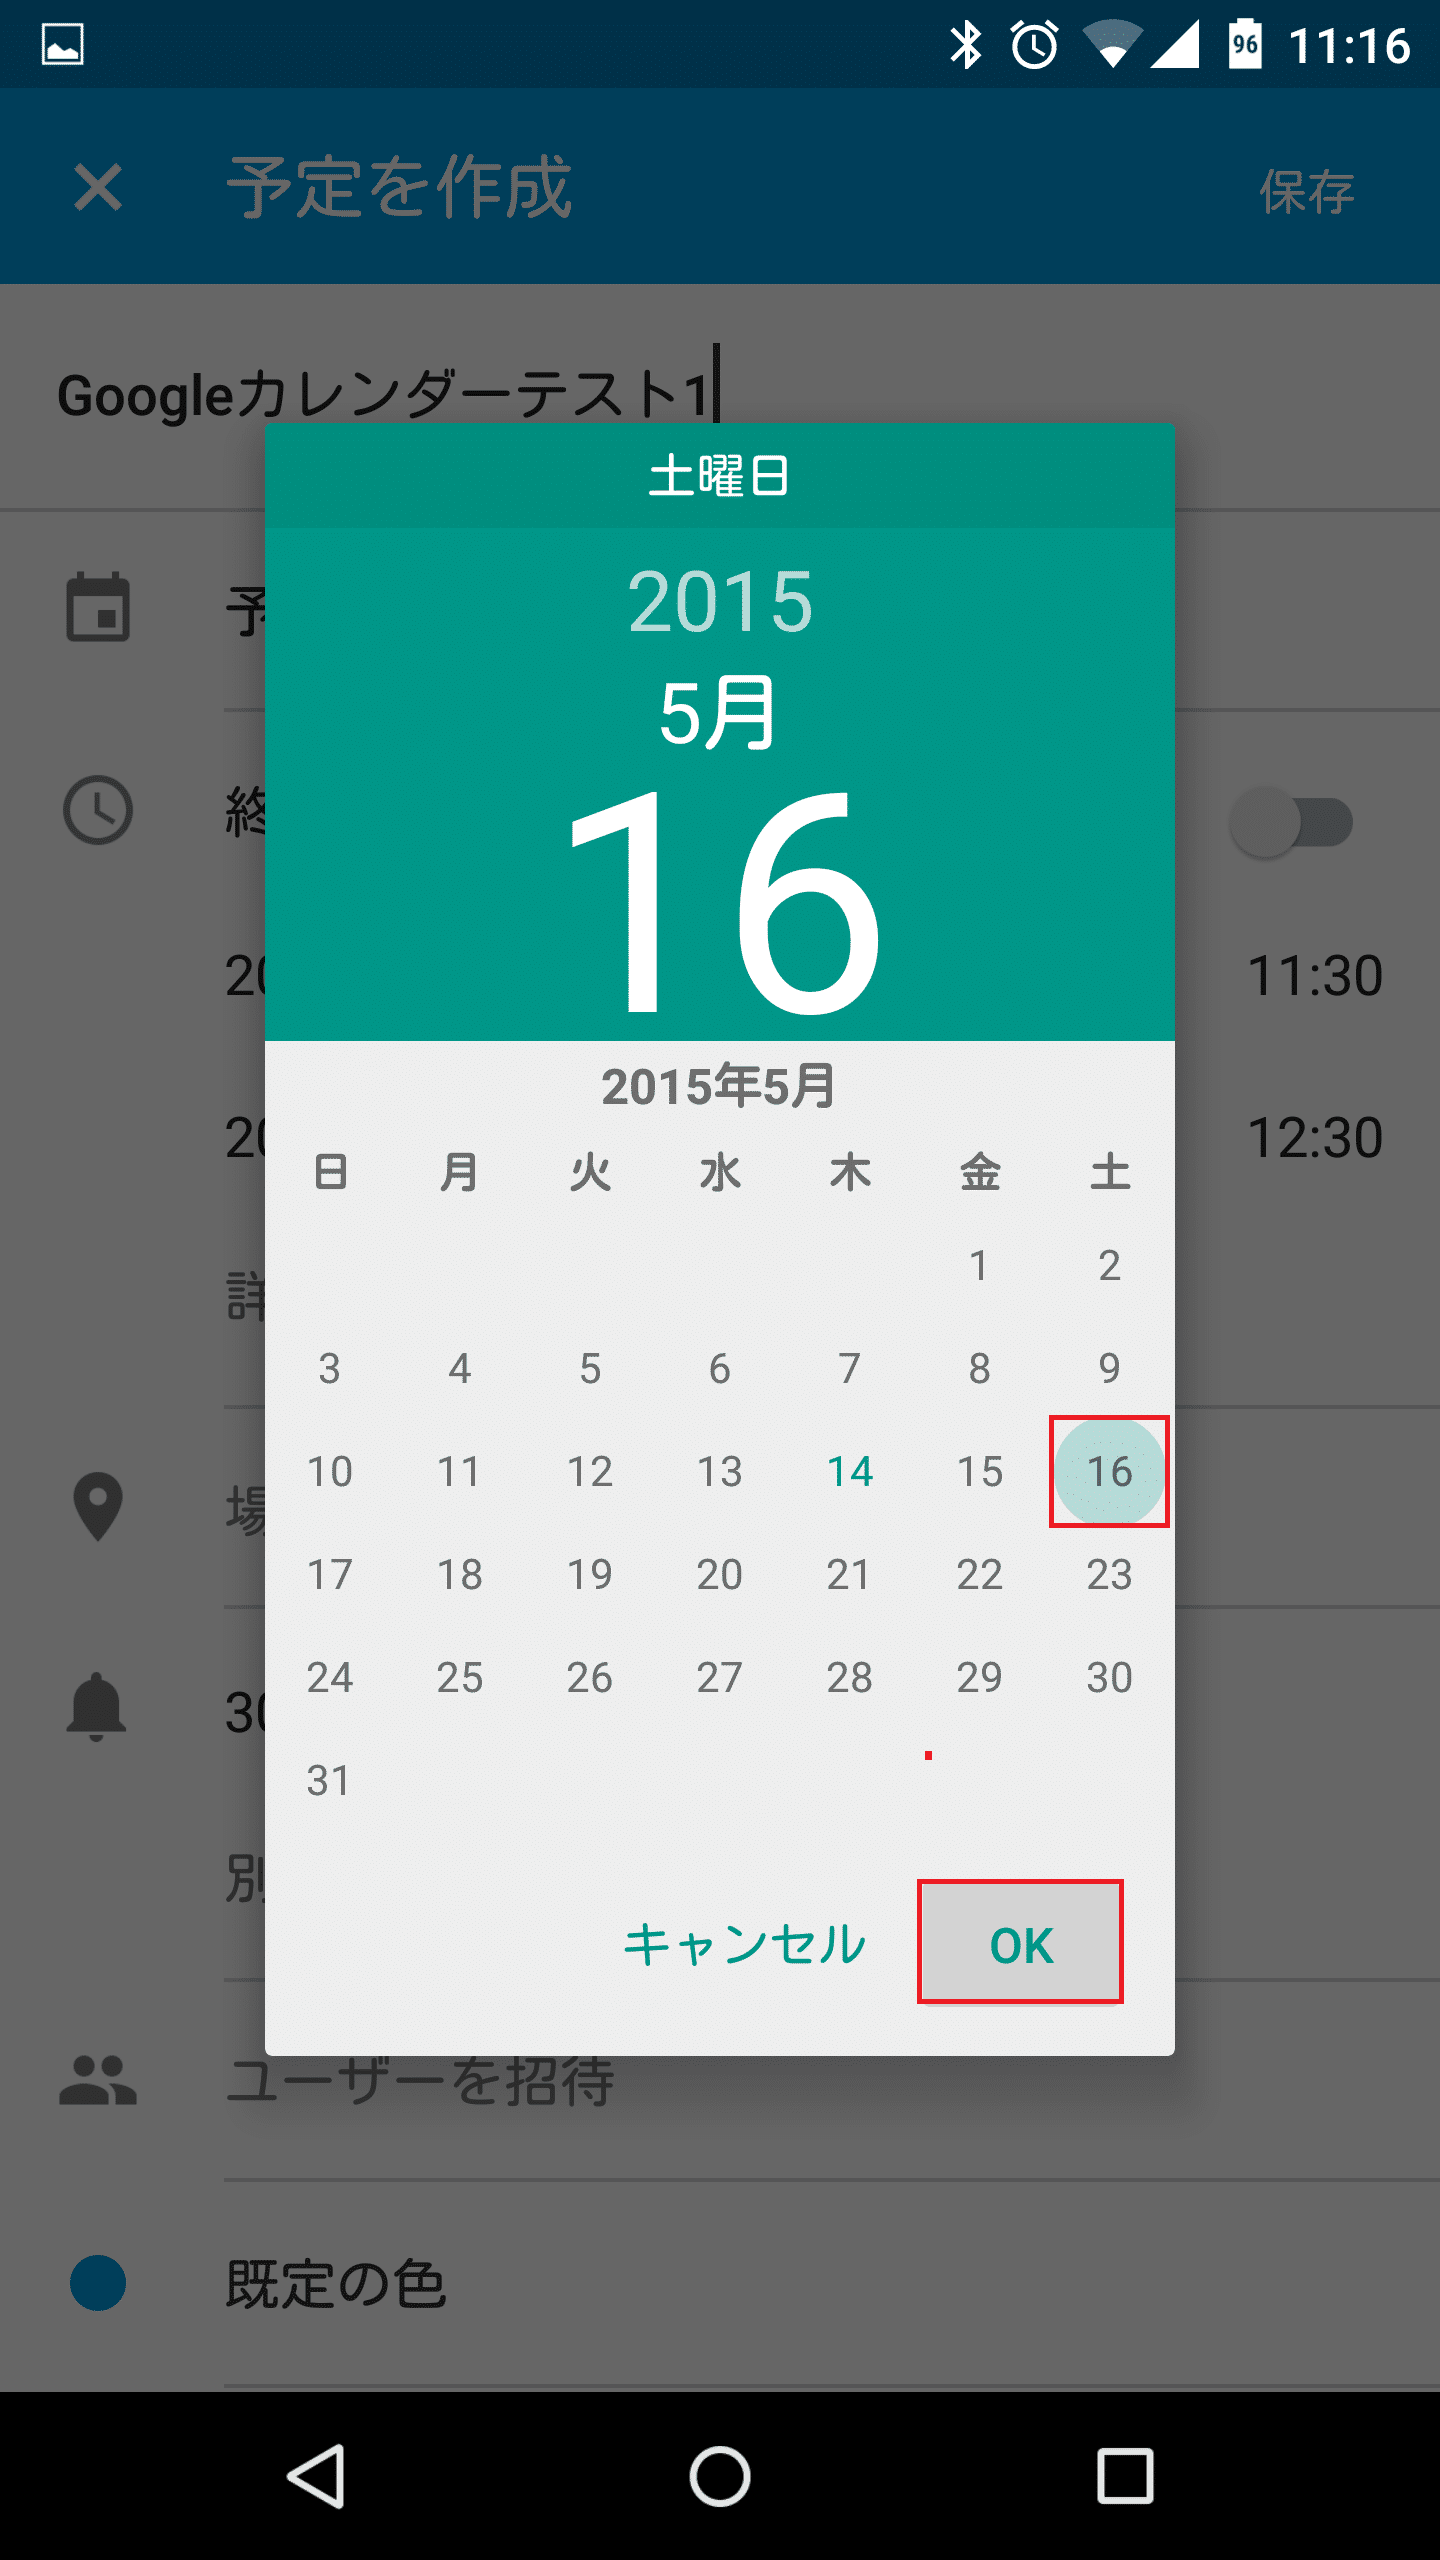
まずは予定開始の日にちを指定します。年月日が表示されている部分をタップします。![google-calendar-new-schedule4](https://androidlover.net/wp-content/uploads/google-calendar-new-schedule4-281x500.png)
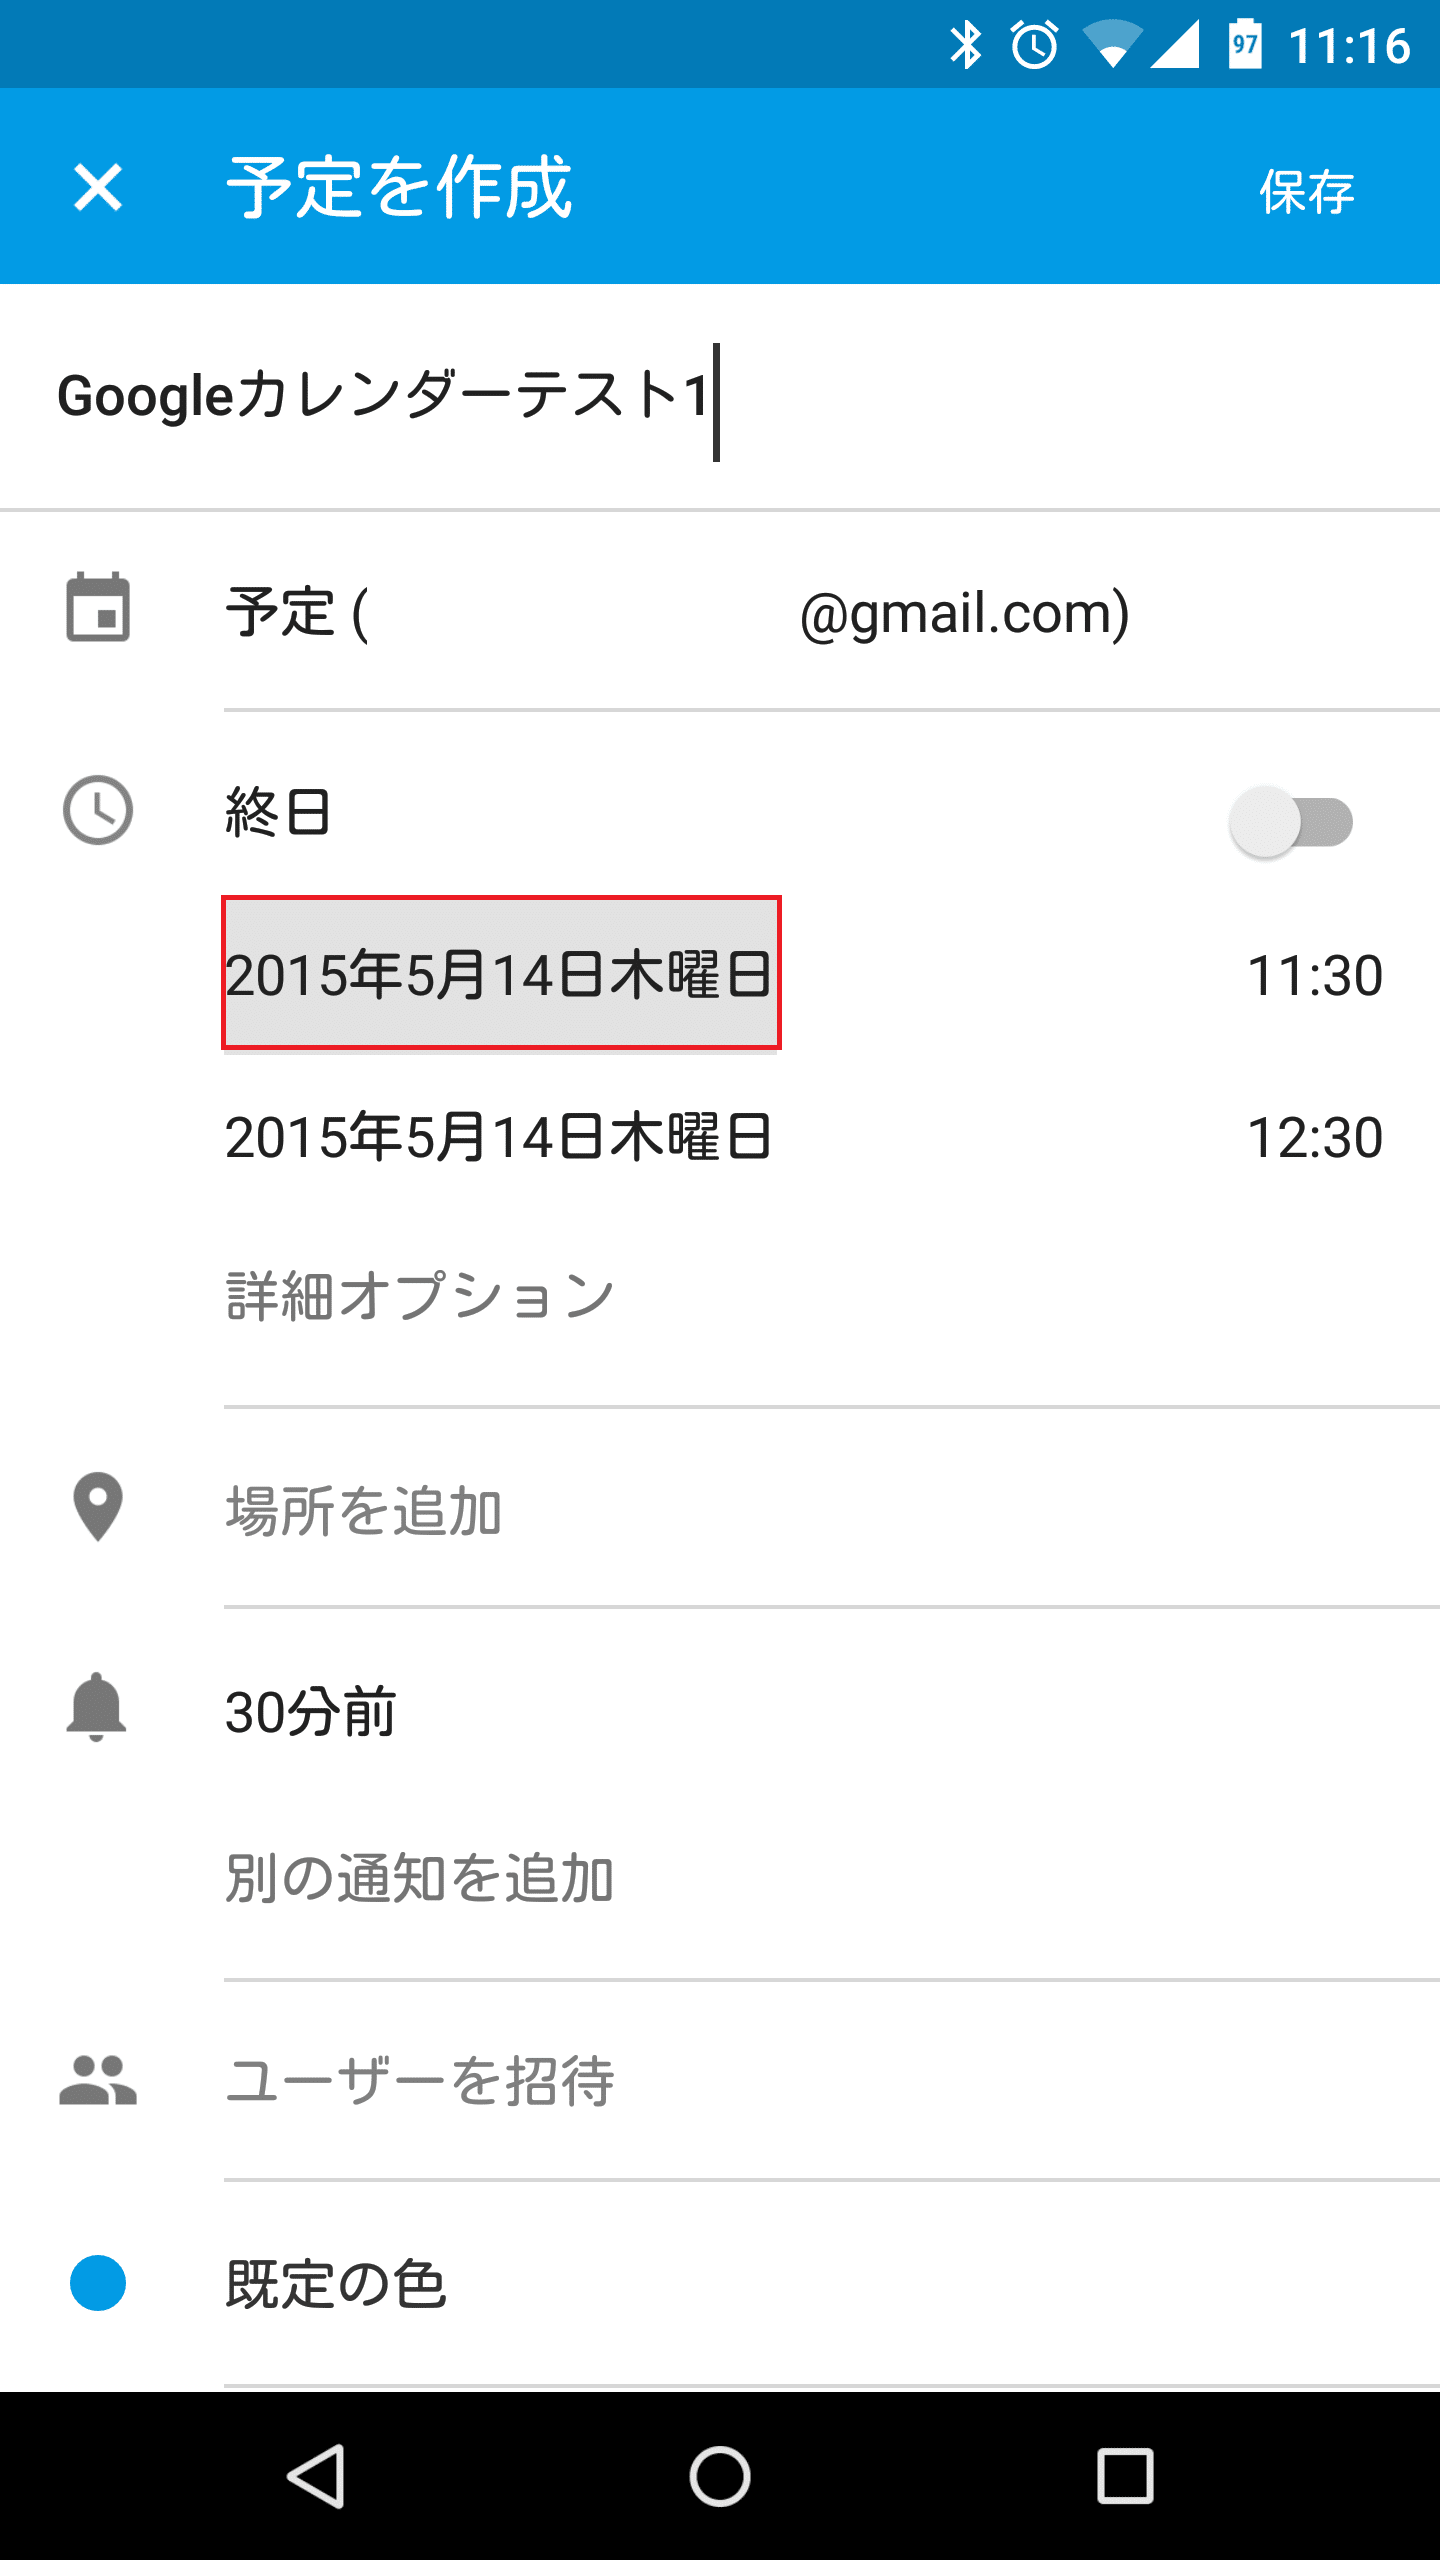
すると、日にちを選ぶためのカレンダーが表示されます。
![google-calendar-new-schedule5](https://androidlover.net/wp-content/uploads/google-calendar-new-schedule5-281x500.png)
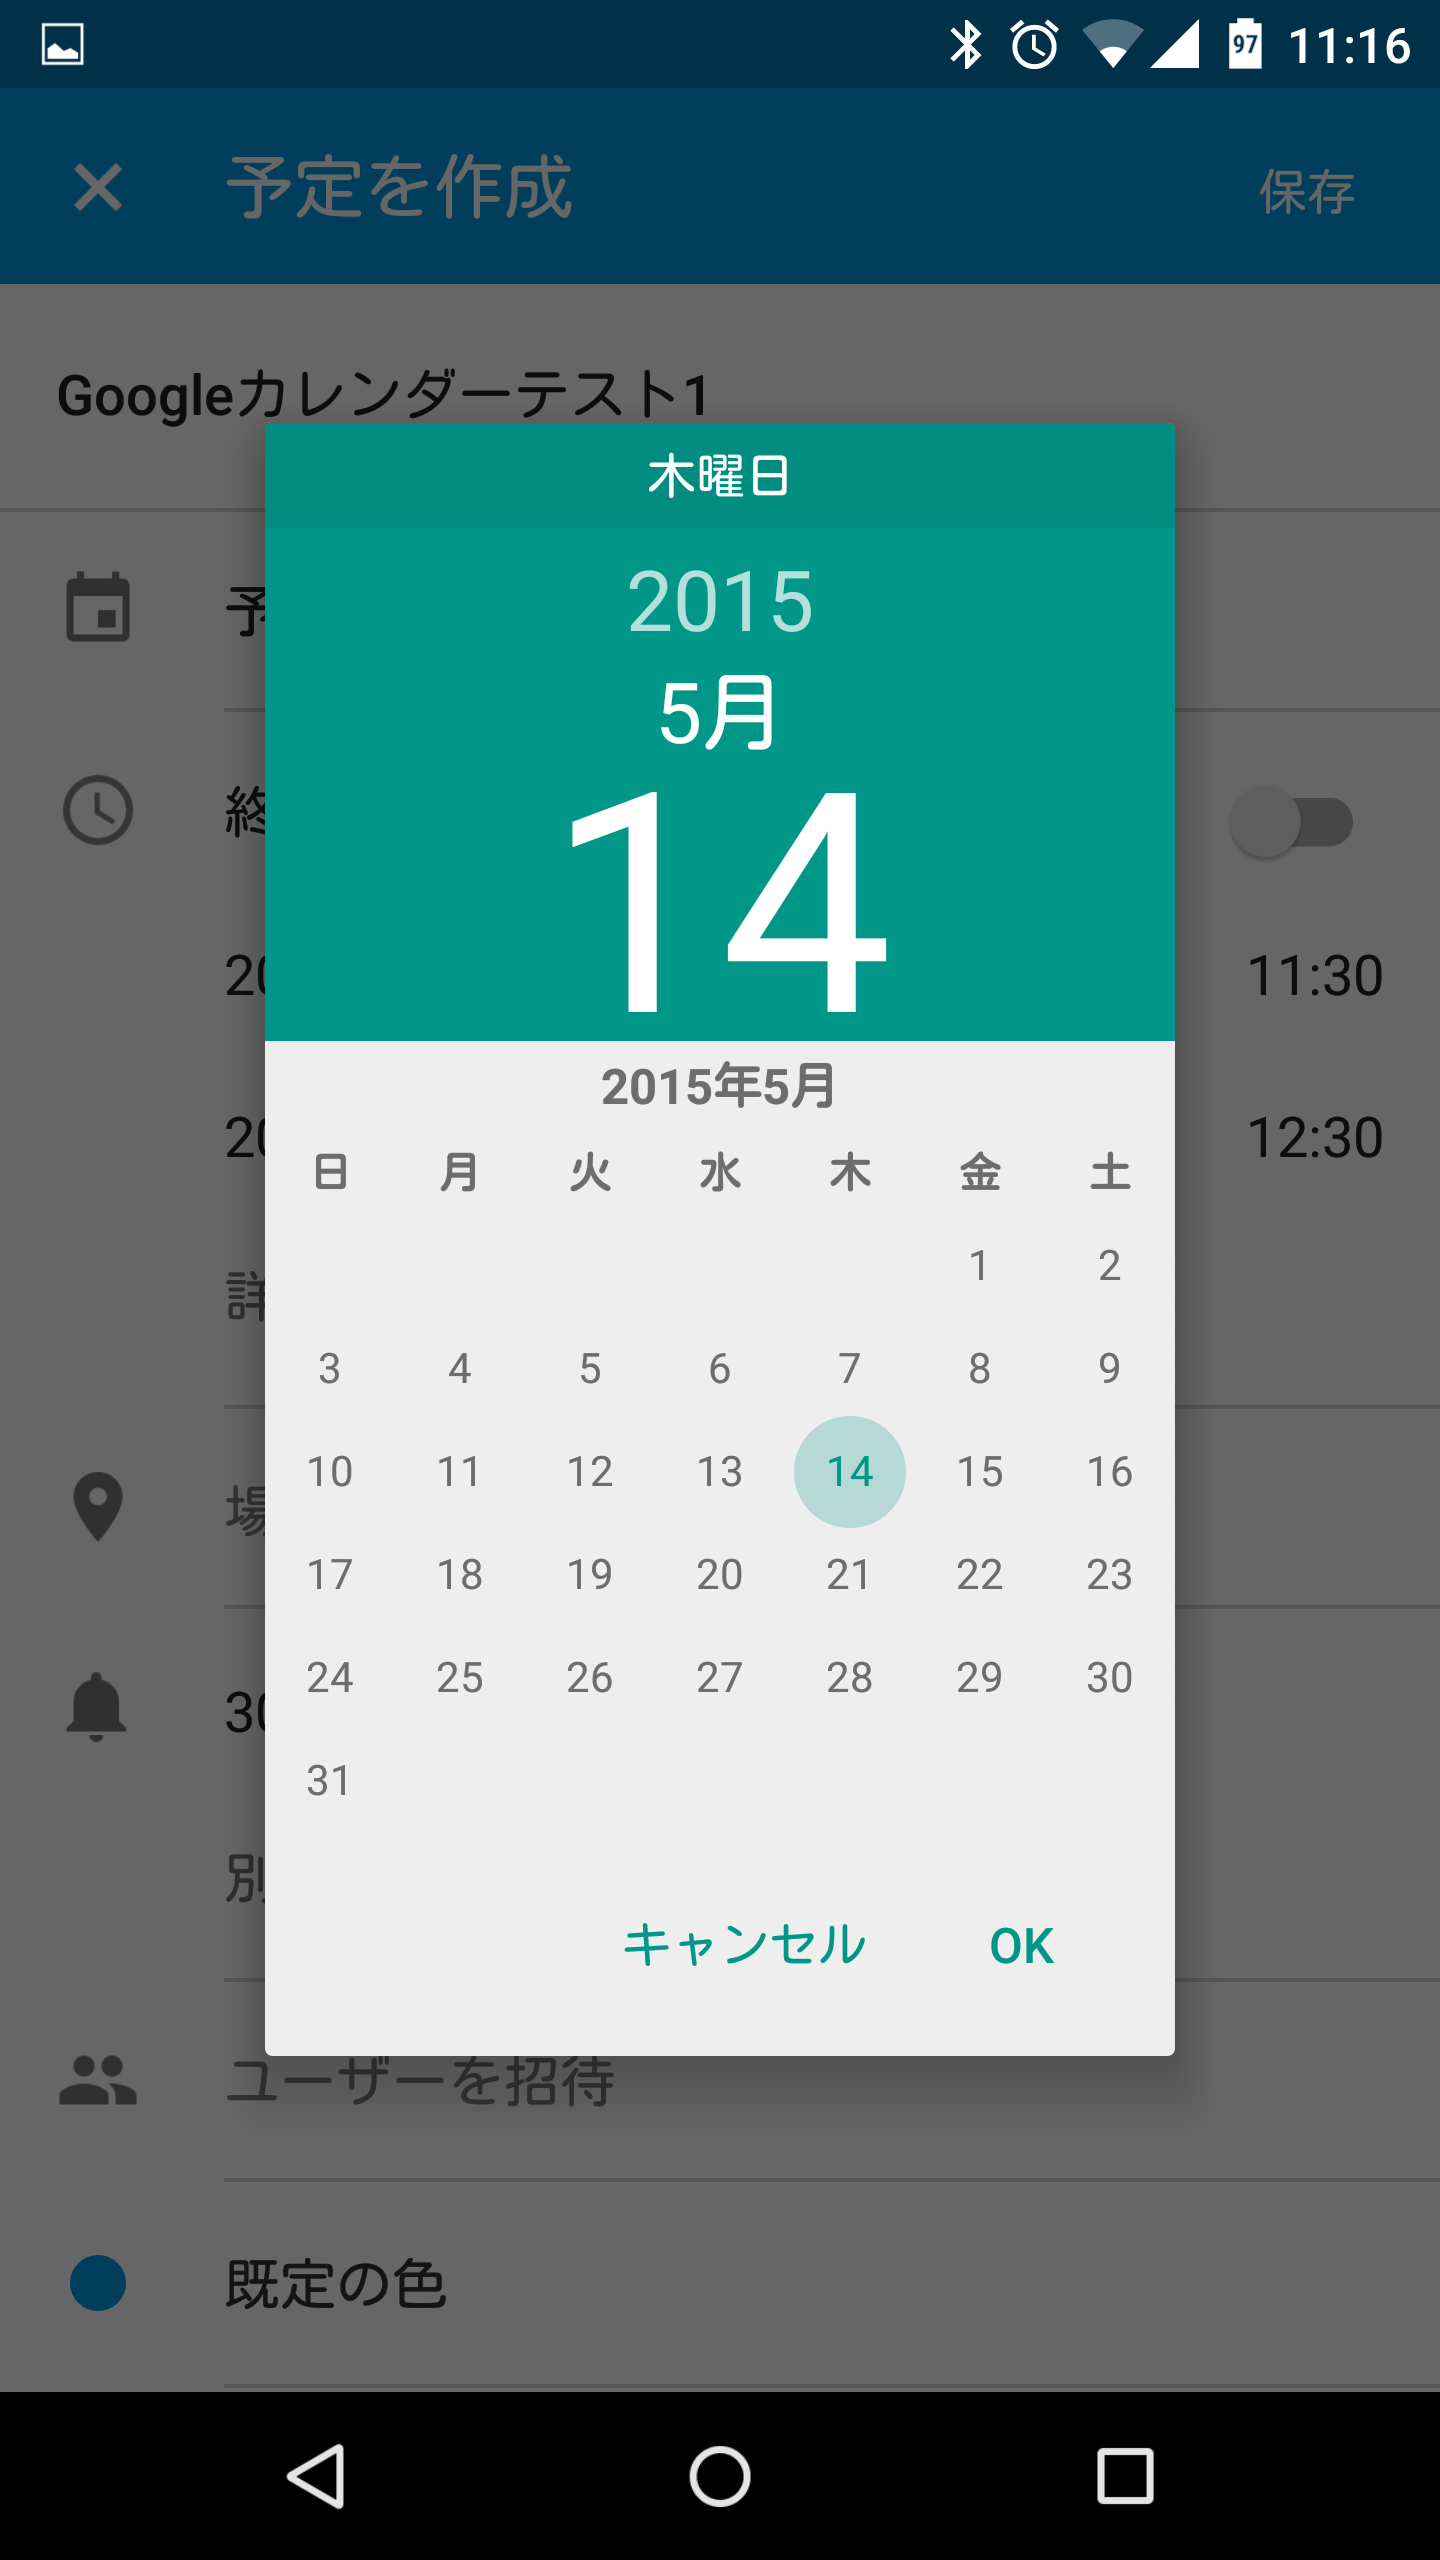
予定の日にちをタップして「OK」をタップします。
![google-calendar-new-schedule6](https://androidlover.net/wp-content/uploads/google-calendar-new-schedule6-281x500.png)
予定終了の日にちを指定する
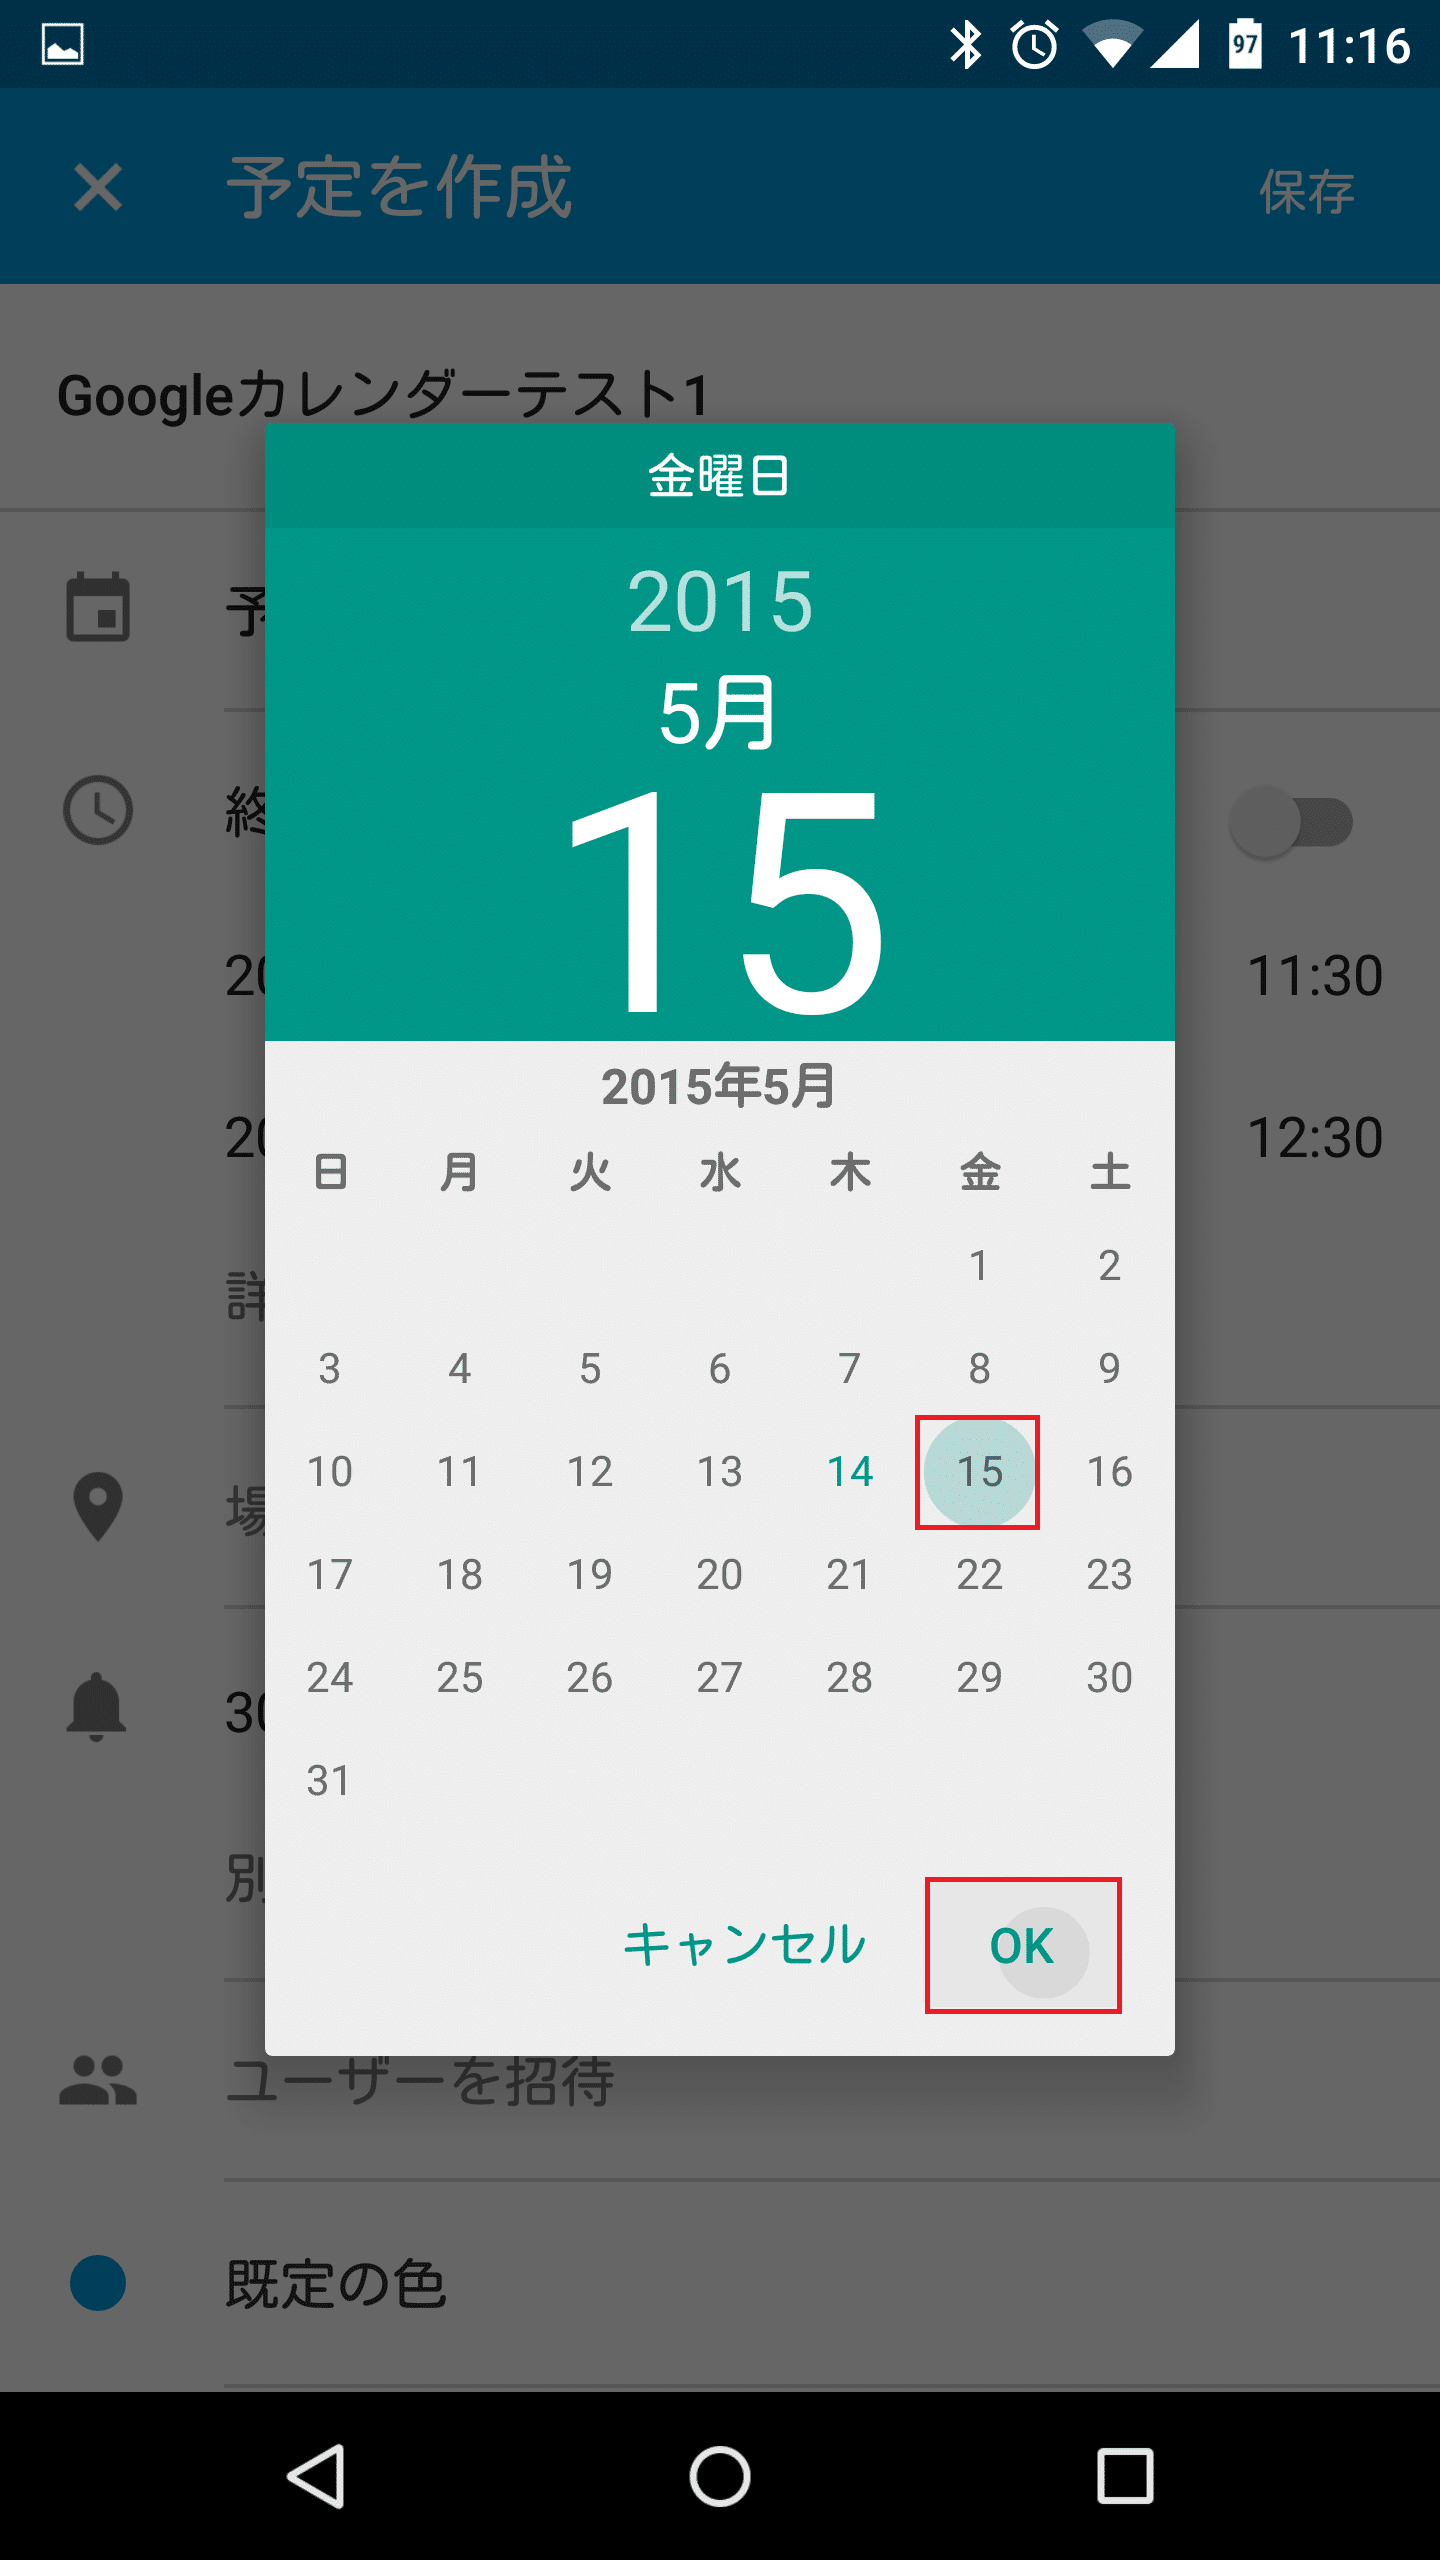
予定開始の日にちを指定したら、次は予定終了の日時を指定します。下に表示されている年月日をタップします。
![google-calendar-new-schedule7](https://androidlover.net/wp-content/uploads/google-calendar-new-schedule7-281x500.png)
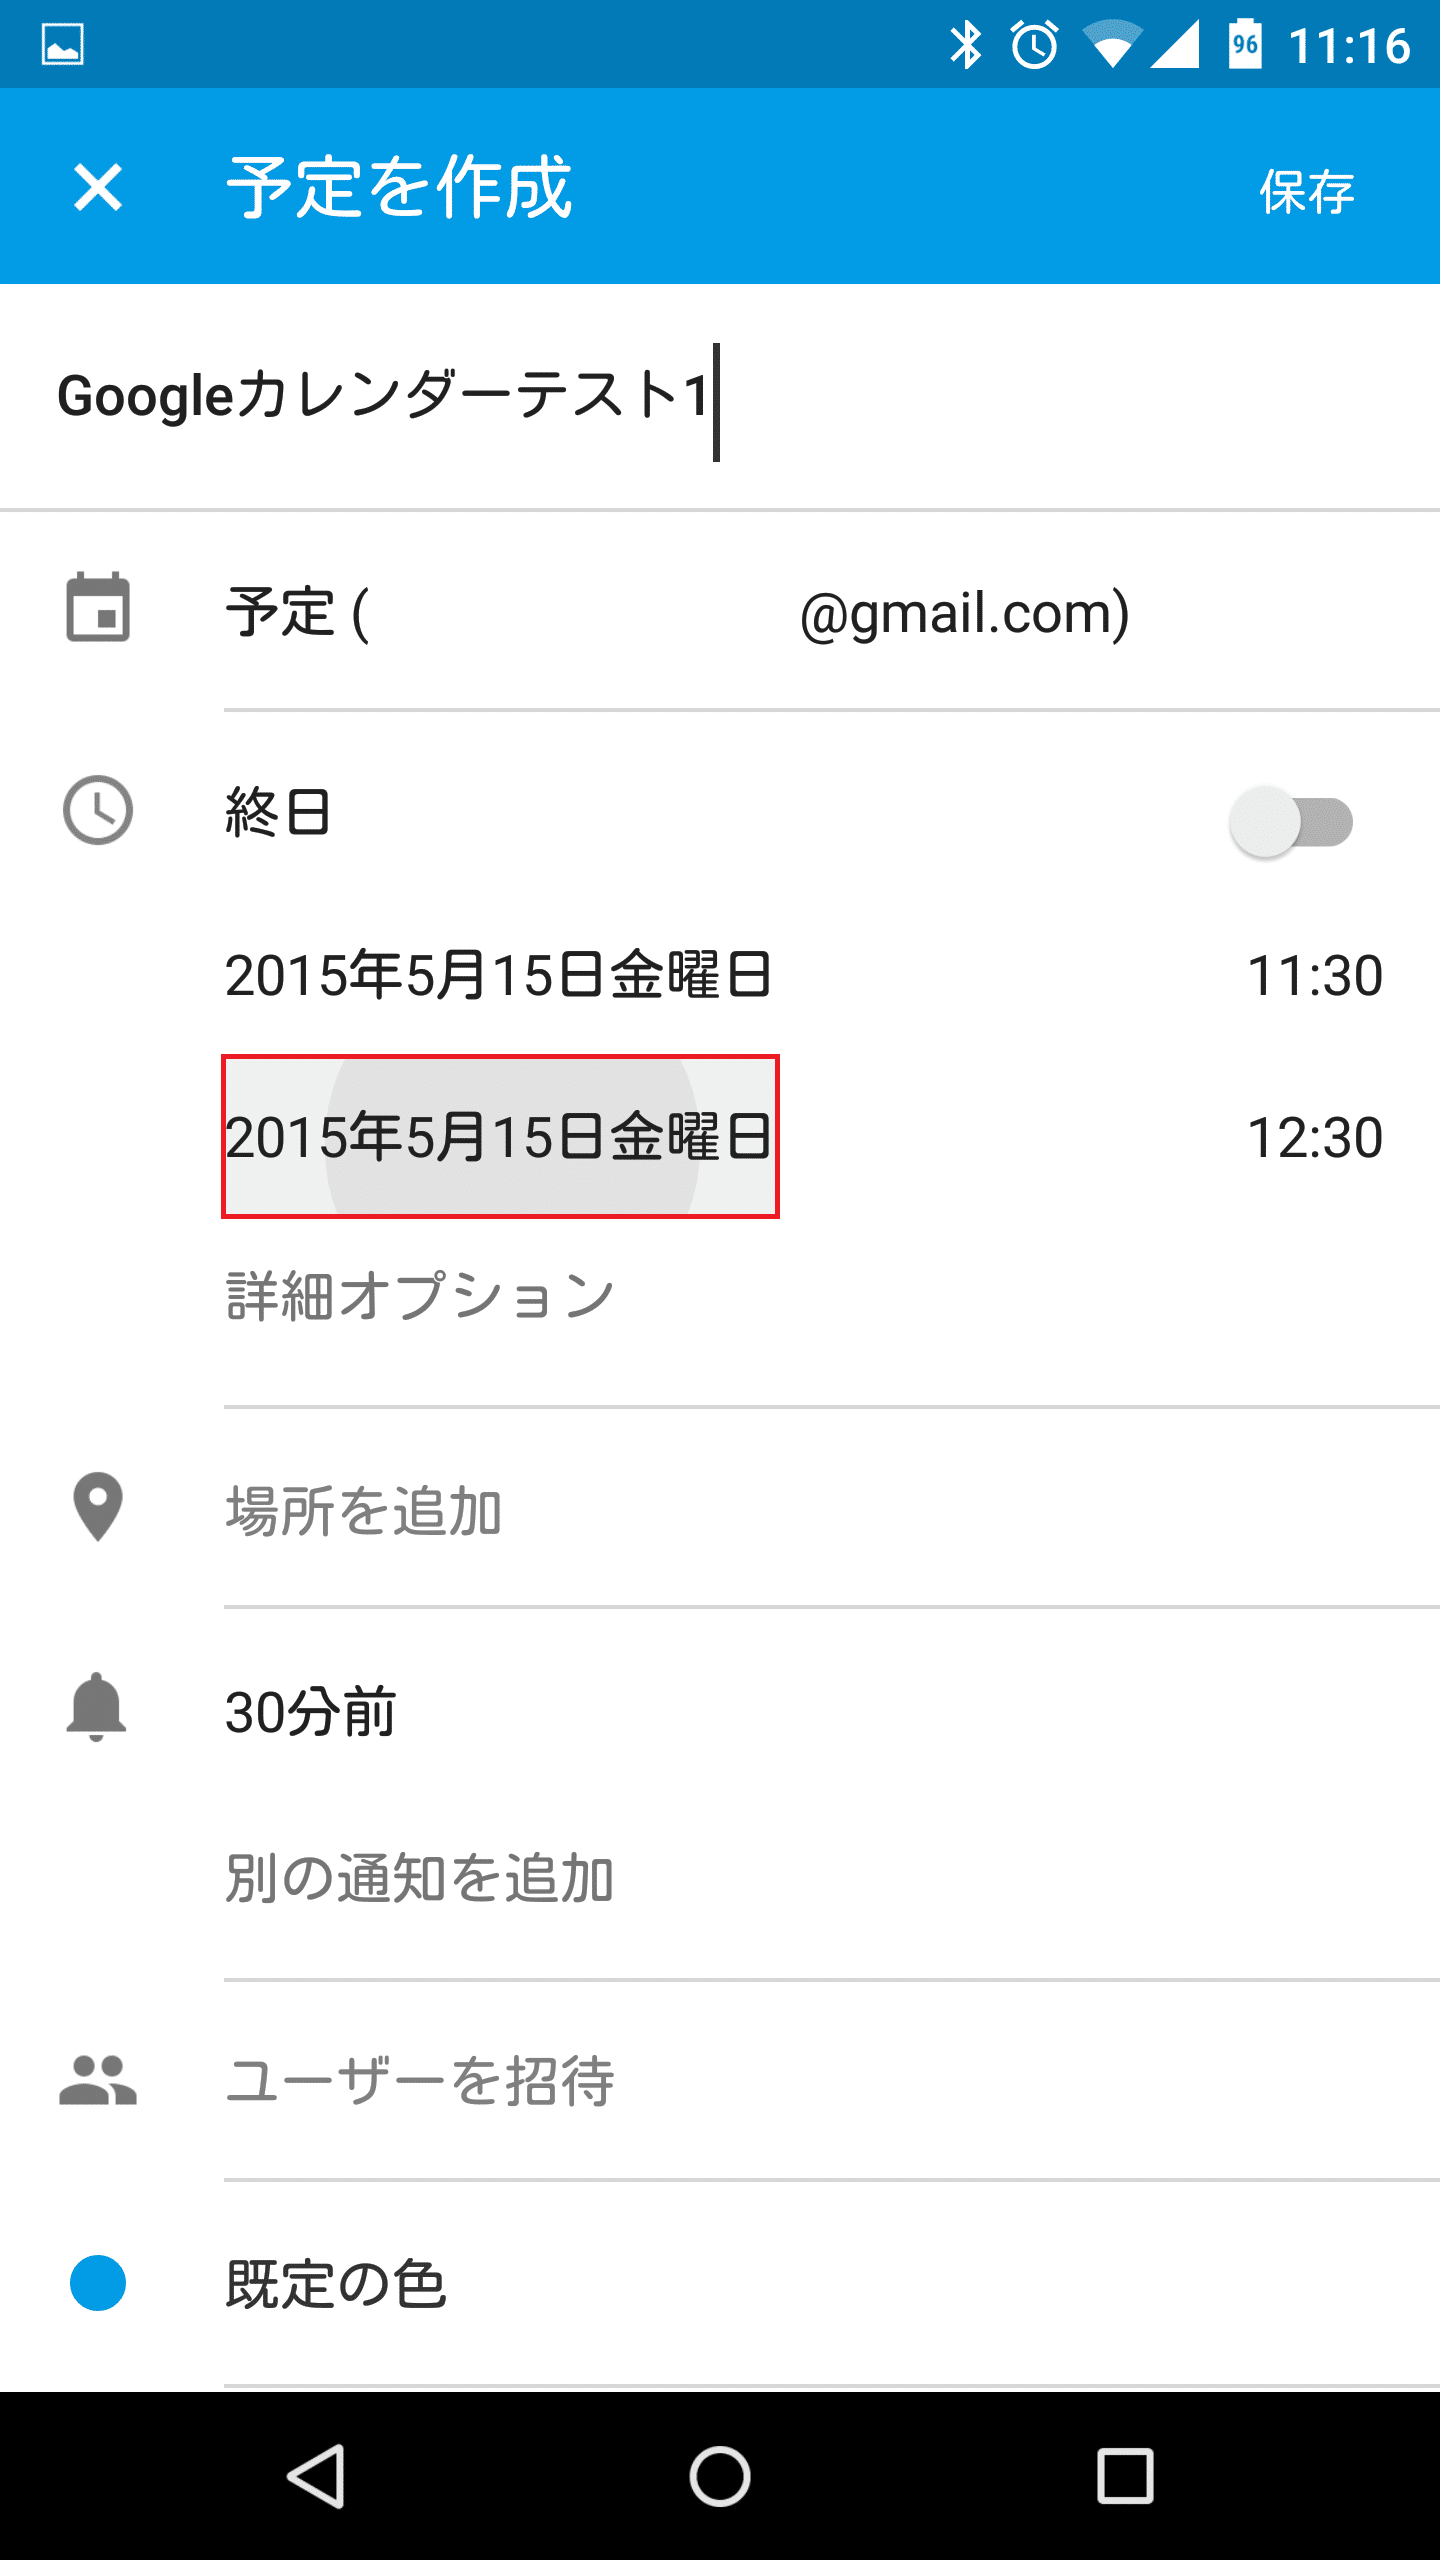
日にちを指定するためのカレンダーが表示されるので、予定終了の日にちをタップして「OK」をタップします。
![google-calendar-new-schedule9](https://androidlover.net/wp-content/uploads/google-calendar-new-schedule9-281x500.png)
予定開始の時間を指定する
予定開始と終了の日にちを指定したら、次は予定開始の時間を指定します。上に表示されている時間をタップします。
![google-calendar-new-schedule10](https://androidlover.net/wp-content/uploads/google-calendar-new-schedule10-281x500.png)
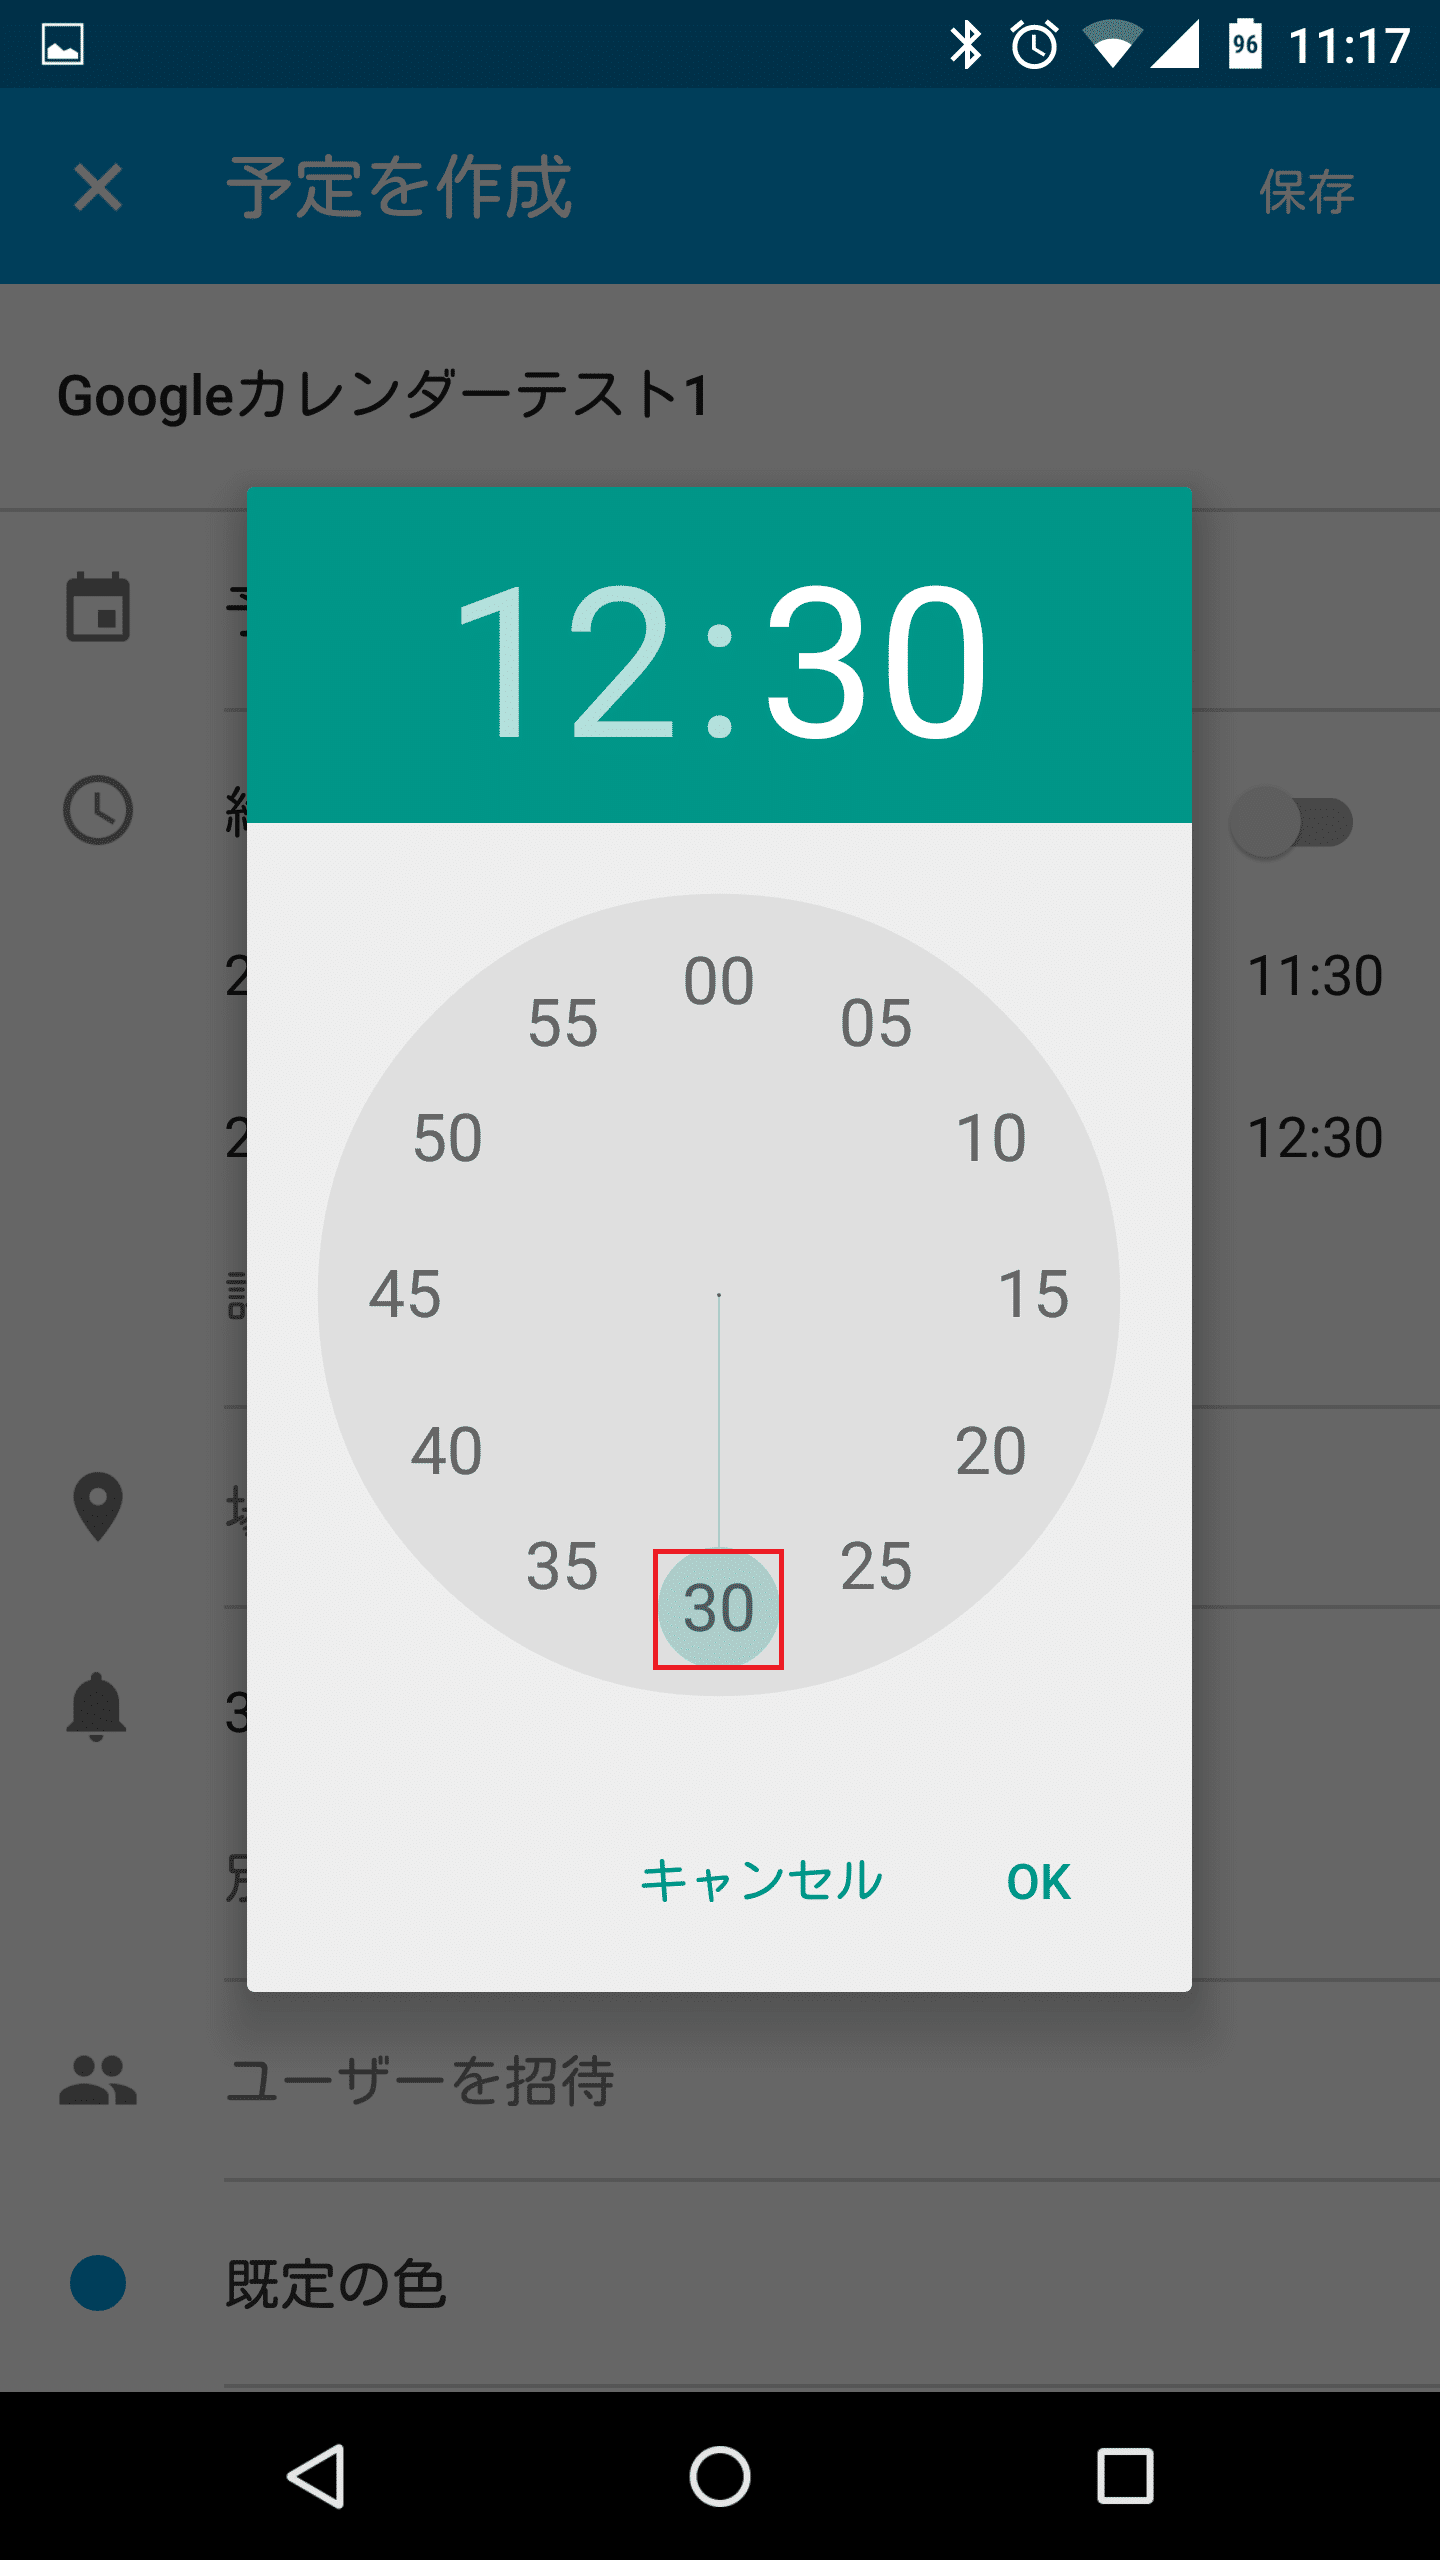
まずは時間を選びます。予定開始時間をタップして選びます。
![google-calendar-new-schedule11](https://androidlover.net/wp-content/uploads/google-calendar-new-schedule11-281x500.png)
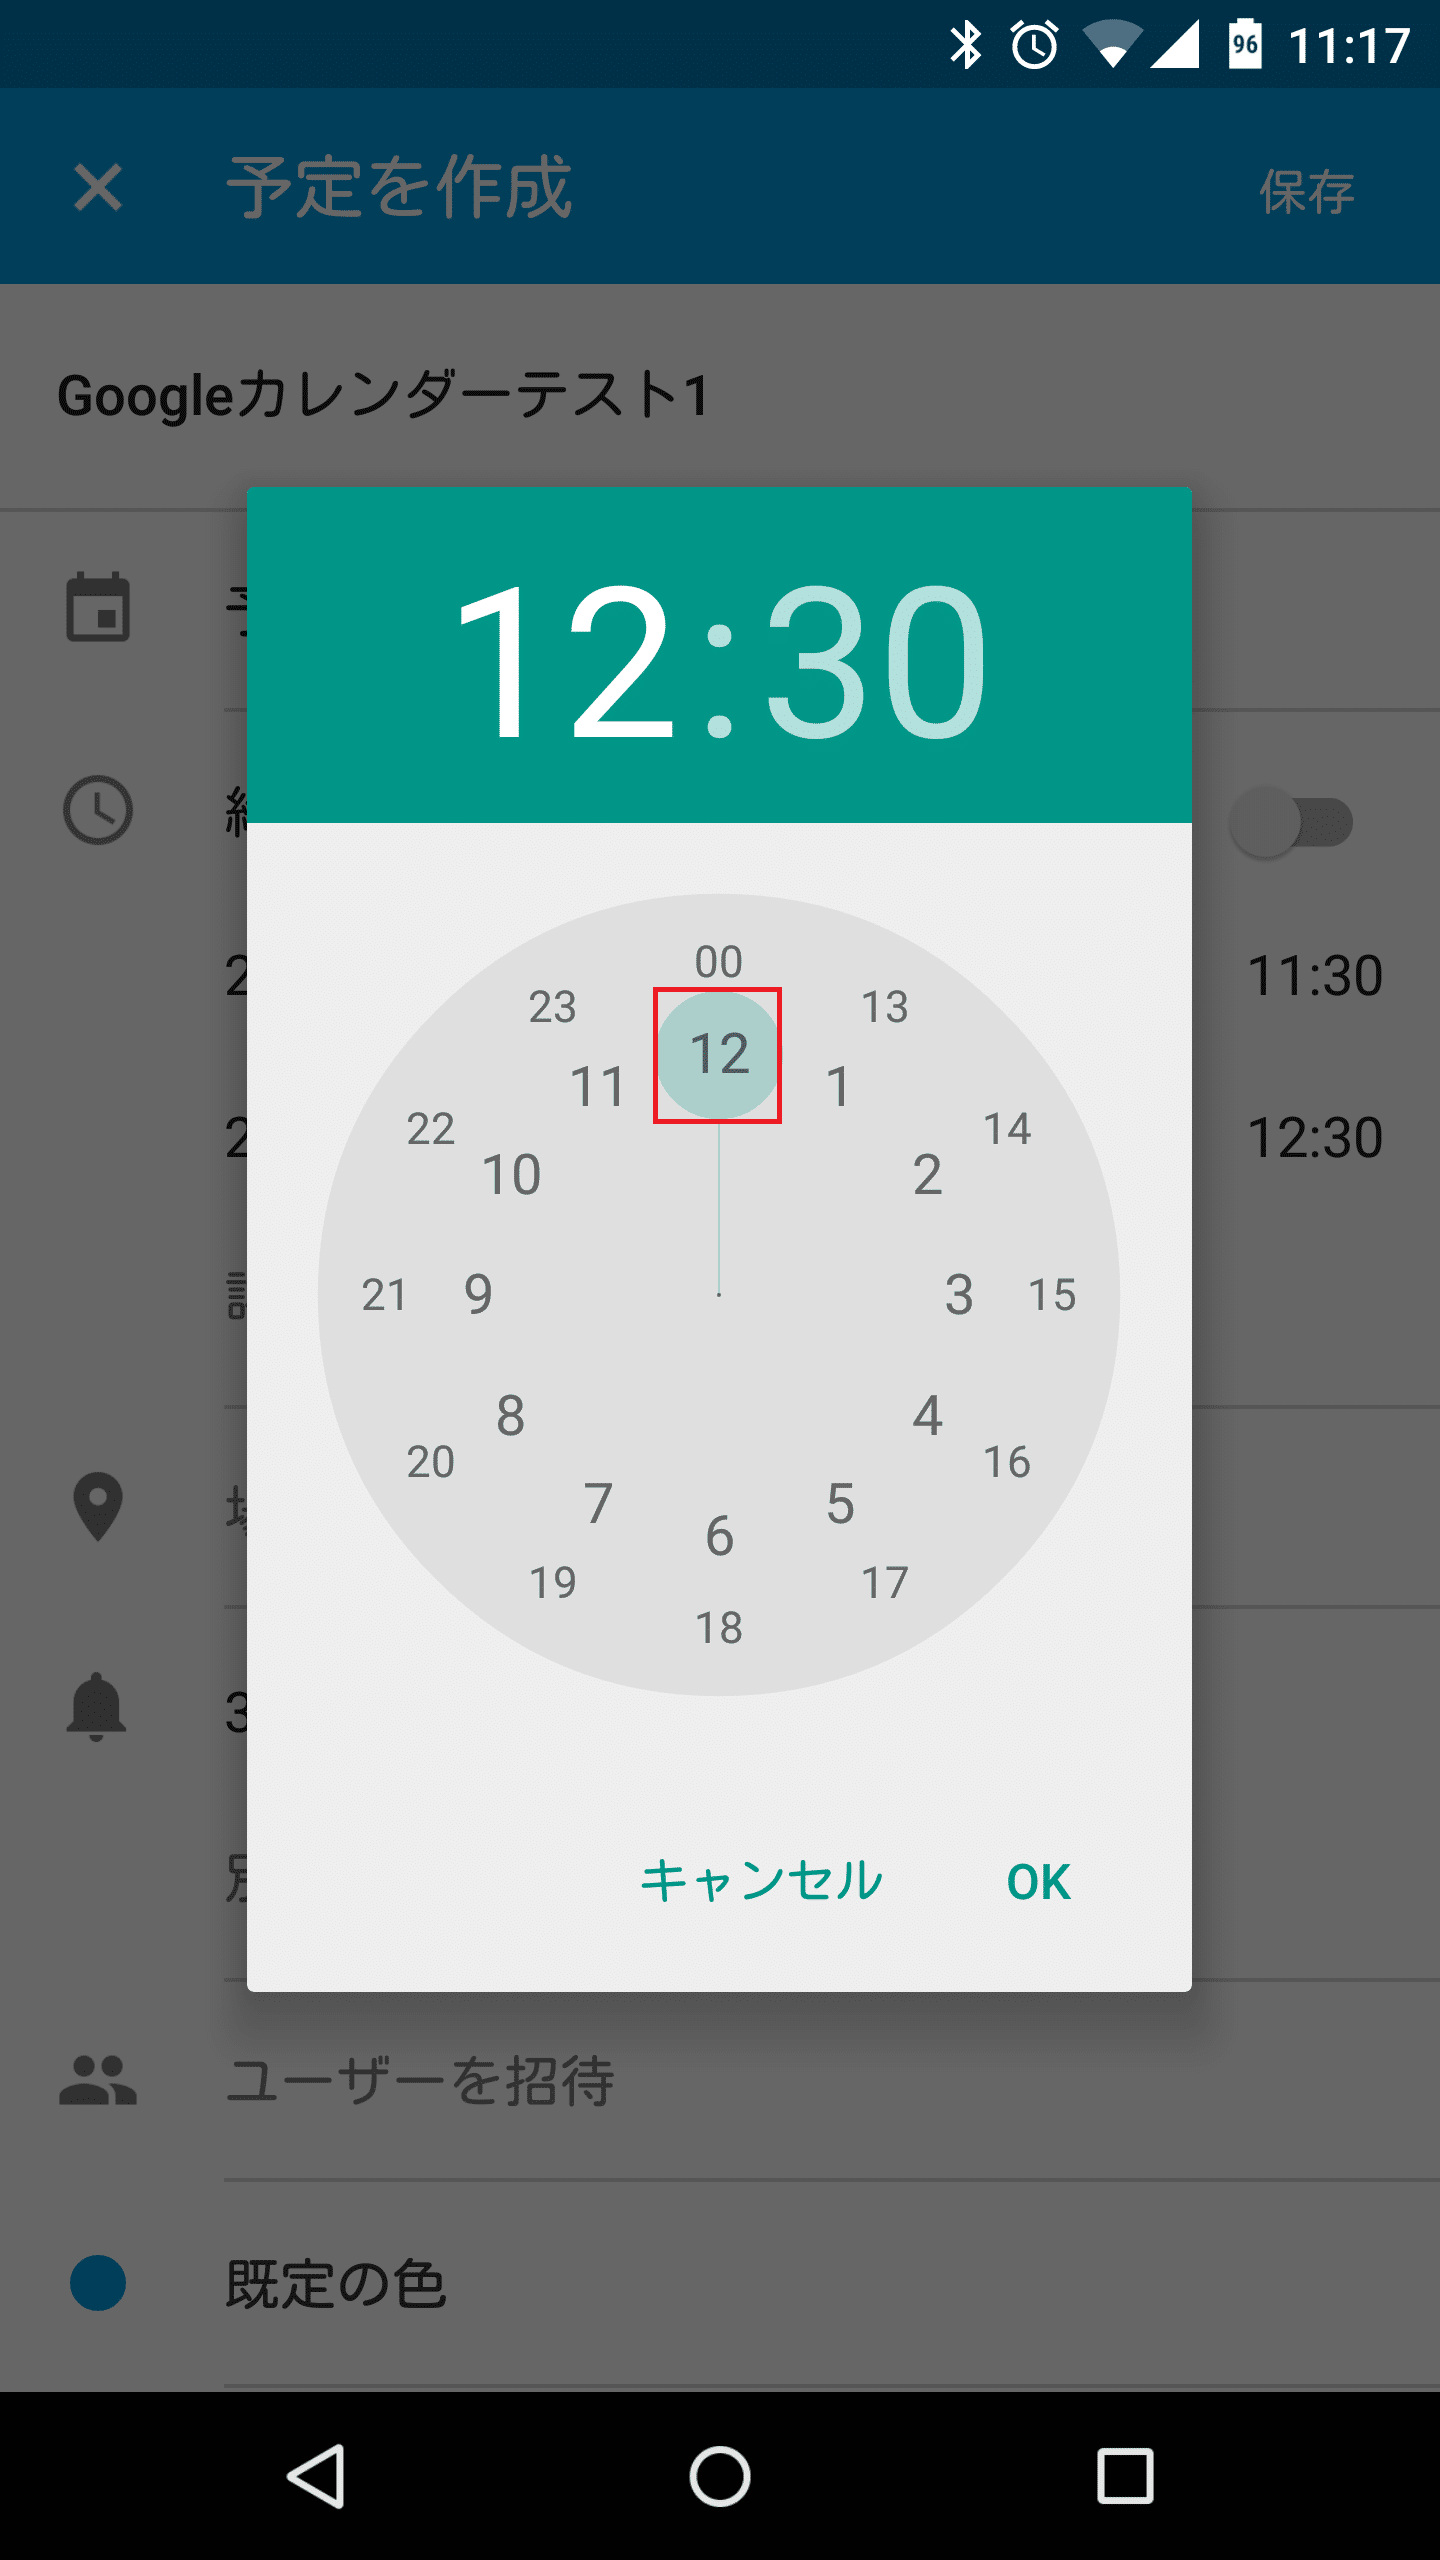
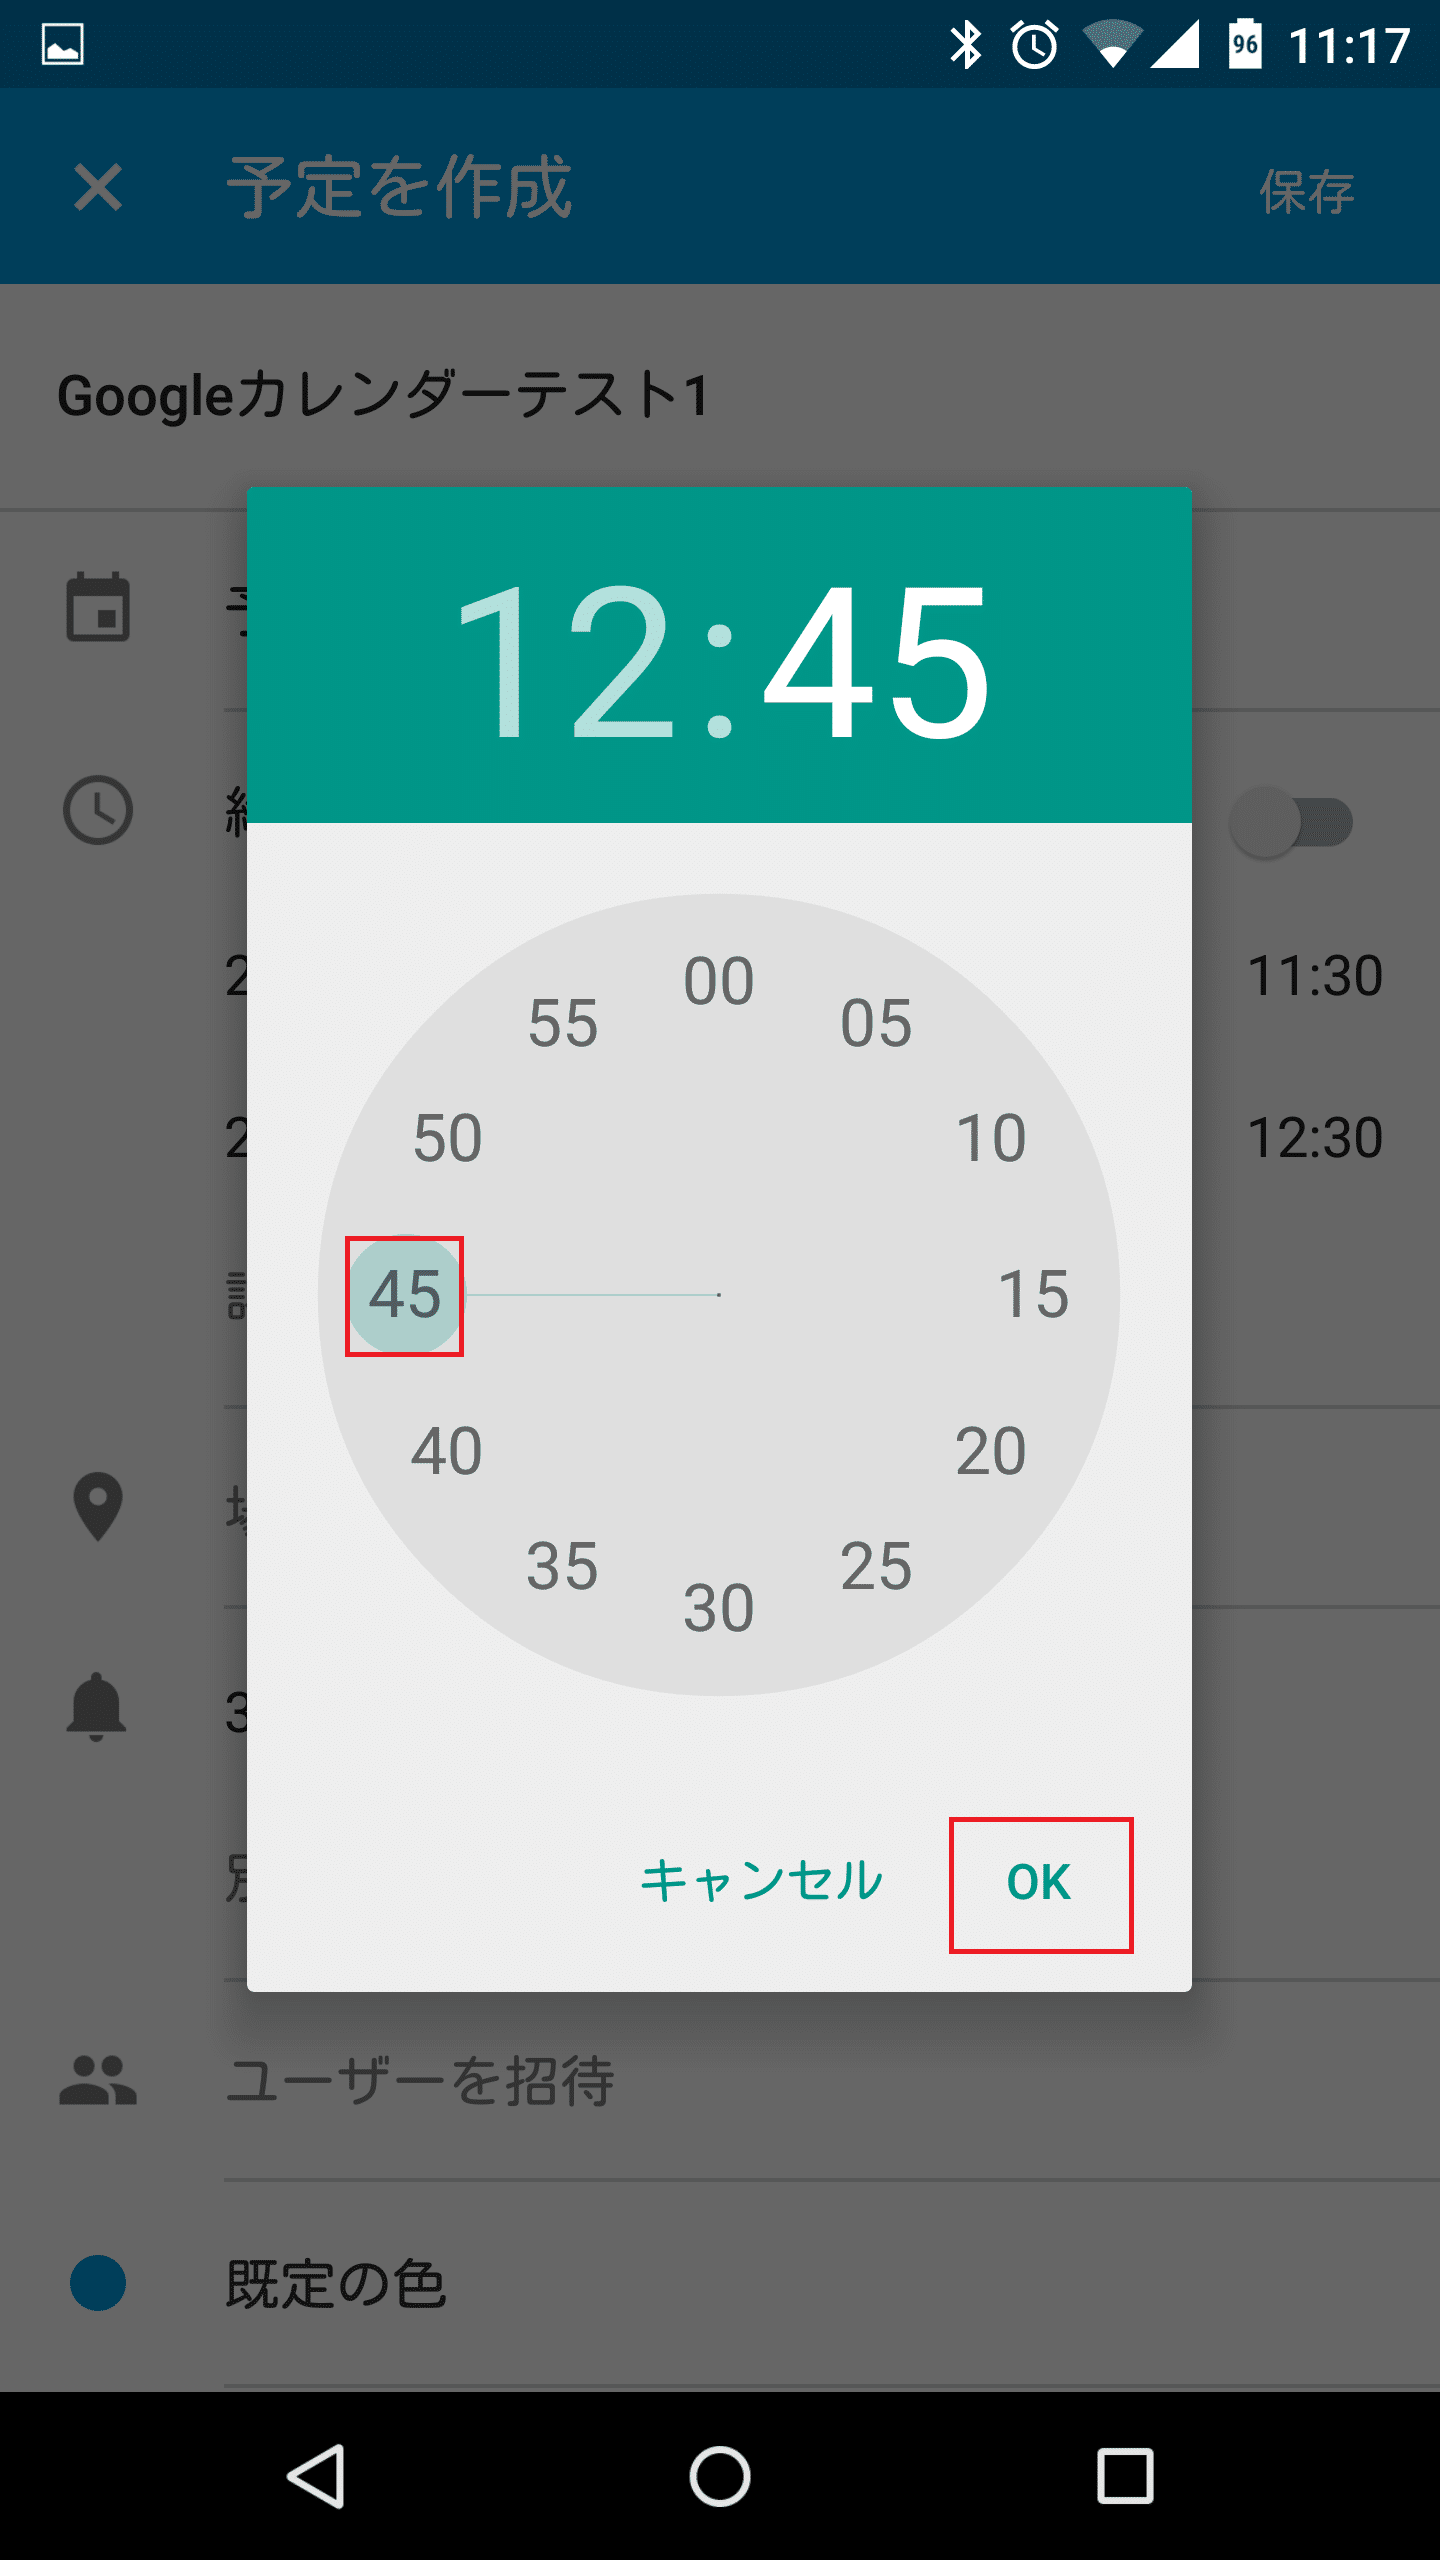
時間をタップしたら自動的に分を選ぶ表示になります。
![google-calendar-new-schedule12](https://androidlover.net/wp-content/uploads/google-calendar-new-schedule12-281x500.png)
予定開始の分をタップして「OK」をタップします。
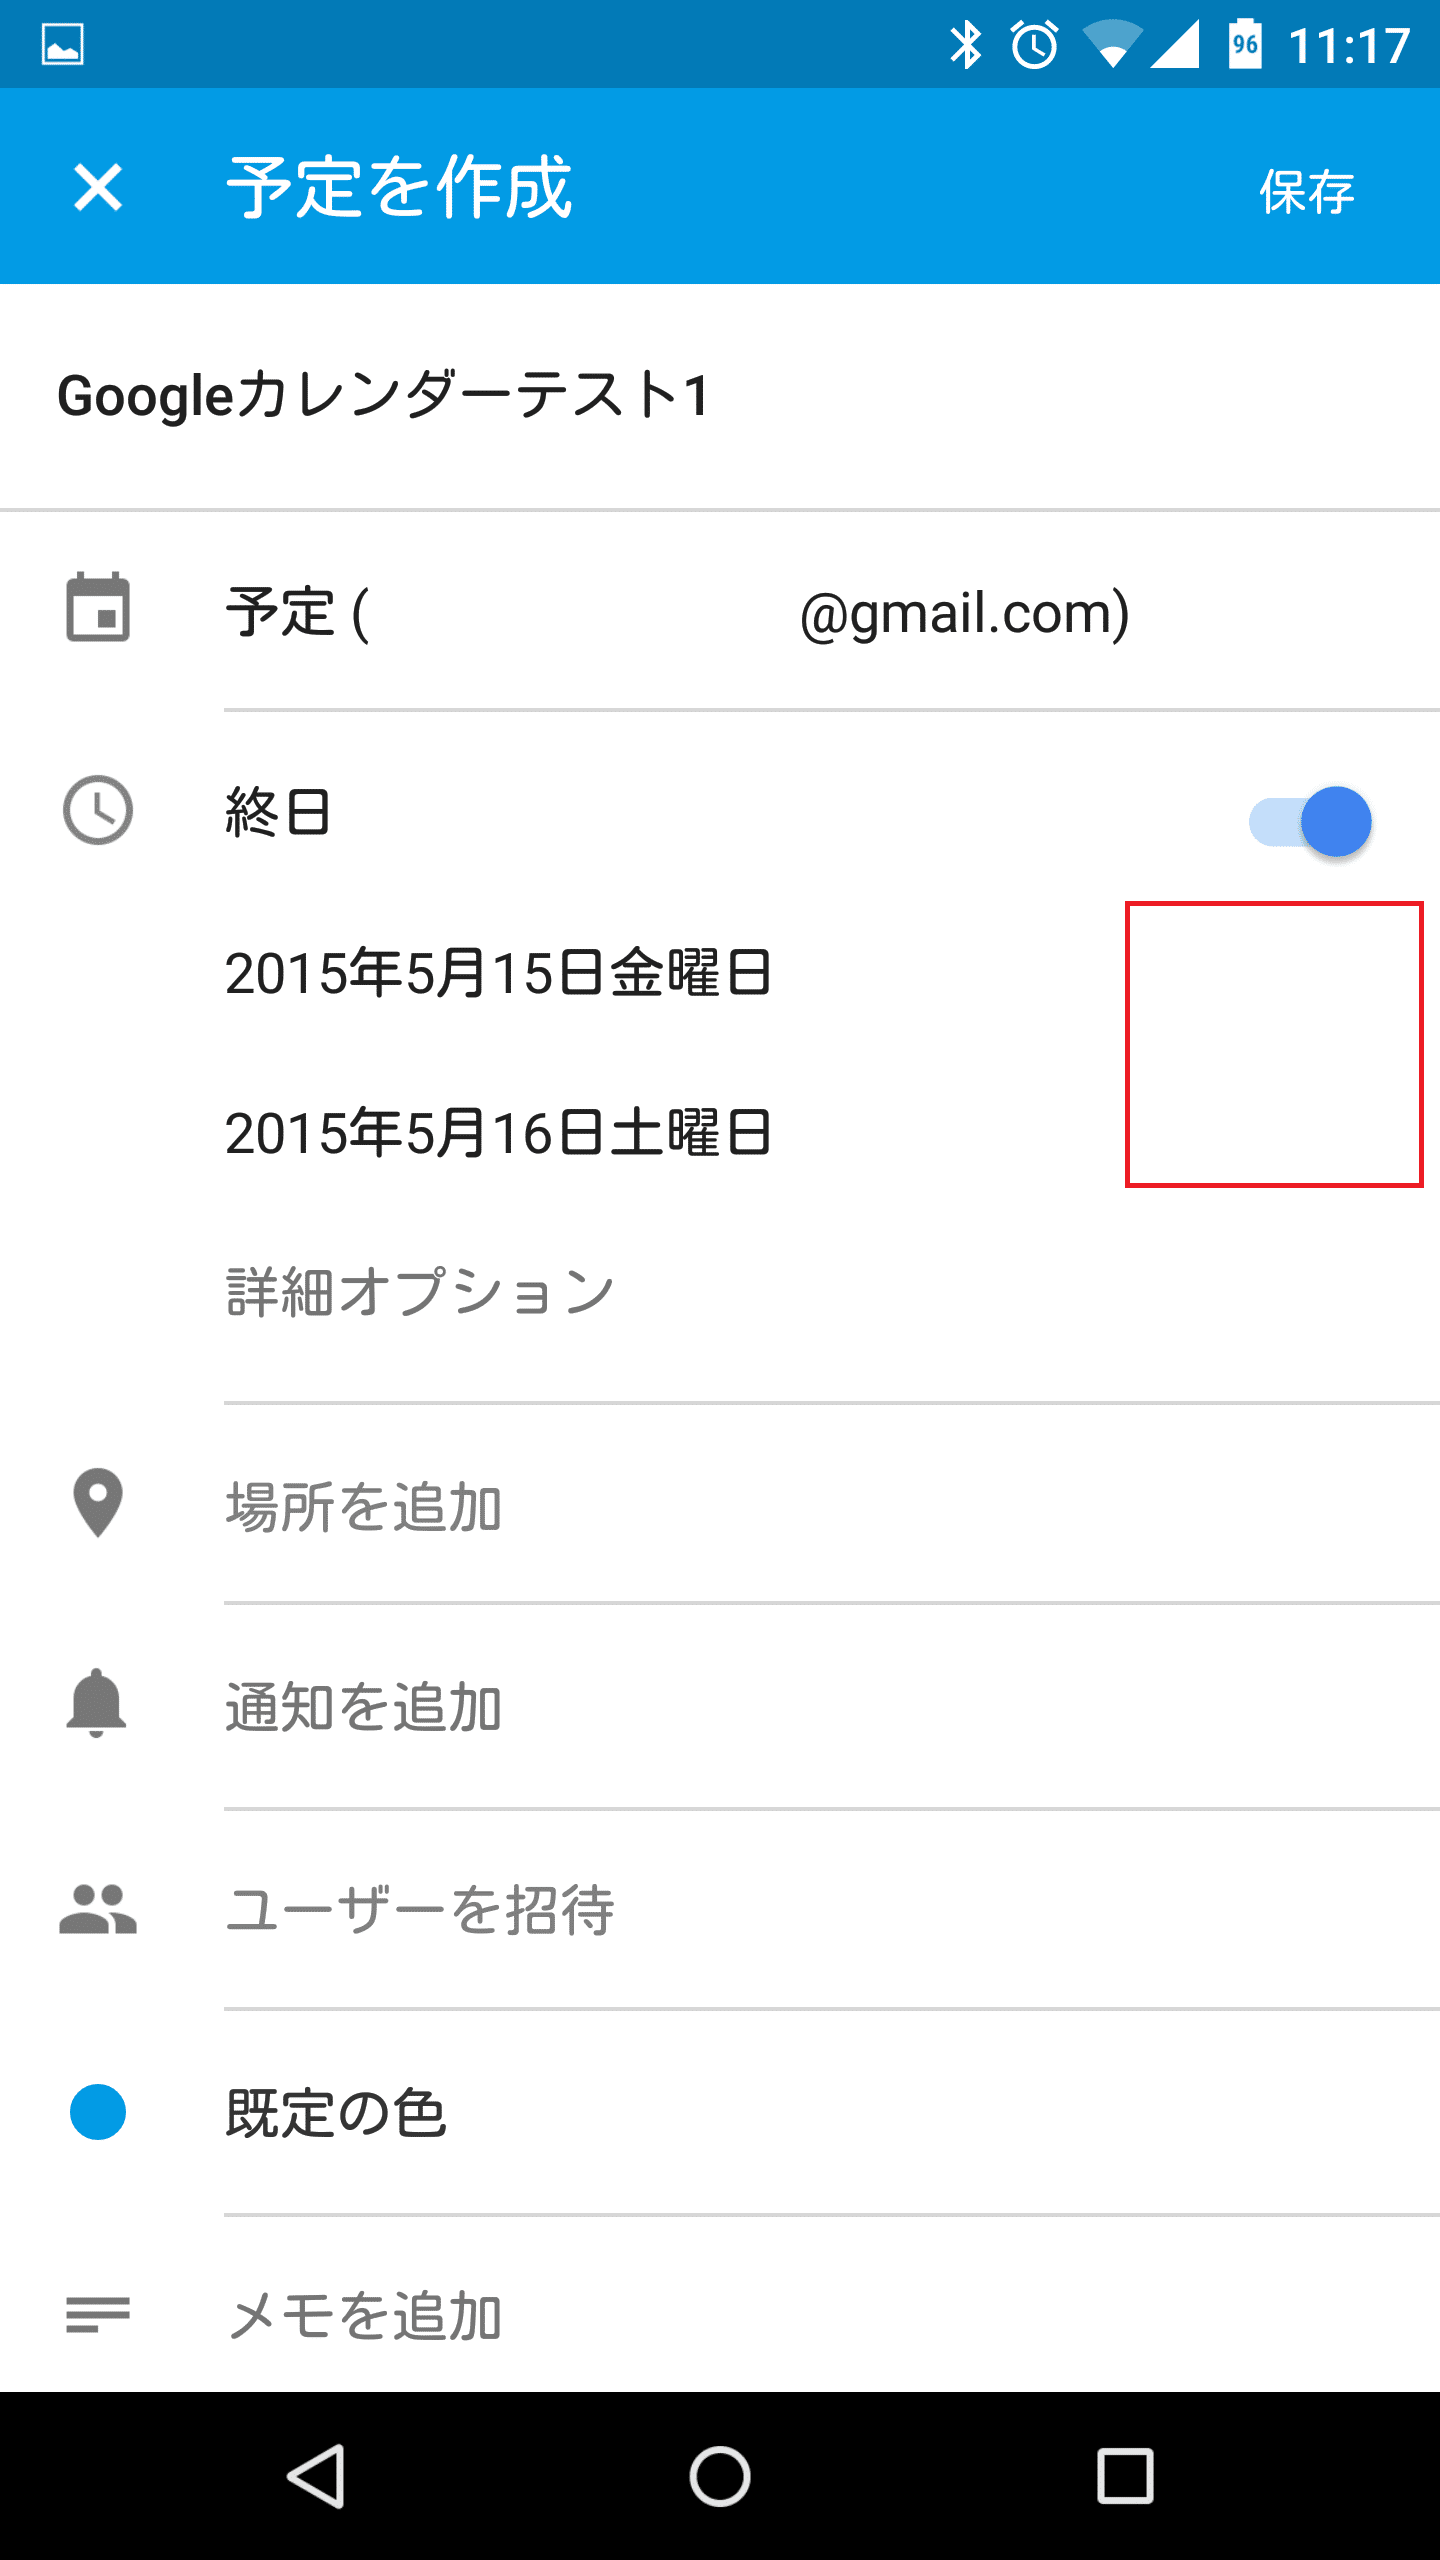
![google-calendar-new-schedule13](https://androidlover.net/wp-content/uploads/google-calendar-new-schedule13-281x500.png)
予定を終日にする
Googleカレンダー Android版では、予定を終日にすることもできます。終日をオンにします。
![google-calendar-new-schedule14](https://androidlover.net/wp-content/uploads/google-calendar-new-schedule14-281x500.png)
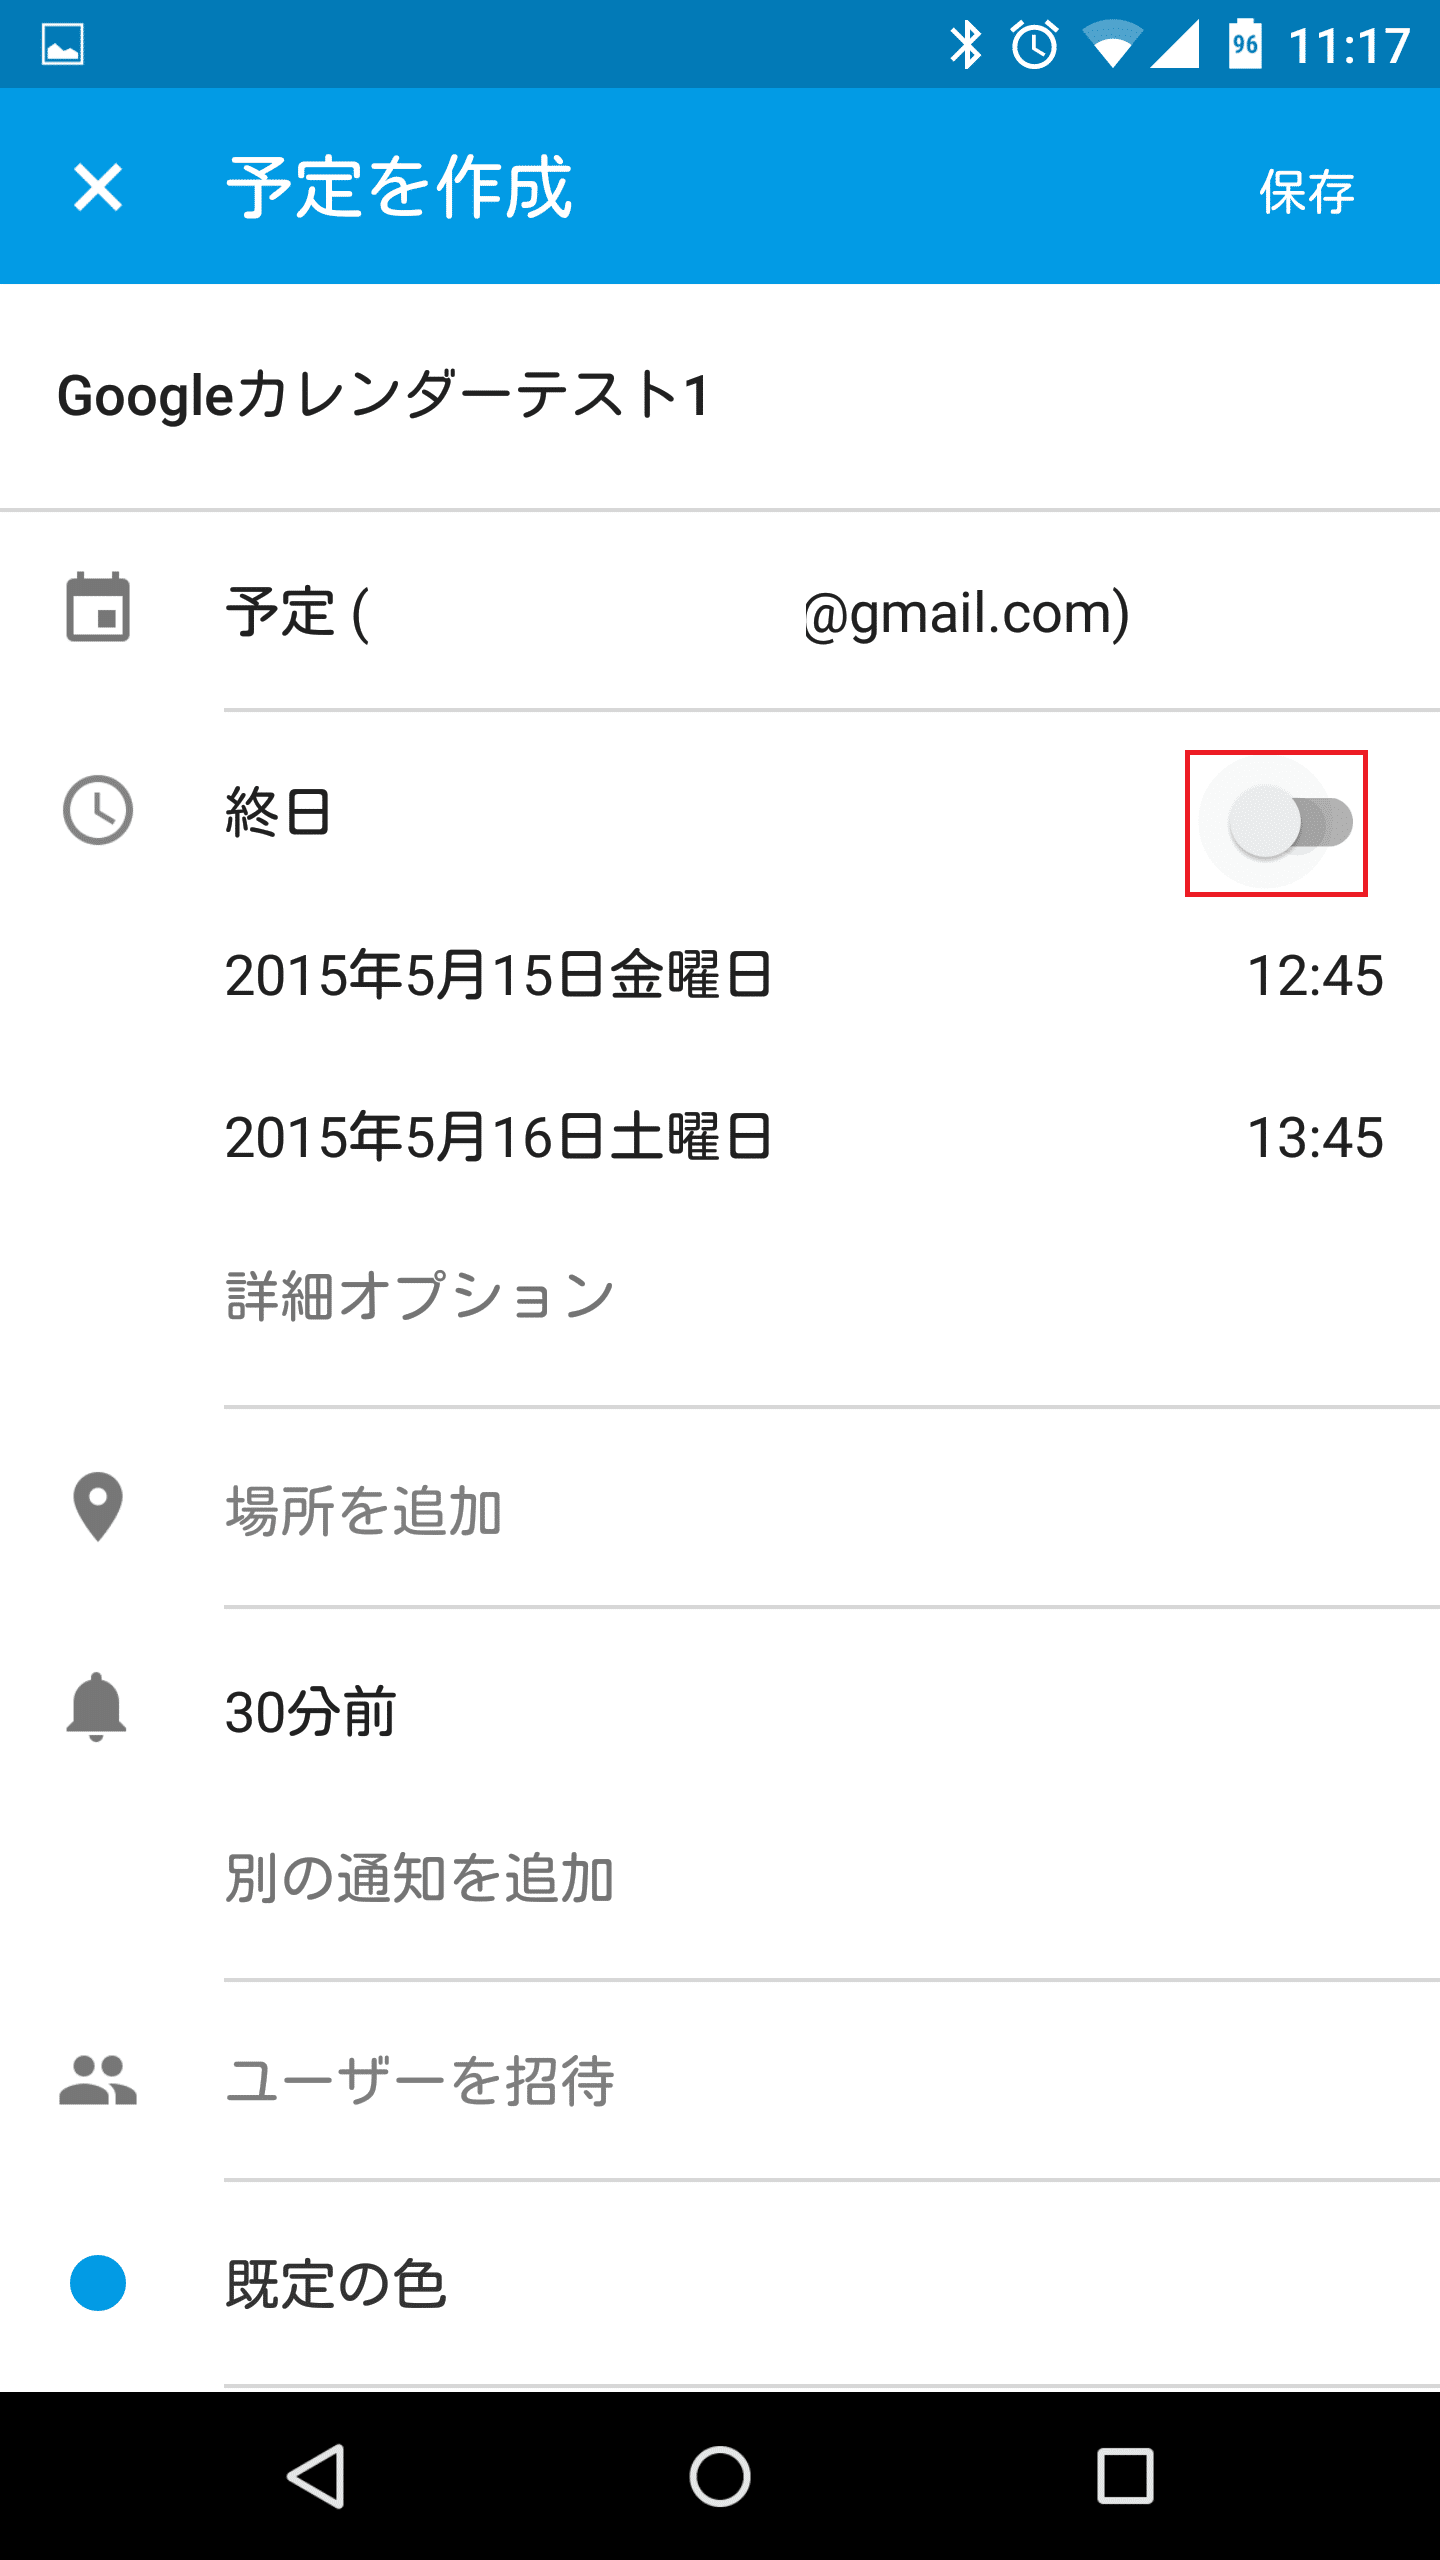
すると、予定の時間が消えて終日の予定に切り替わります。
![google-calendar-new-schedule15](https://androidlover.net/wp-content/uploads/google-calendar-new-schedule15-281x500.png)
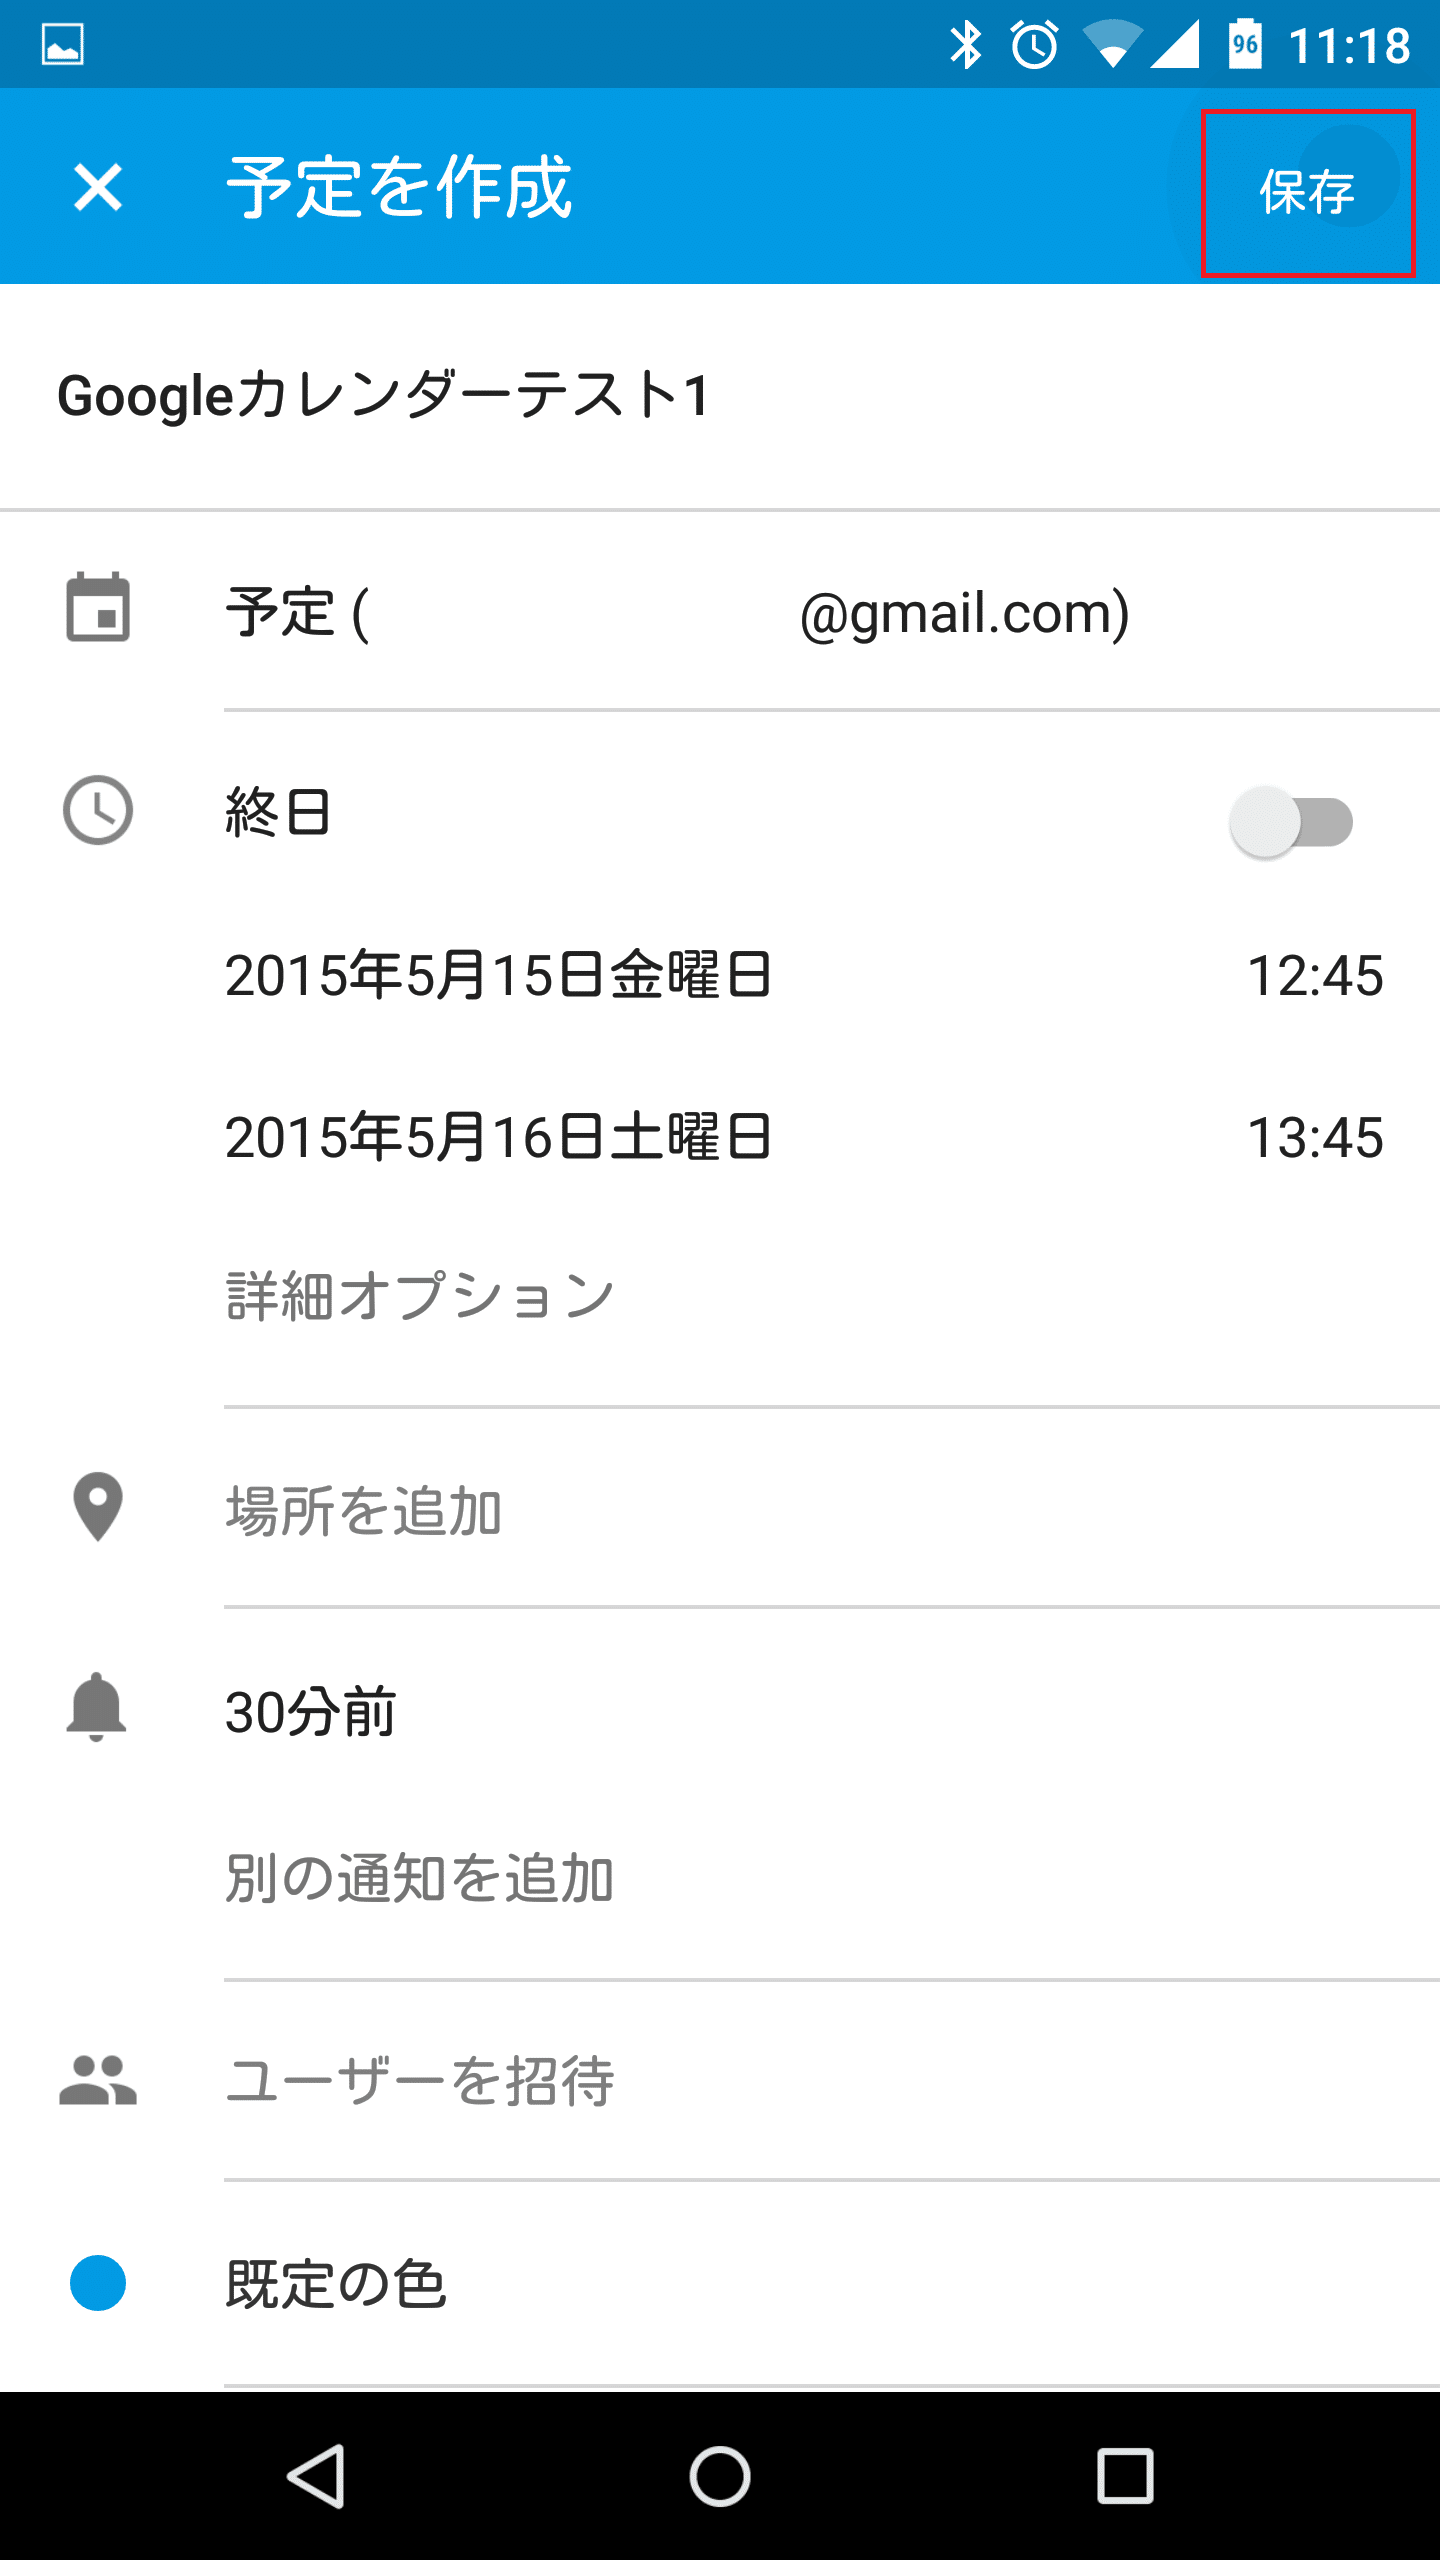
予定の設定が終わったら「保存」をタップします。
![google-calendar-new-schedule16](https://androidlover.net/wp-content/uploads/google-calendar-new-schedule16-281x500.png)
「予定を作成しました。」と表示されれば、Googleカレンダーに新しい予定が追加されます。
![google-calendar-new-schedule17](https://androidlover.net/wp-content/uploads/google-calendar-new-schedule17-281x500.png)
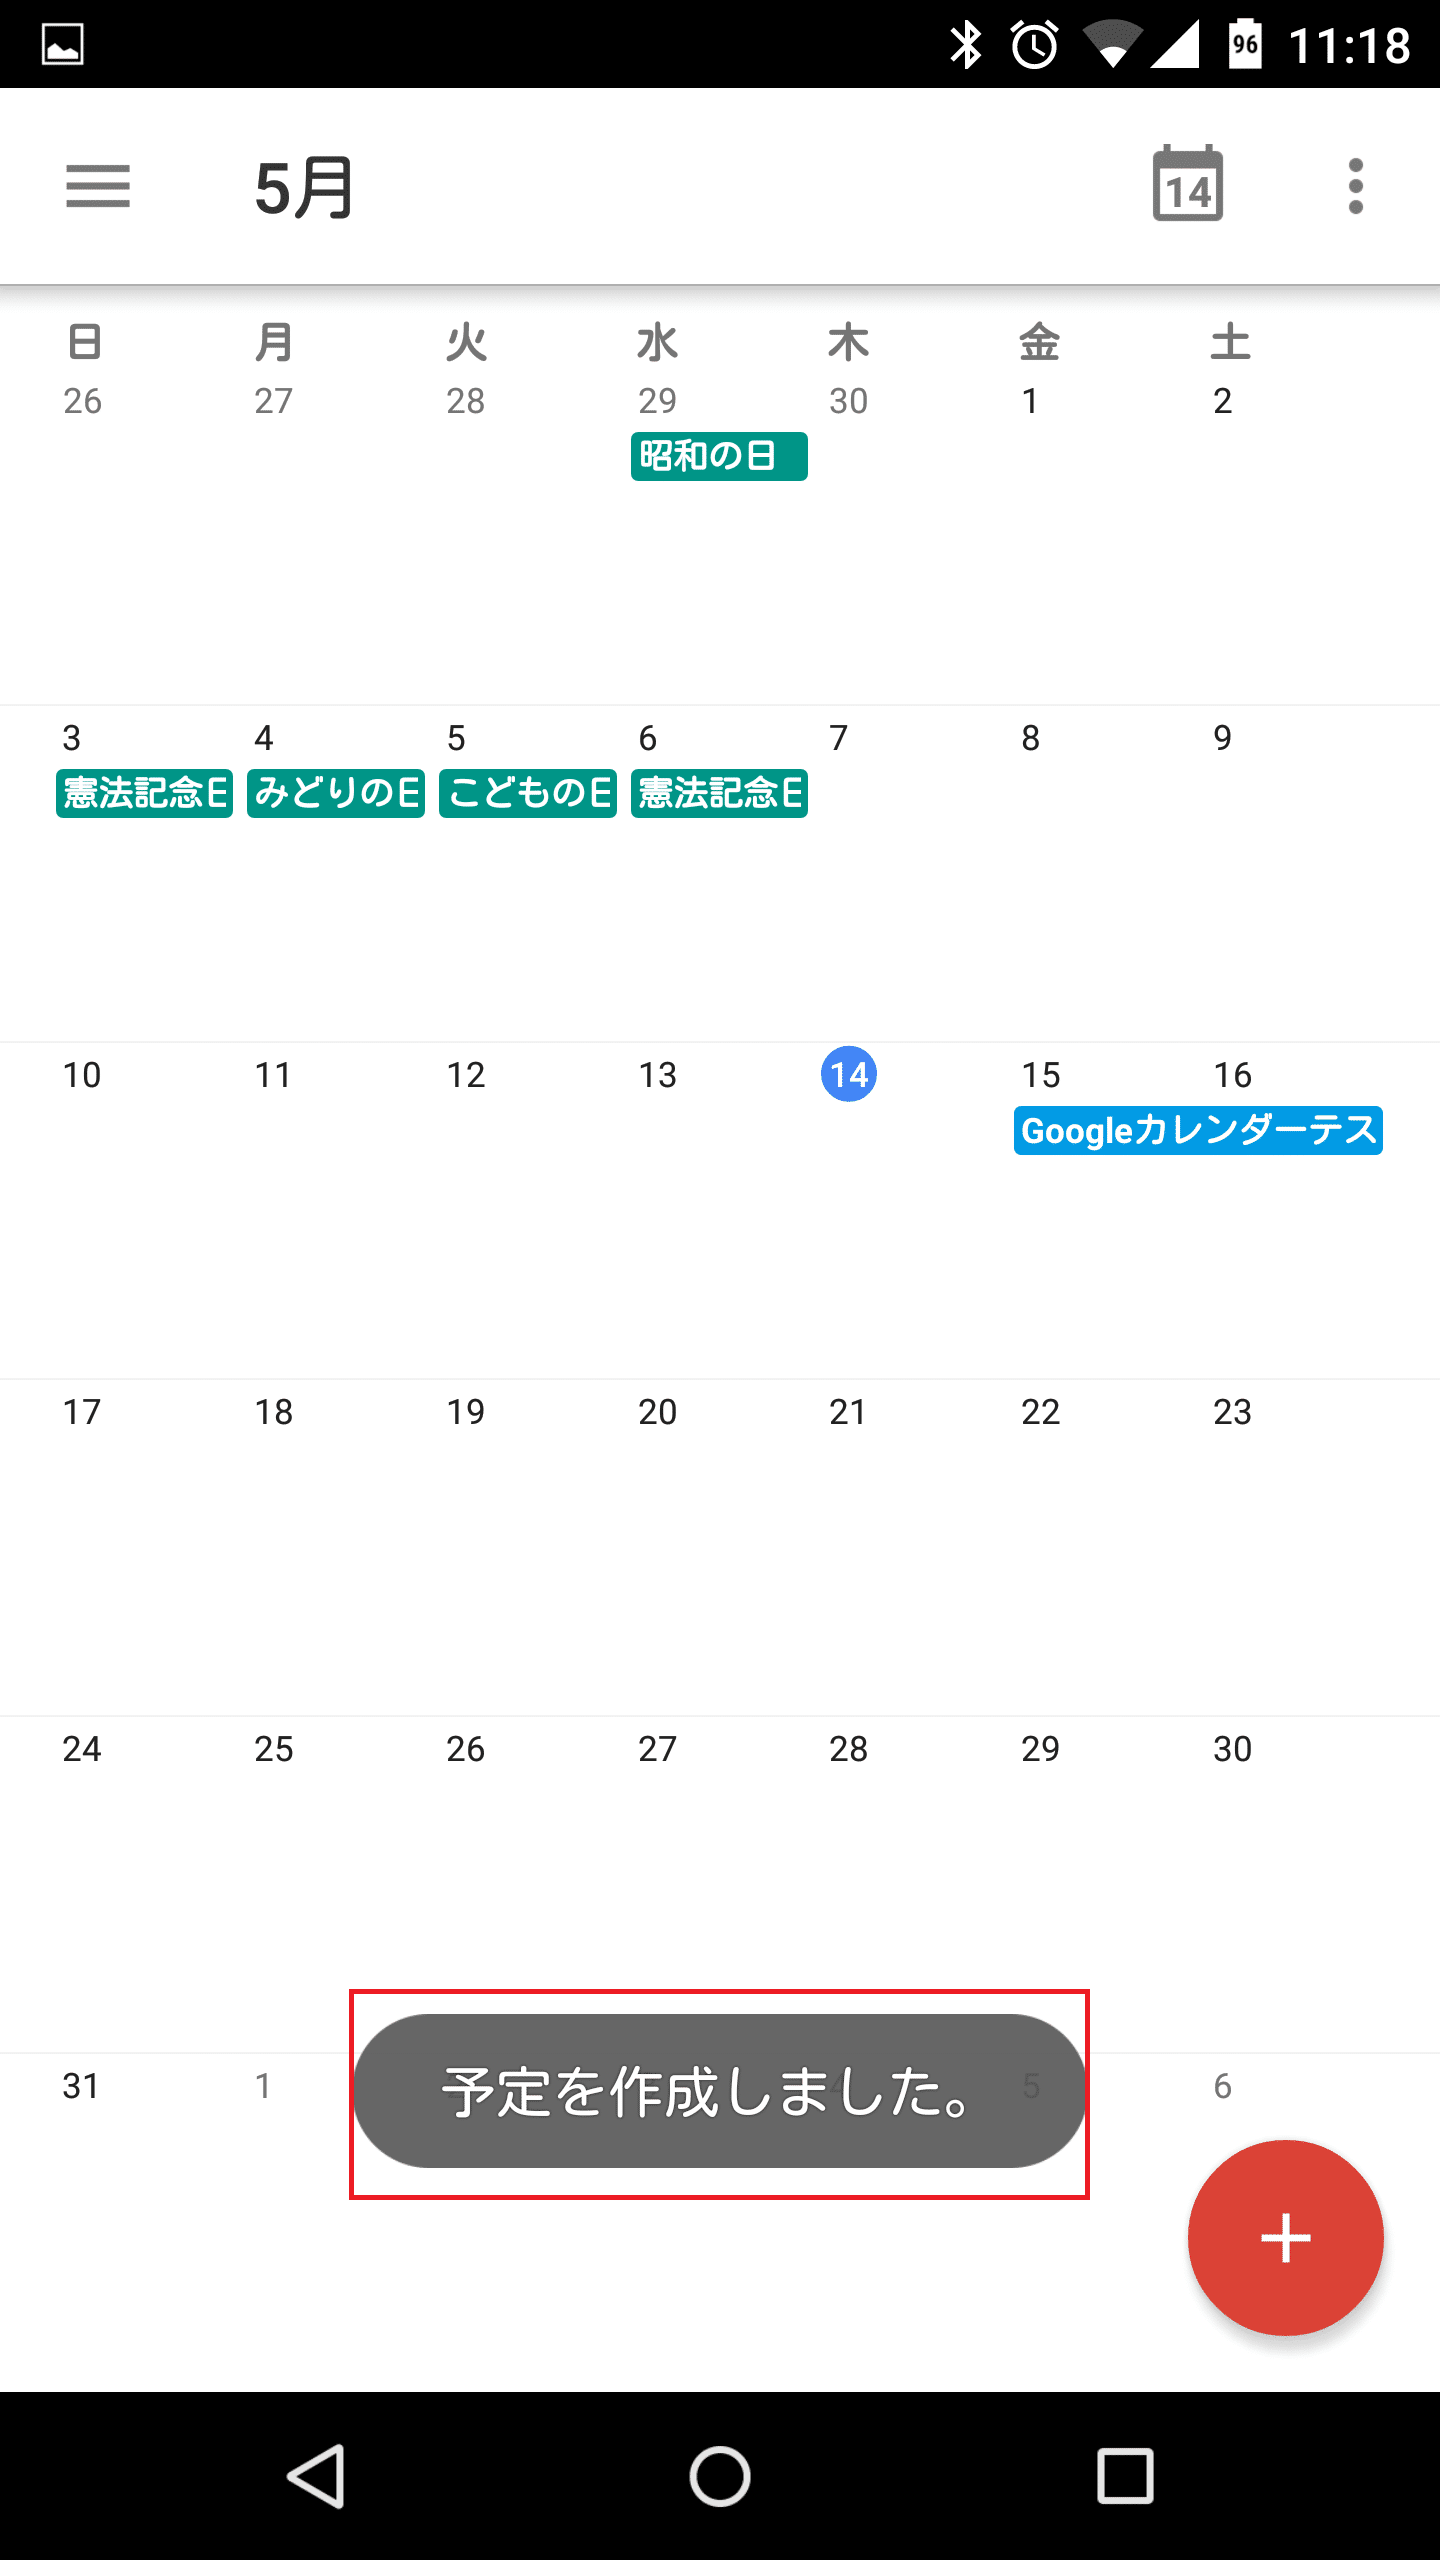
Googleカレンダー Android版で新しい予定(新規スケジュール)を追加する方法は以上です。
なお、Googleカレンダー Android版の新しい予定の追加方法以外の使い方に関する詳細はGoogleカレンダー(グーグルカレンダー) Android版の使い方まとめ。を参照してください。