今回は、Nexus Playerの開発者向けオプションを表示させてUSBデバッグをオンにする方法を紹介します。
Nexus Playerの開発者向けオプションを表示させる
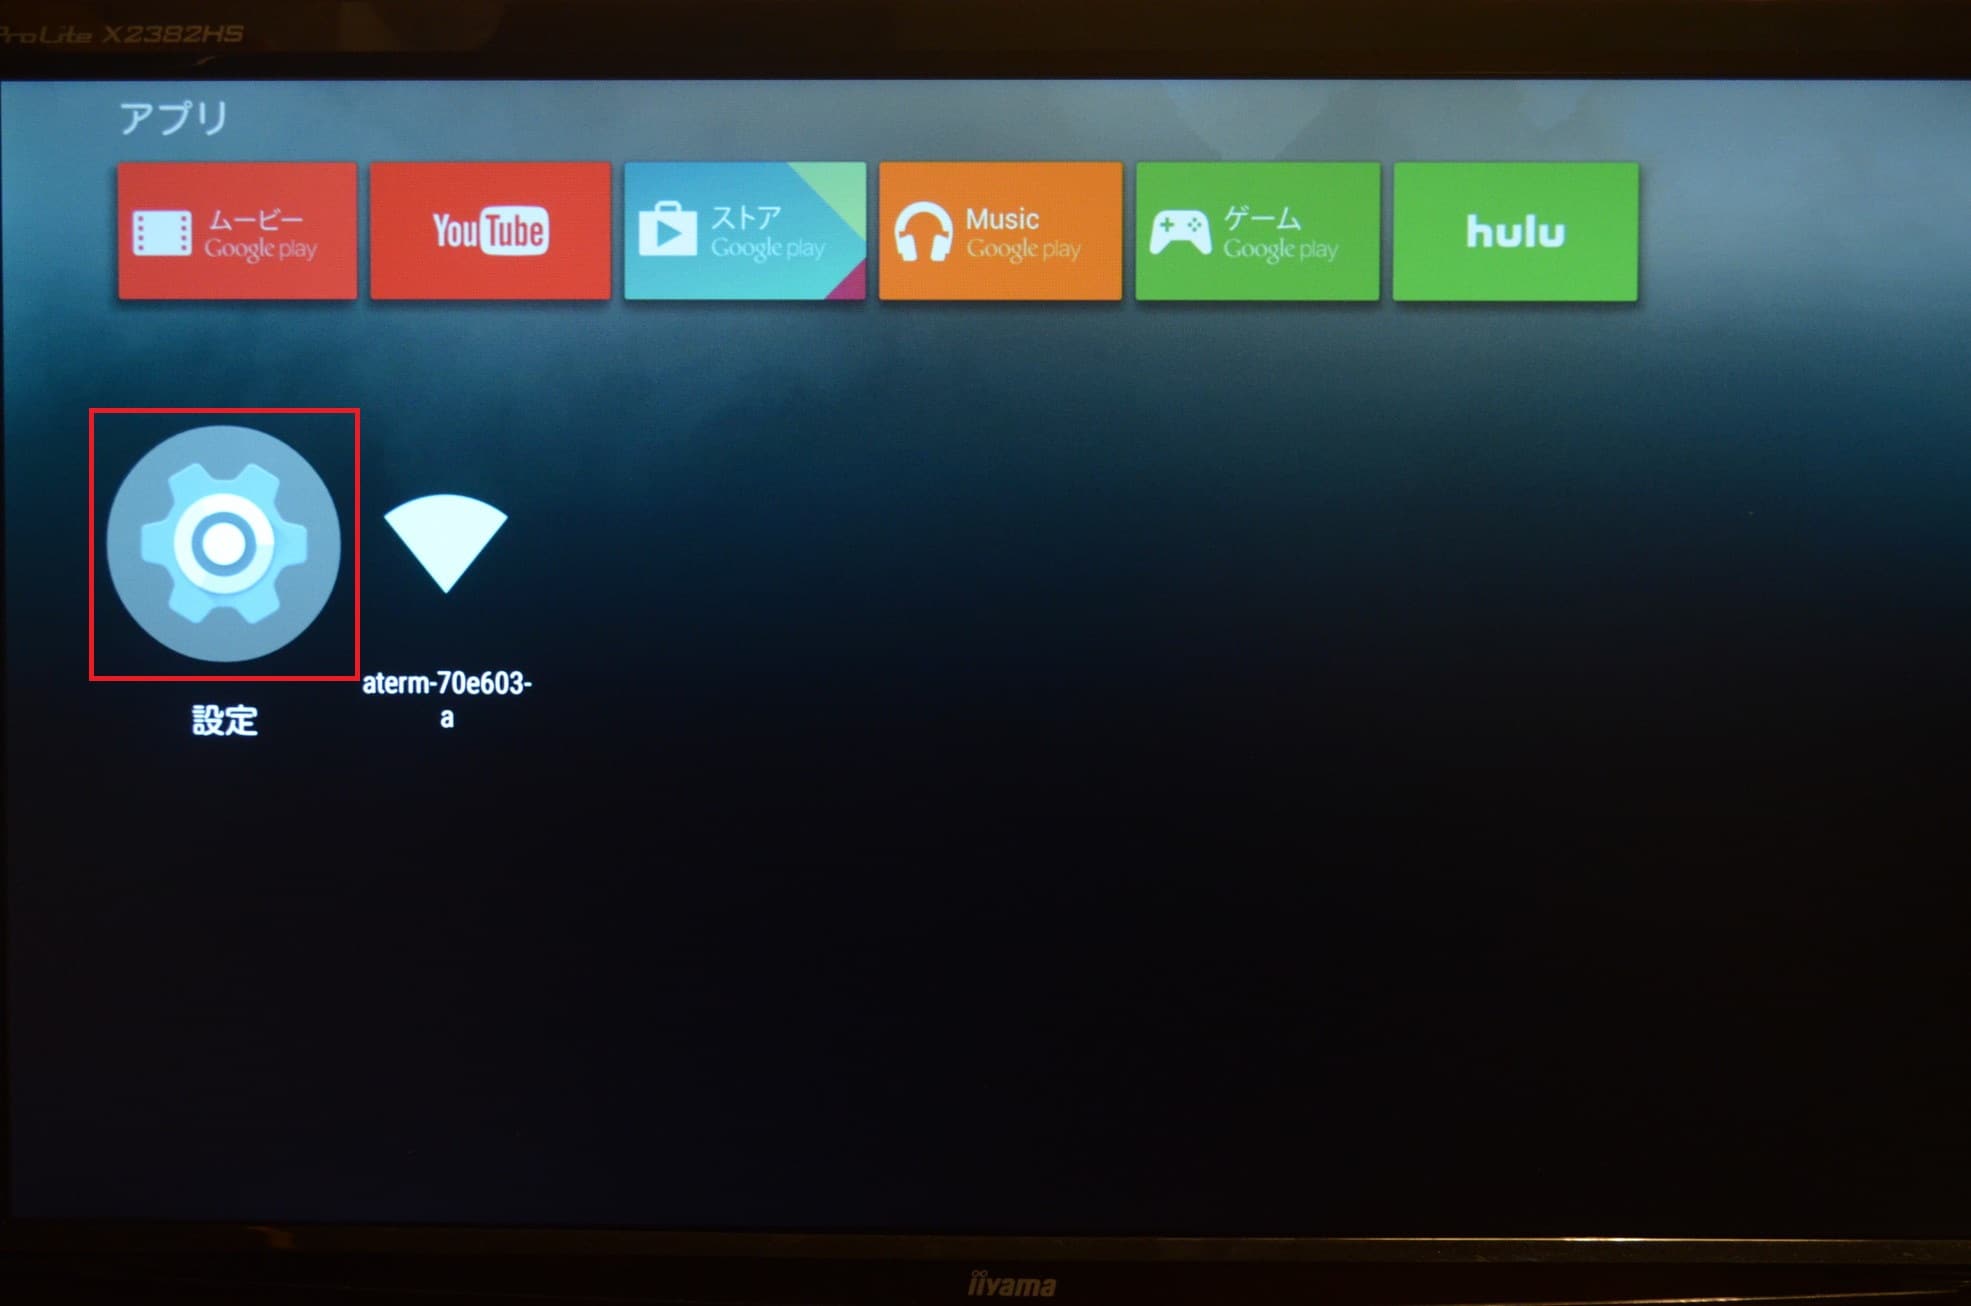
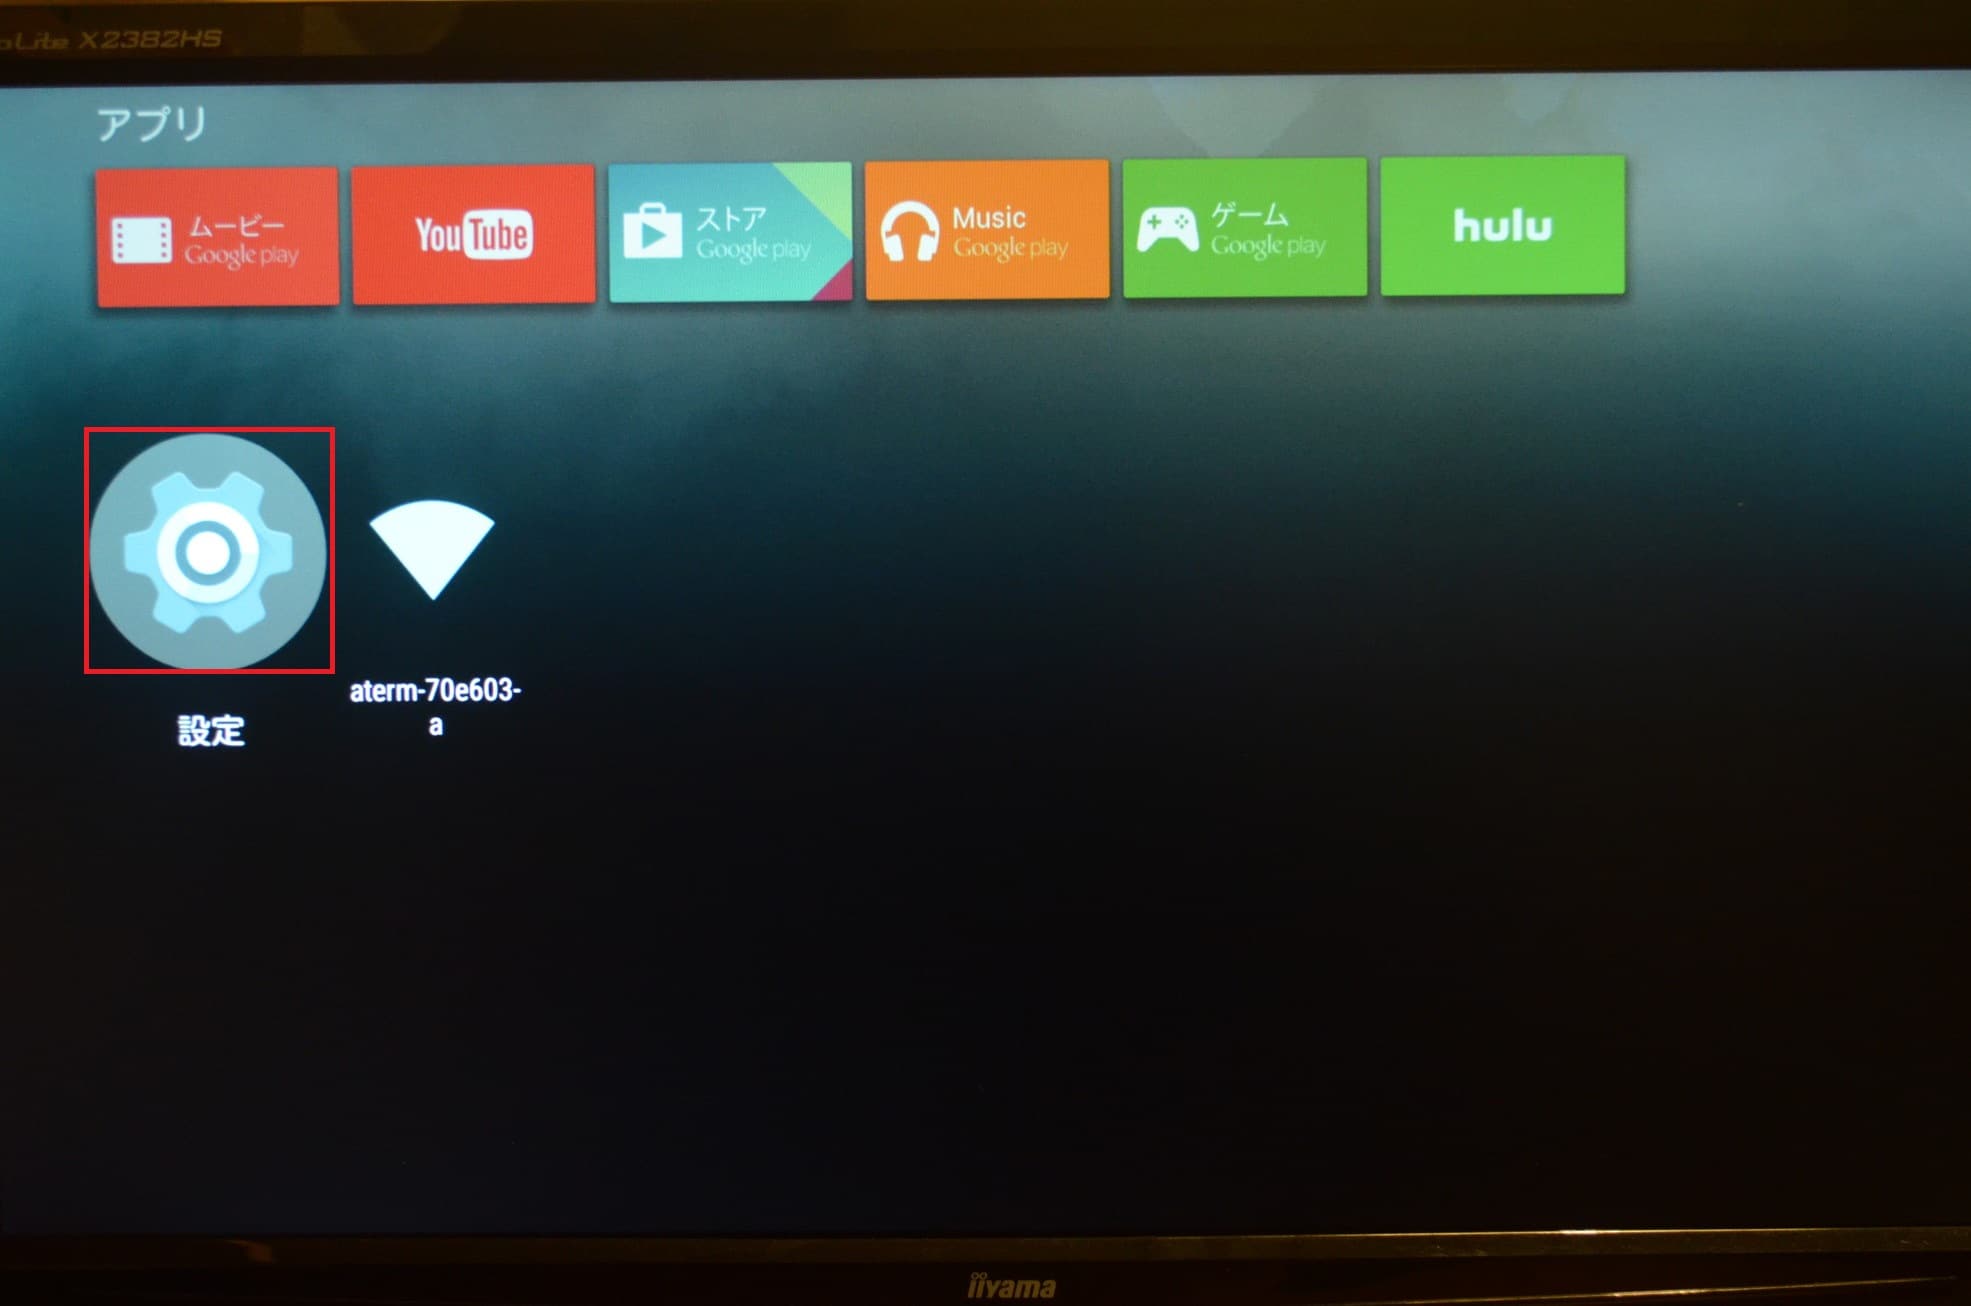
まずは、Nexus Playerの開発者向けオプションを表示させます。Nexus Playerのホーム画面でNexus Playerのリモコンを使って下に移動して「設定」を選び、決定ボタンを押します。
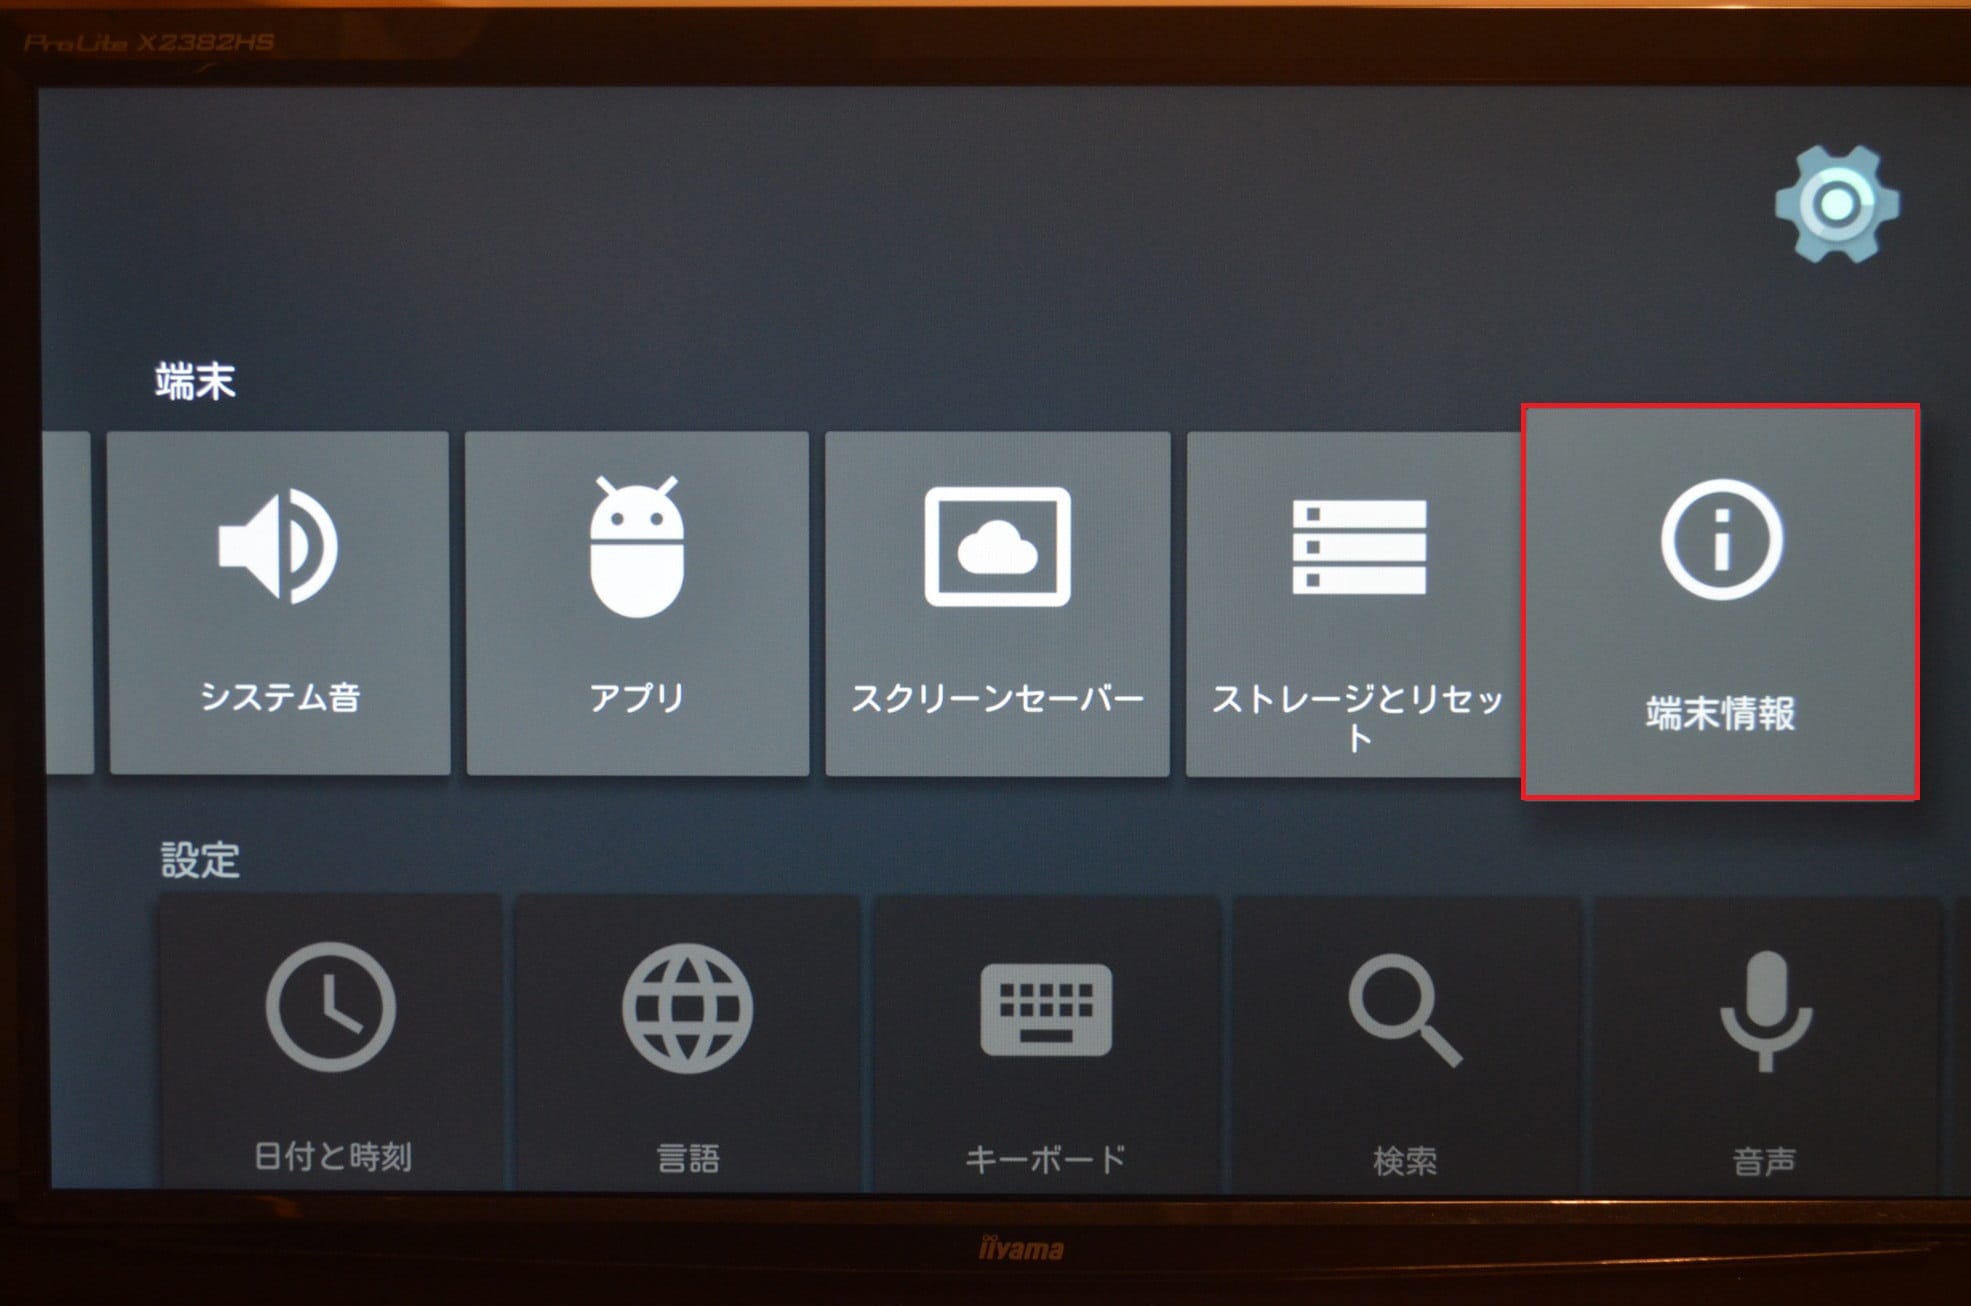
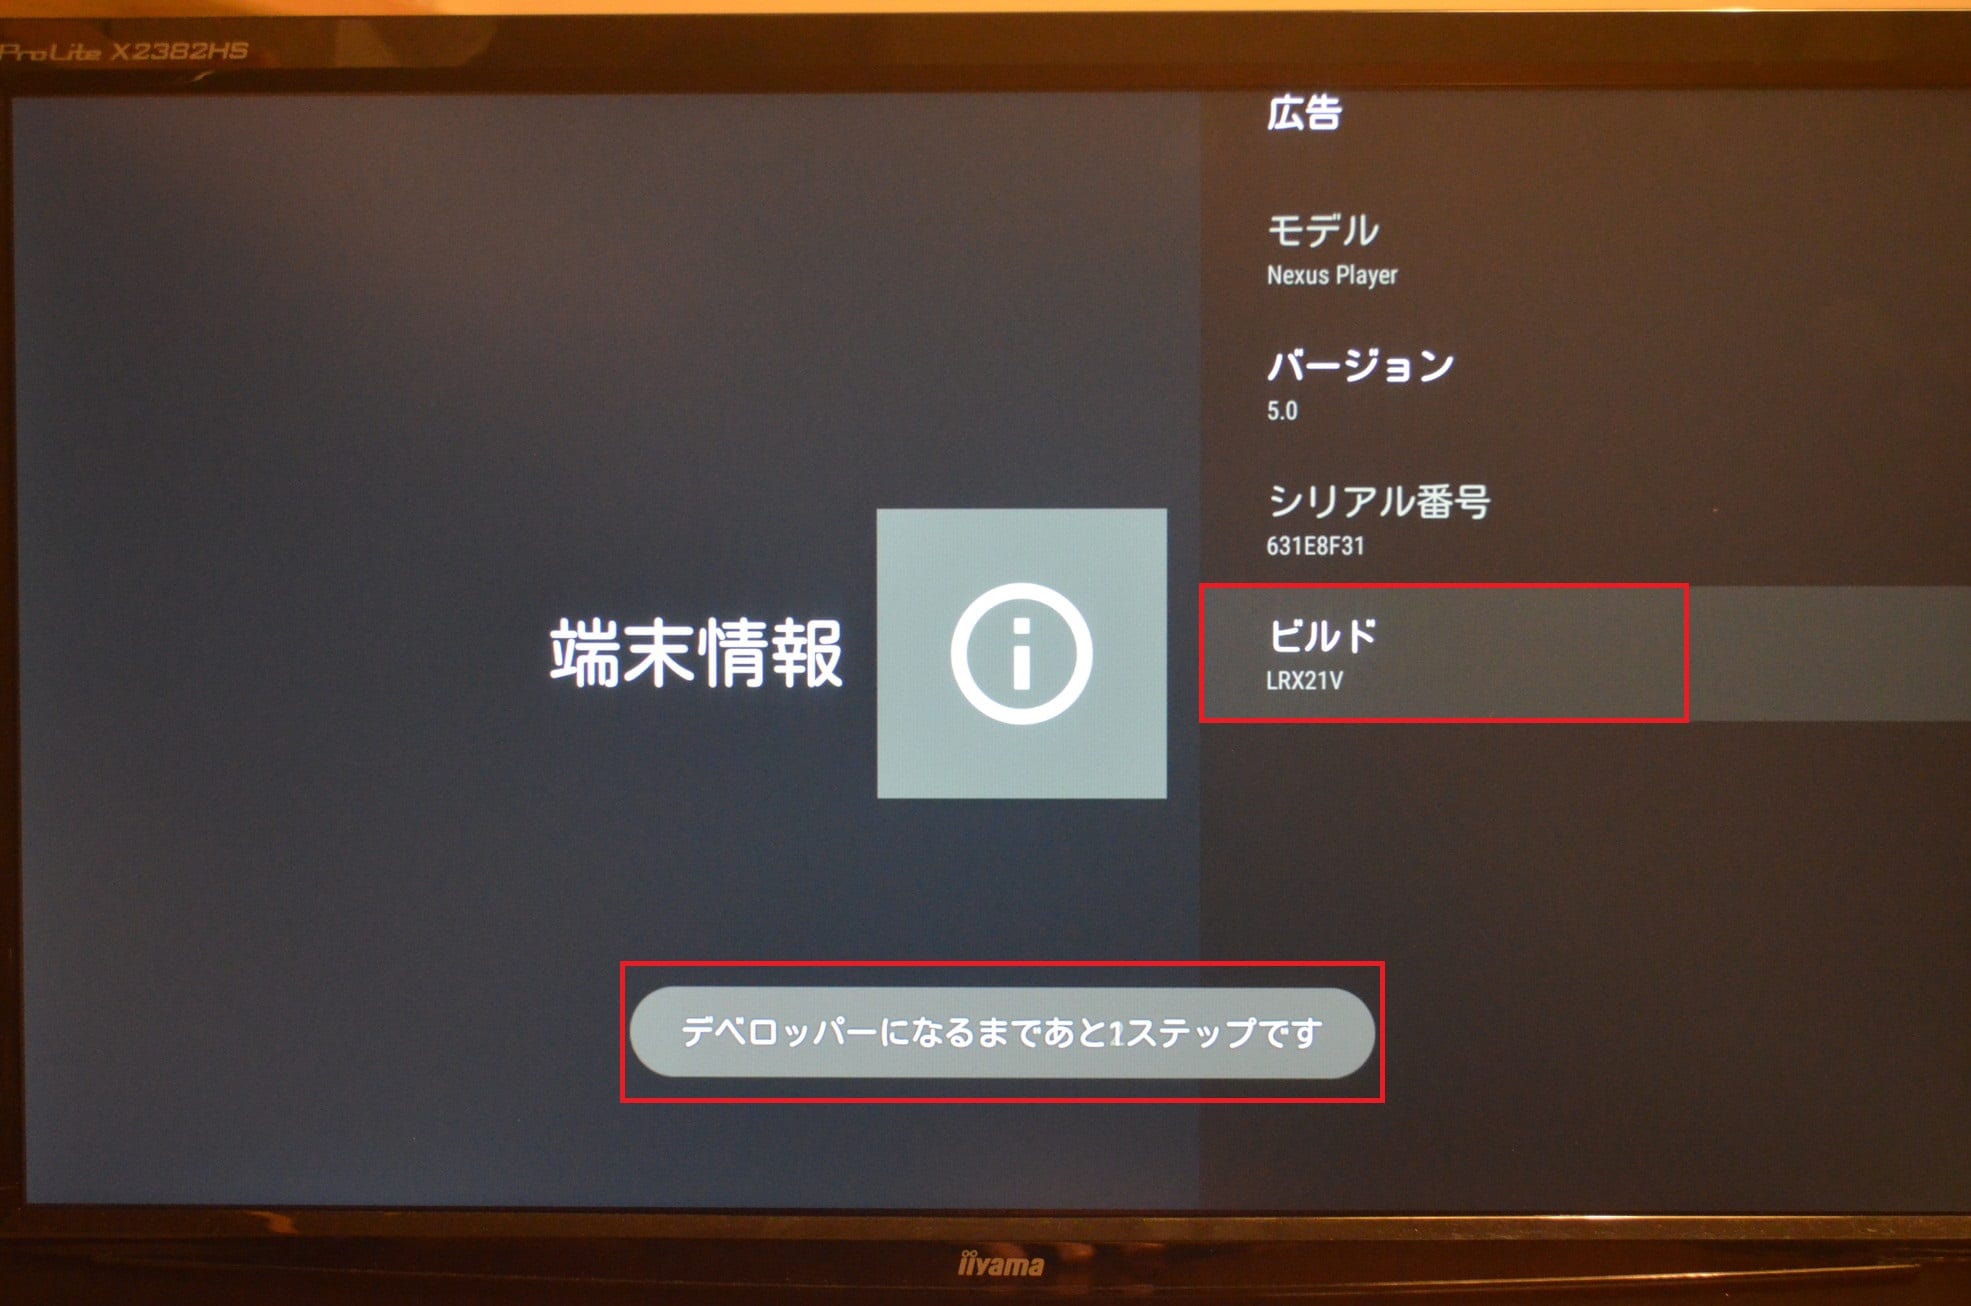
「端末」の項目の「端末情報」を選んで決定ボタンを押します。
「ビルド」を選んで決定ボタンを何度か押します。
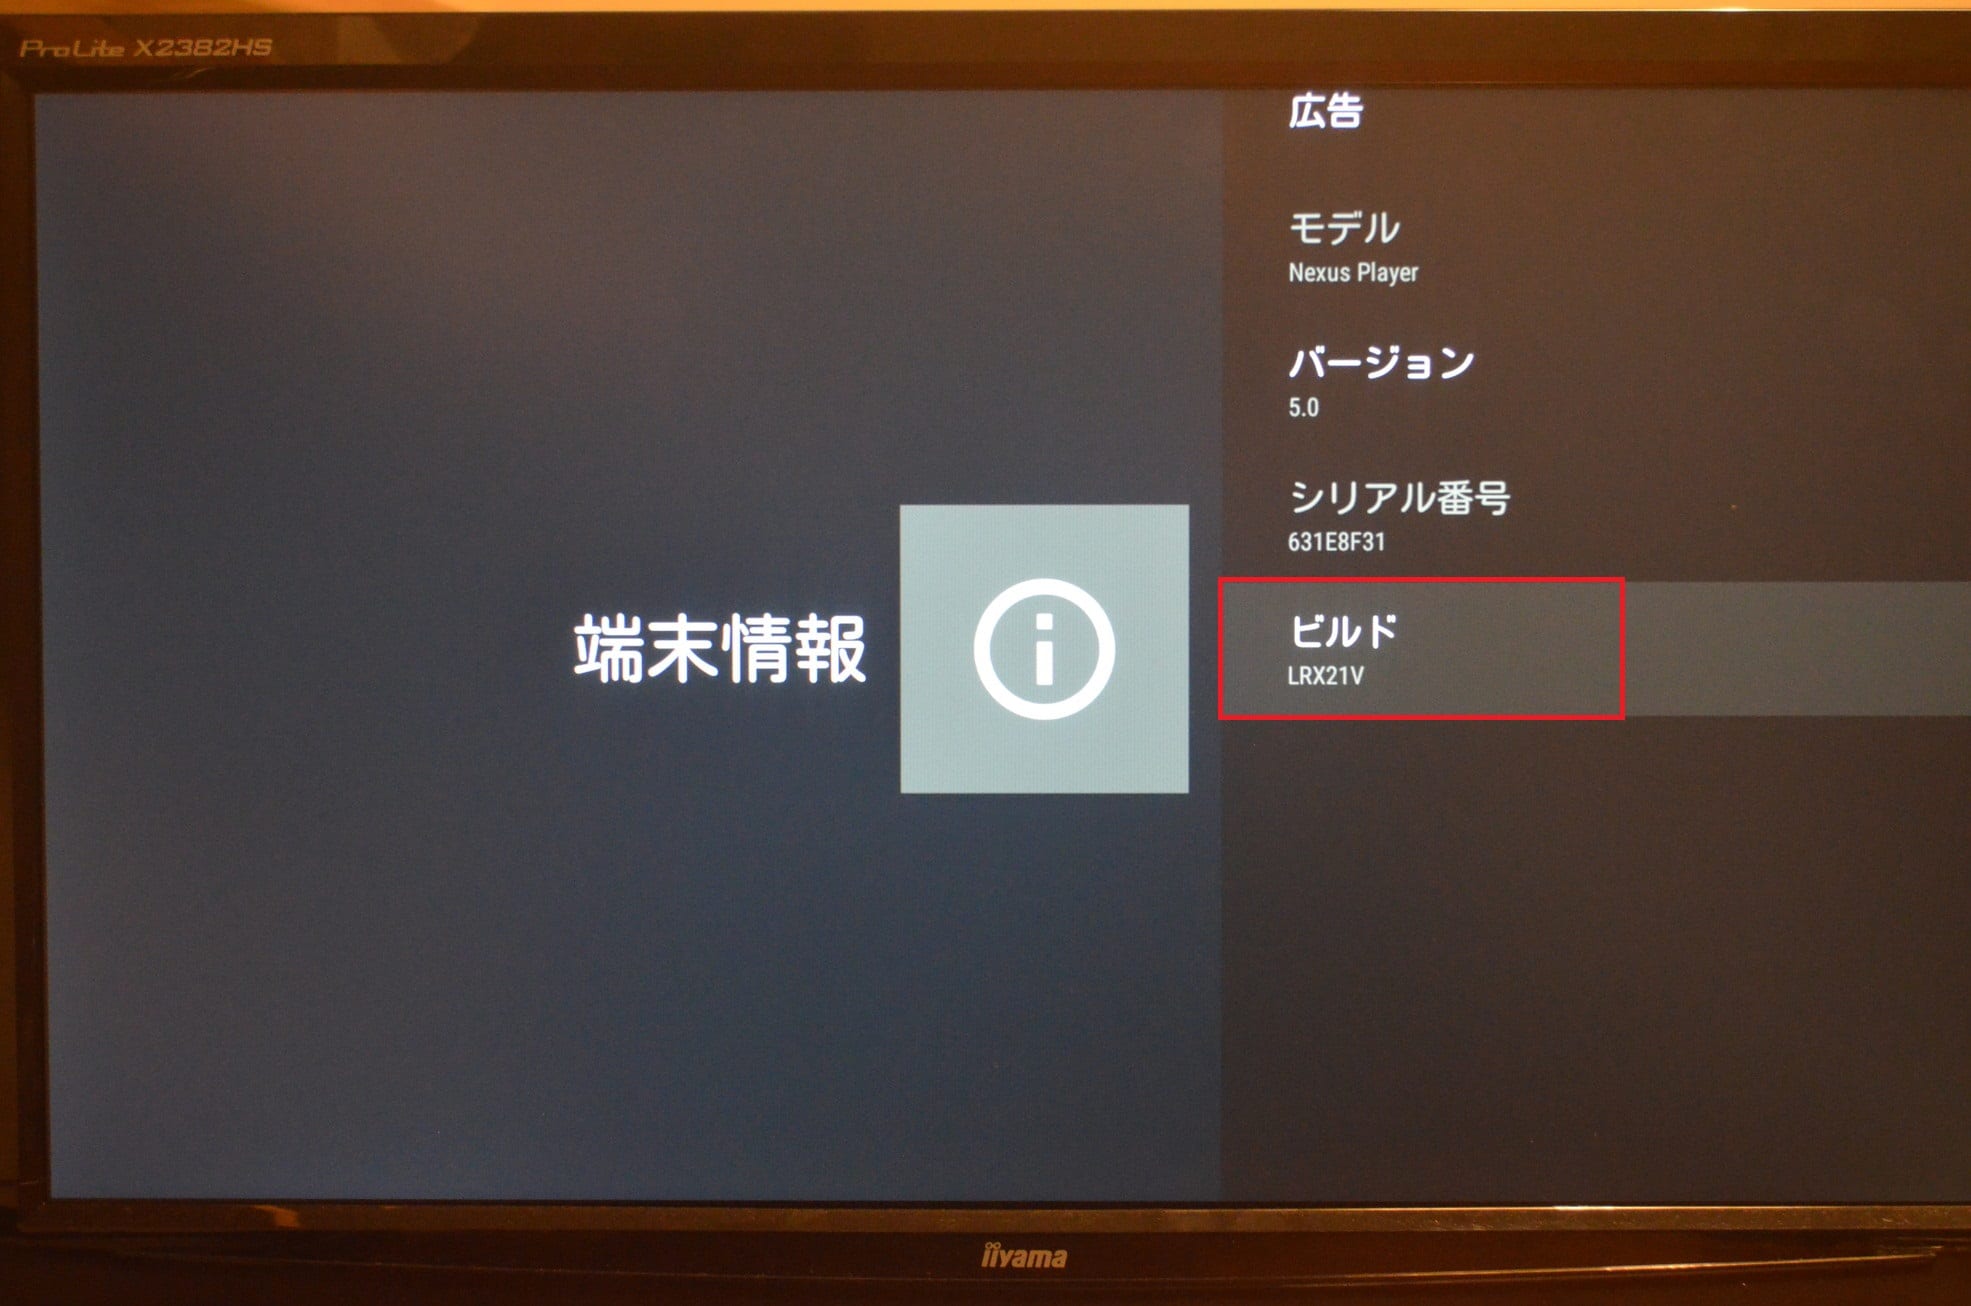
「デベロッパーになるまであと○ステップです」と表示されるので、残りの回数決定ボタンを押します。
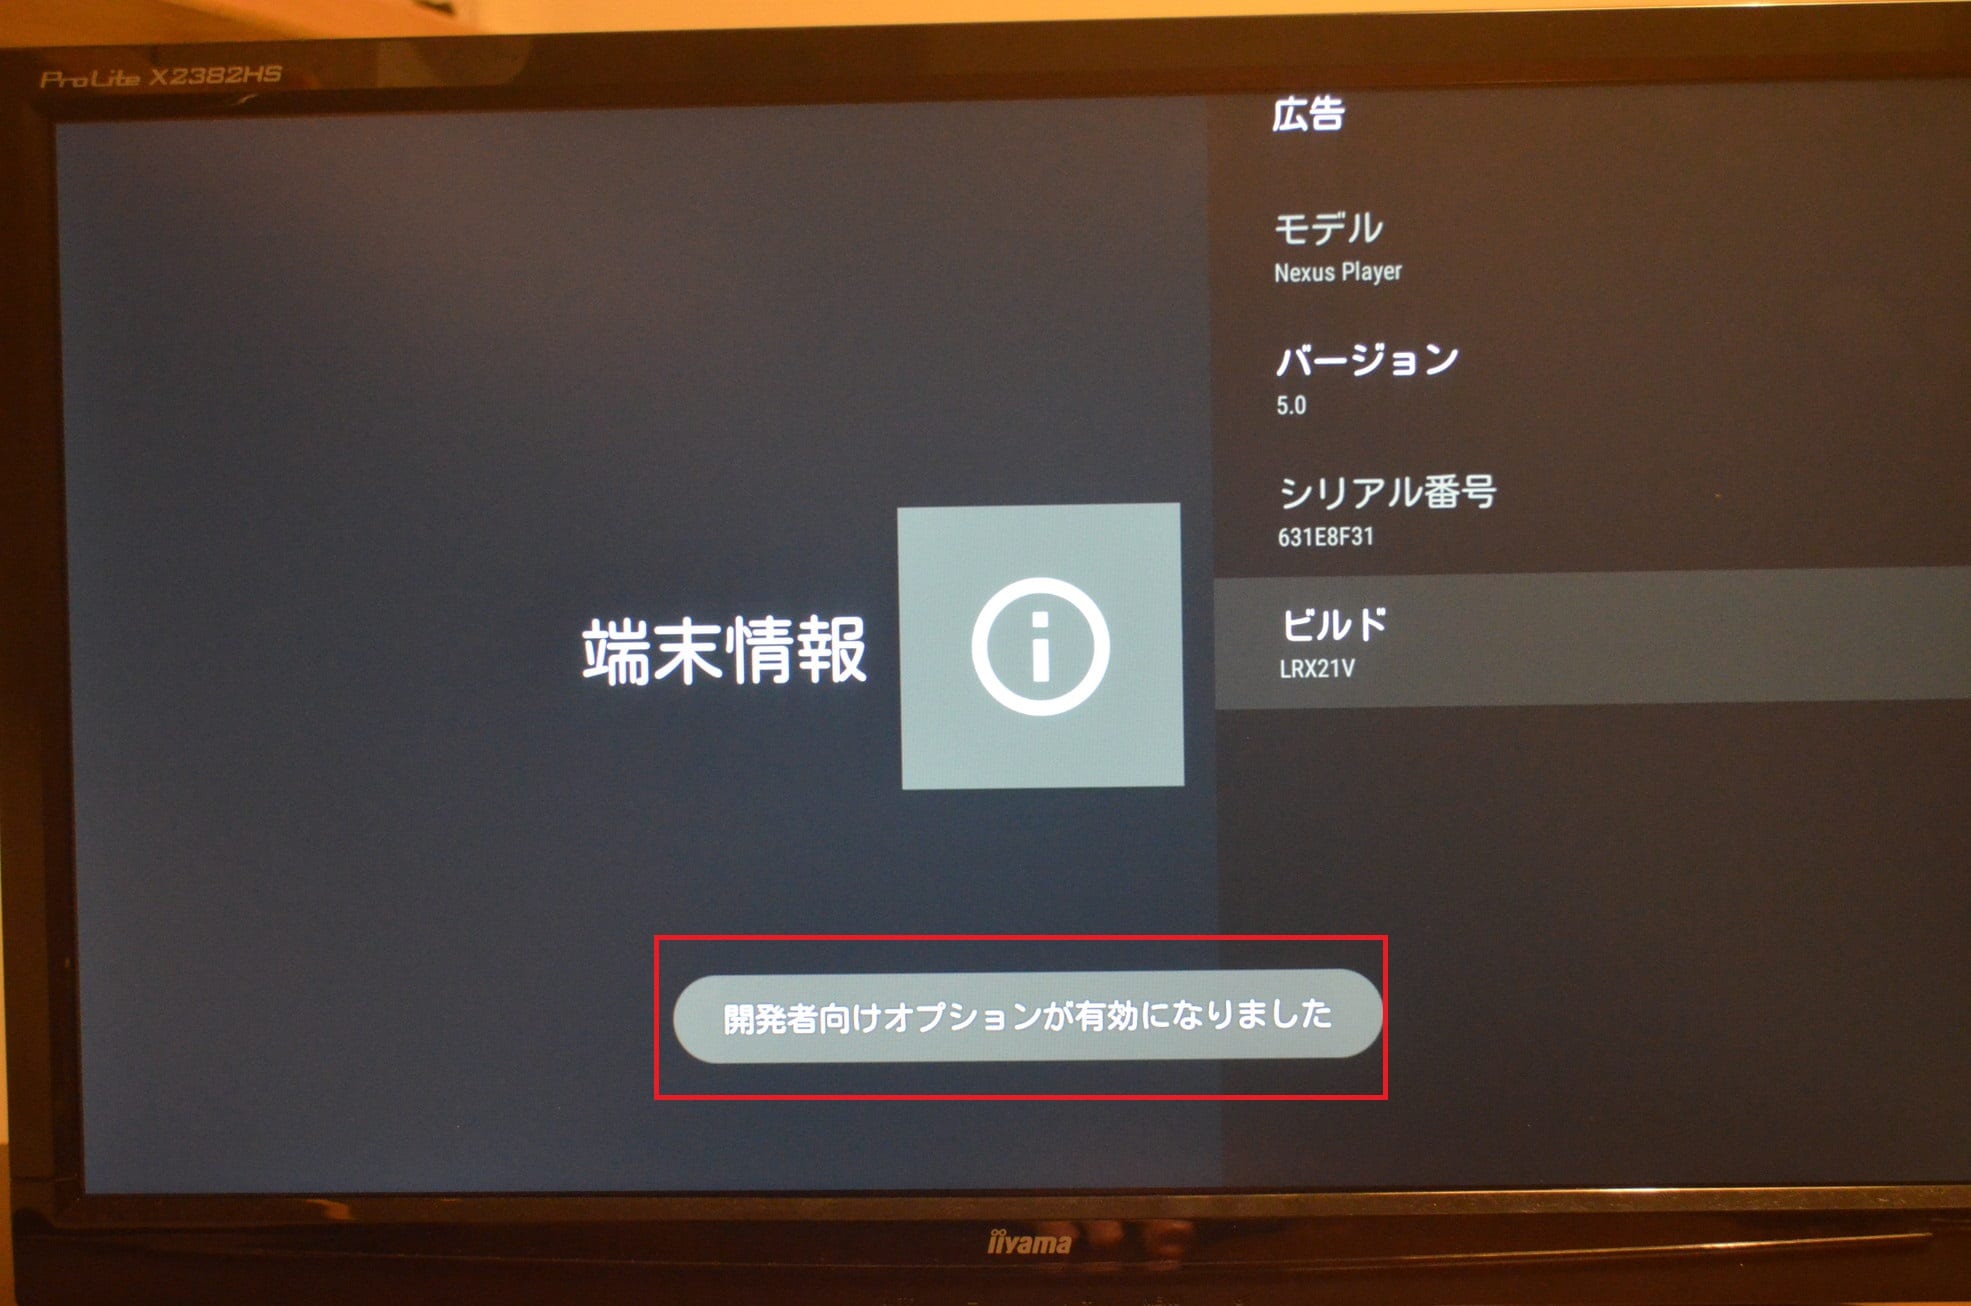
「開発者向けオプションが有効になりました」と表示されたら、戻るボタンで戻ります。
一度Nexus Playerのホーム画面まで戻り、再度「設定」を選んで決定ボタンを押します。
すると、「設定」の項目に開発者向けオプションが表示されました。

Nexus Playerに開発者向けオプションを表示させる方法は以上です。
Nexus PlayerのUSBデバッグをオンにする
Nexus Playerで開発者向けオプションを表示させたら、次はUSBデバッグをオンにしていきます。Nexus Playerのホーム画面から「設定」を選んで決定ボタンを押します。
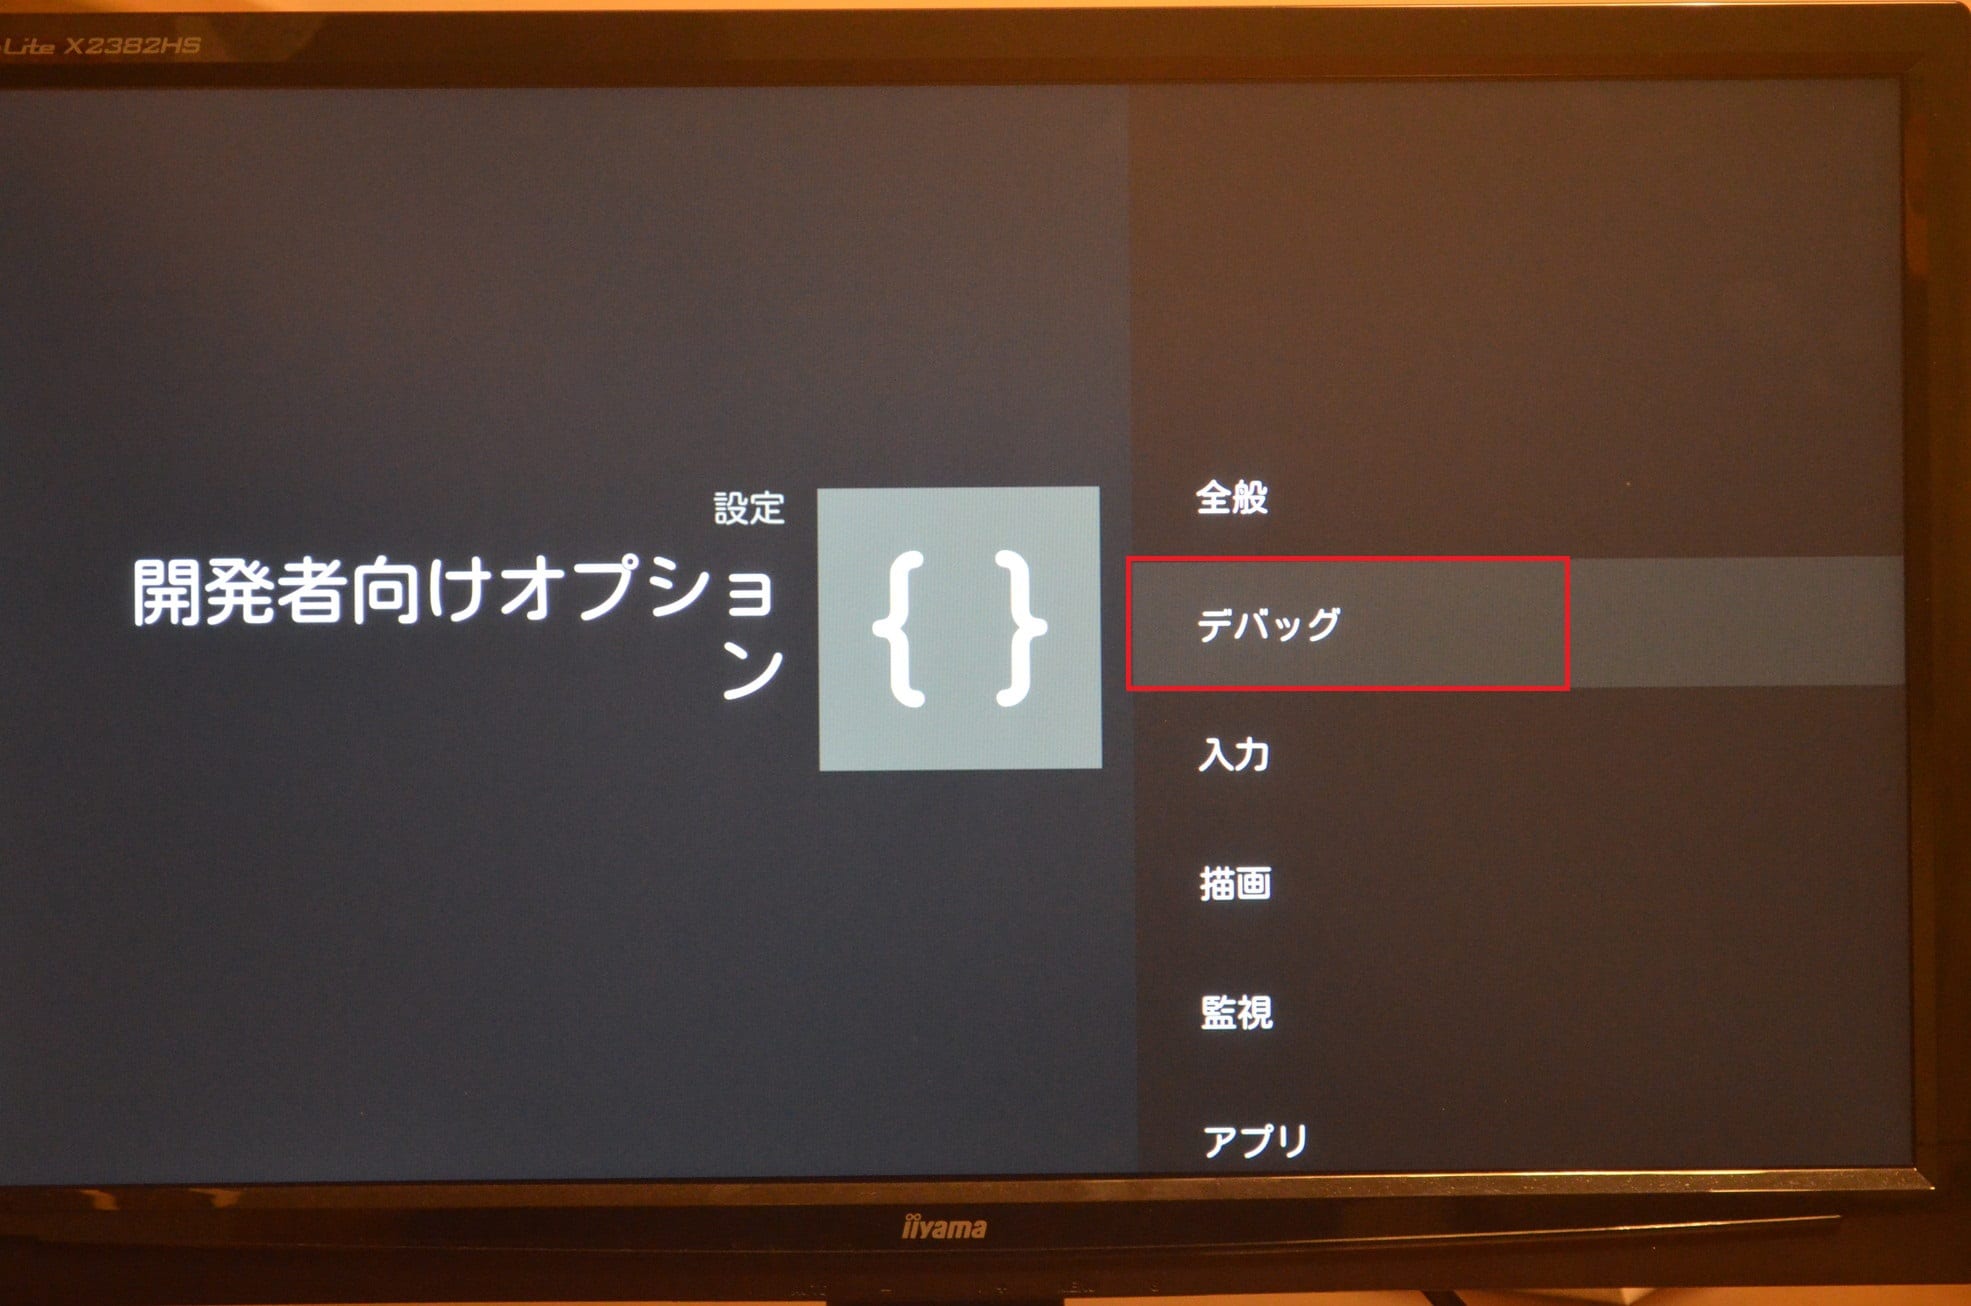
「設定」の項目に表示されている「開発者向けオプション」を選んで決定ボタンを押します。
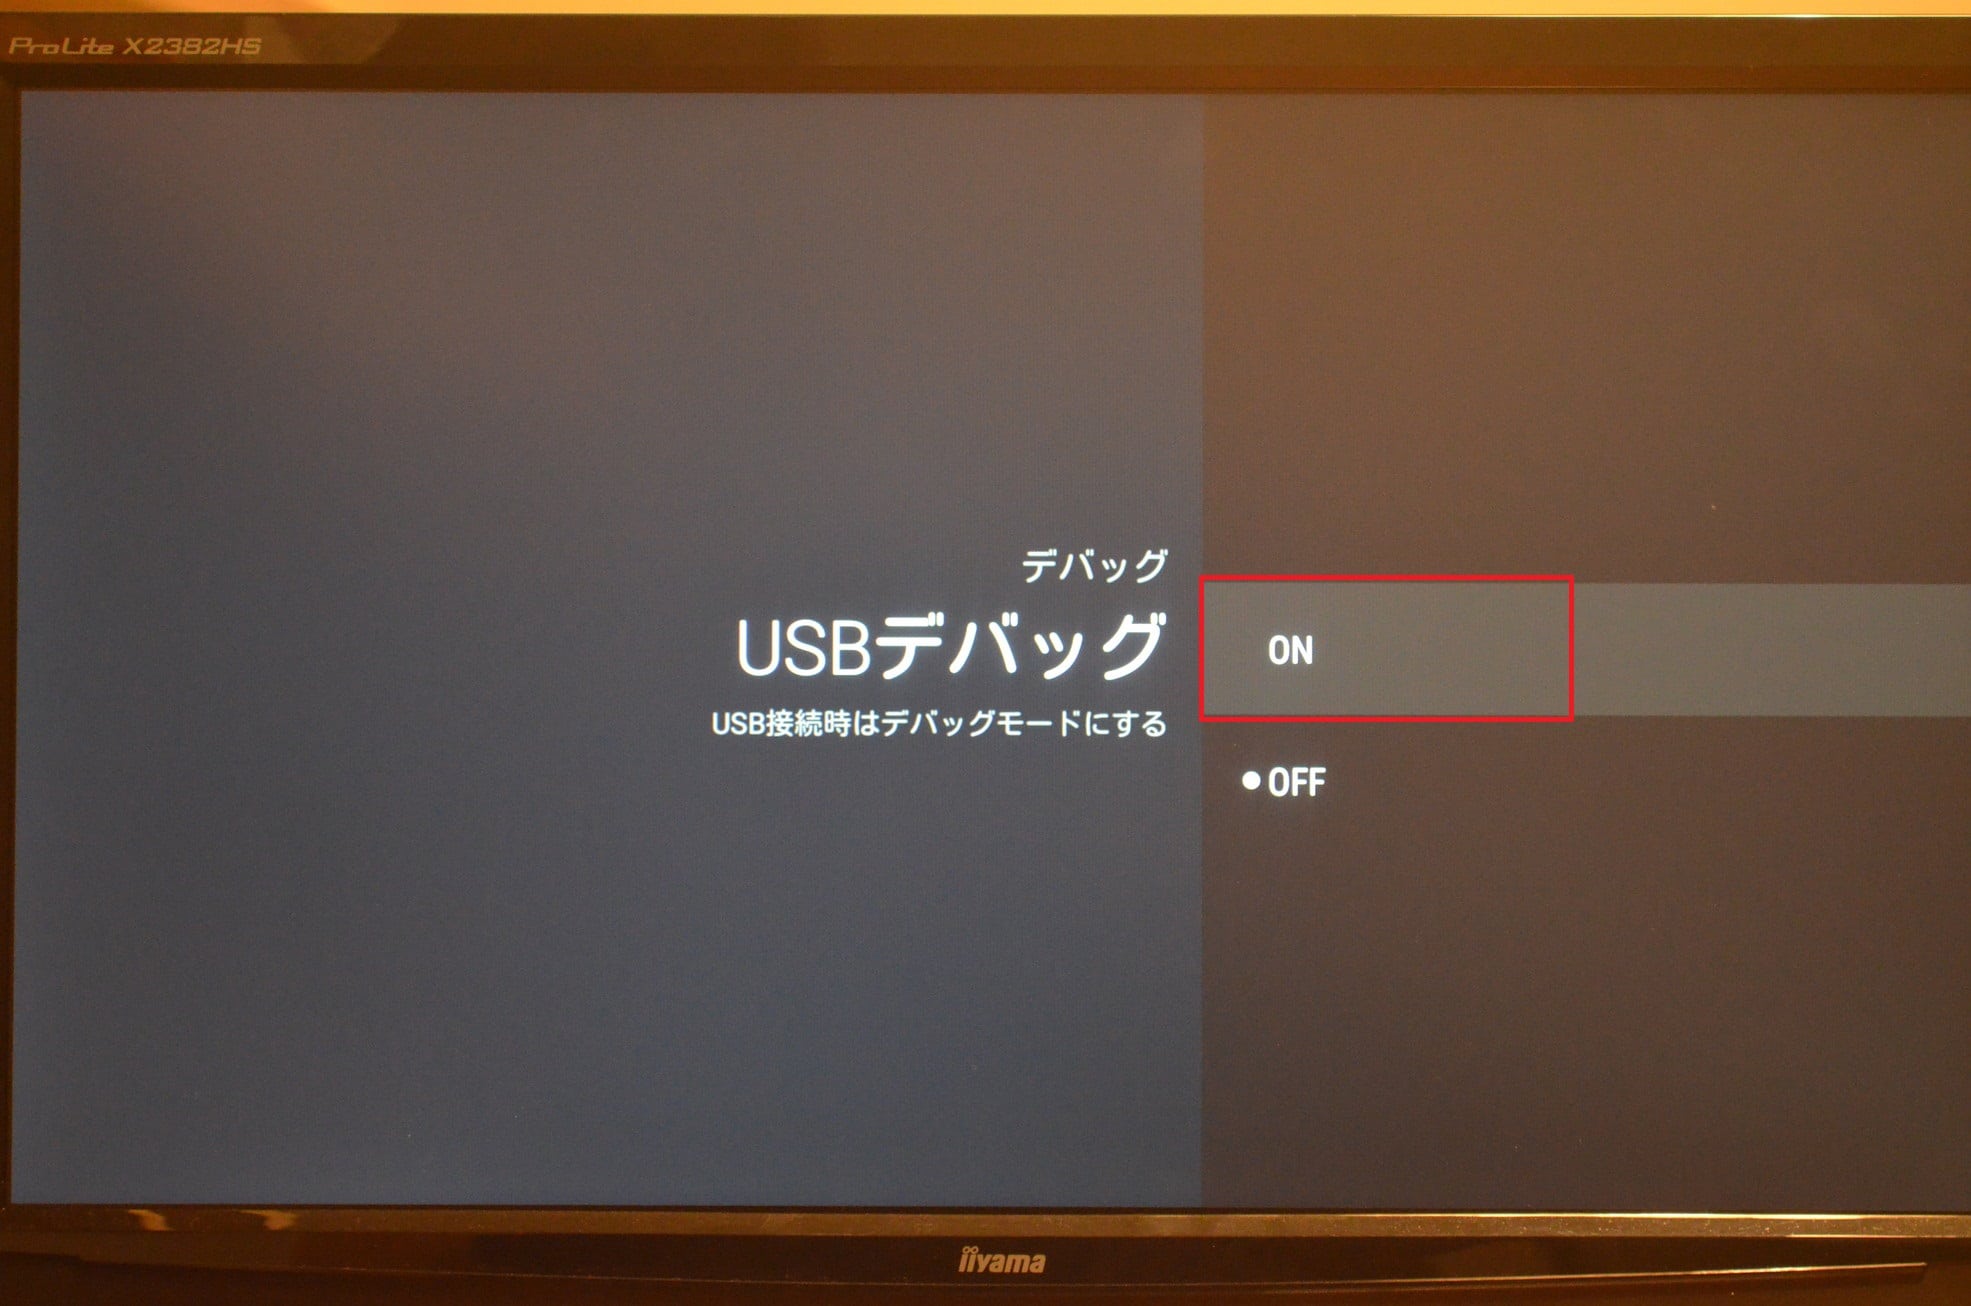
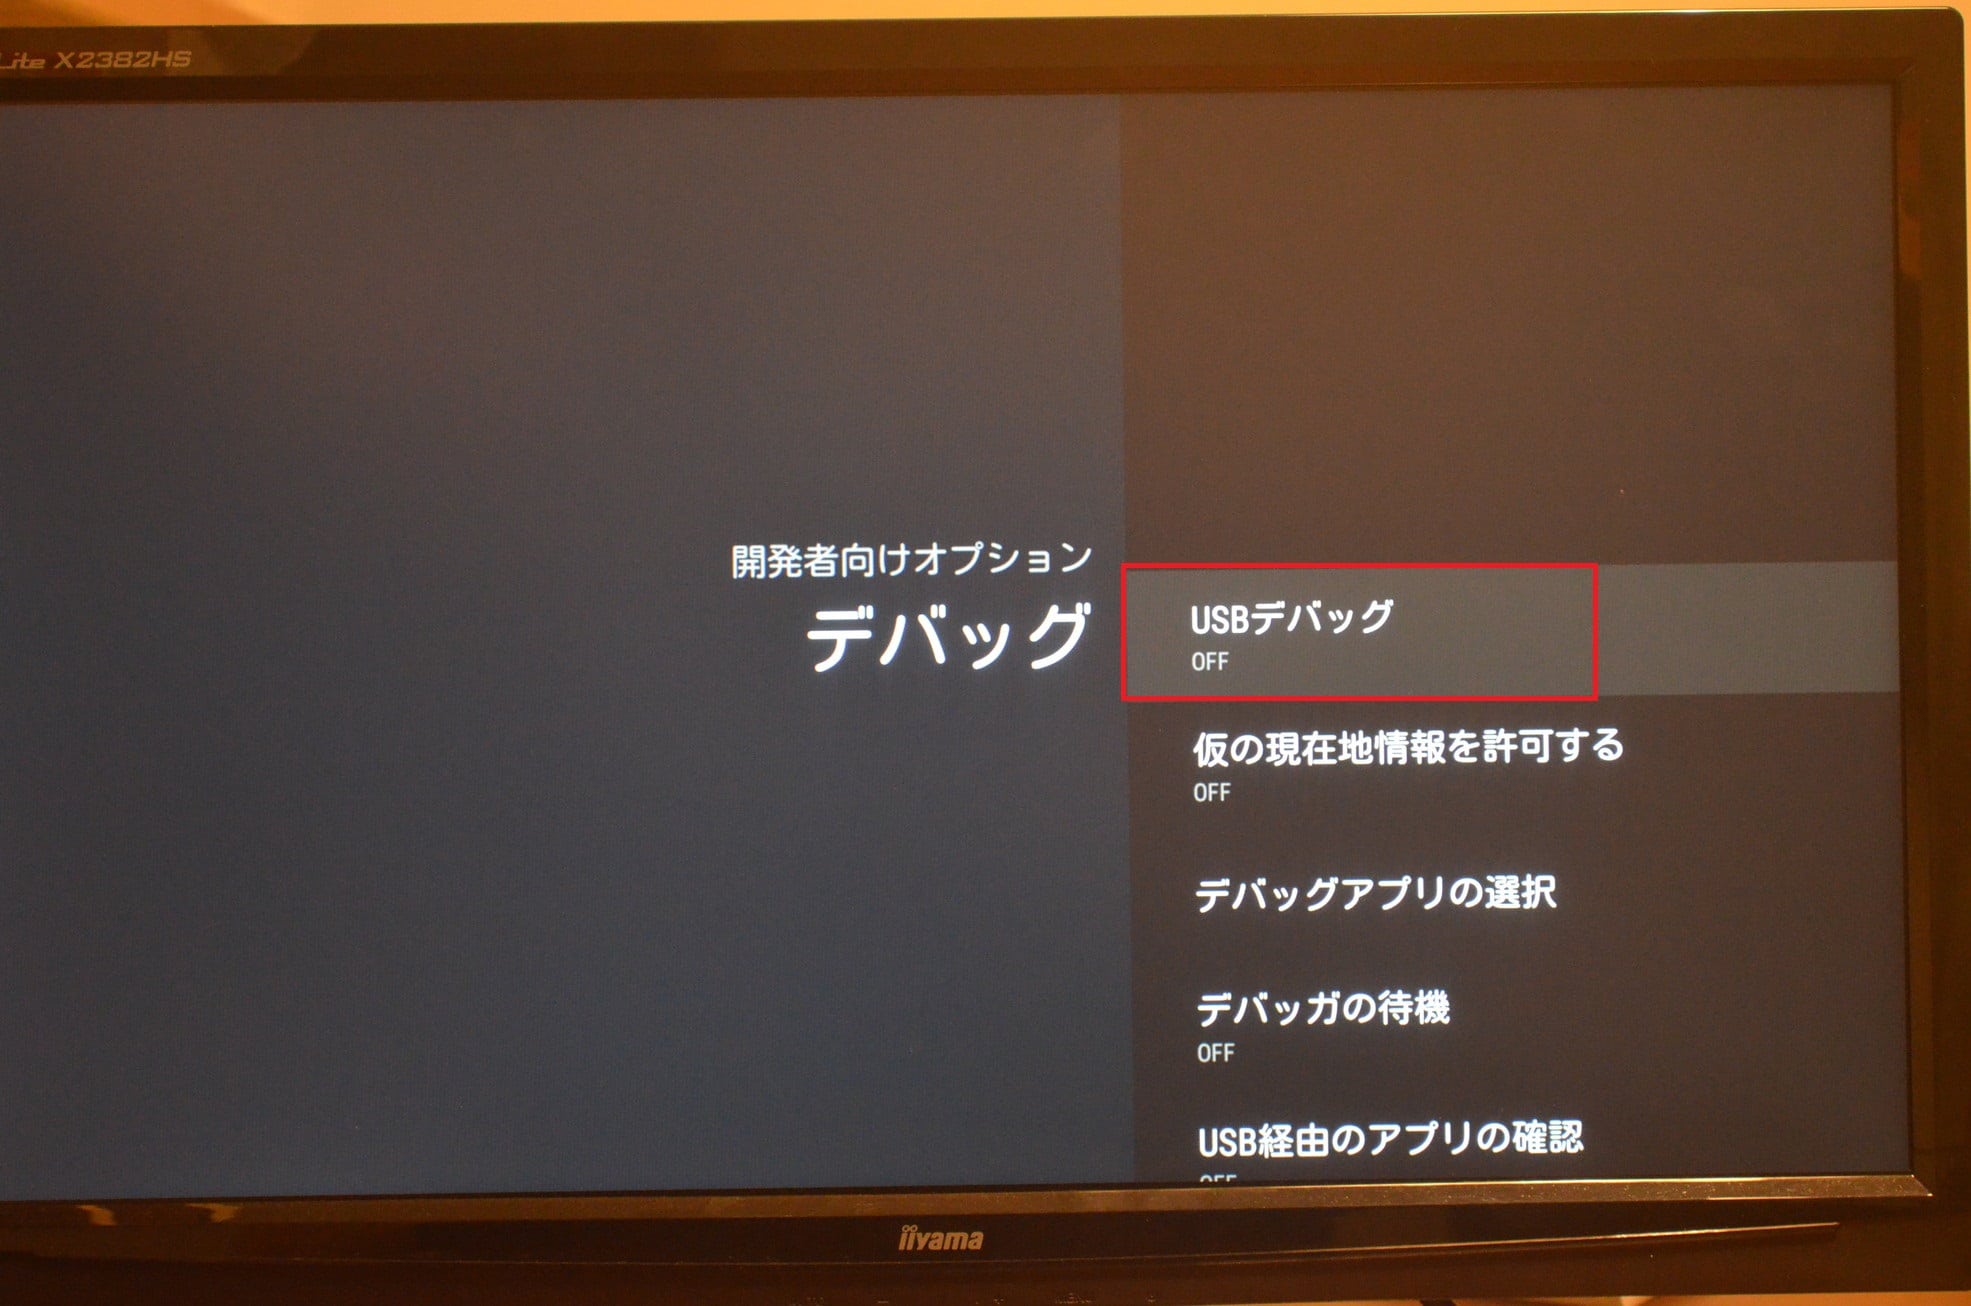
「デバッグ」を選んで決定ボタンを押します。
「USBデバッグ」を選んで決定ボタンを押します。デフォルトではUSBデバッグはOFFになっています。
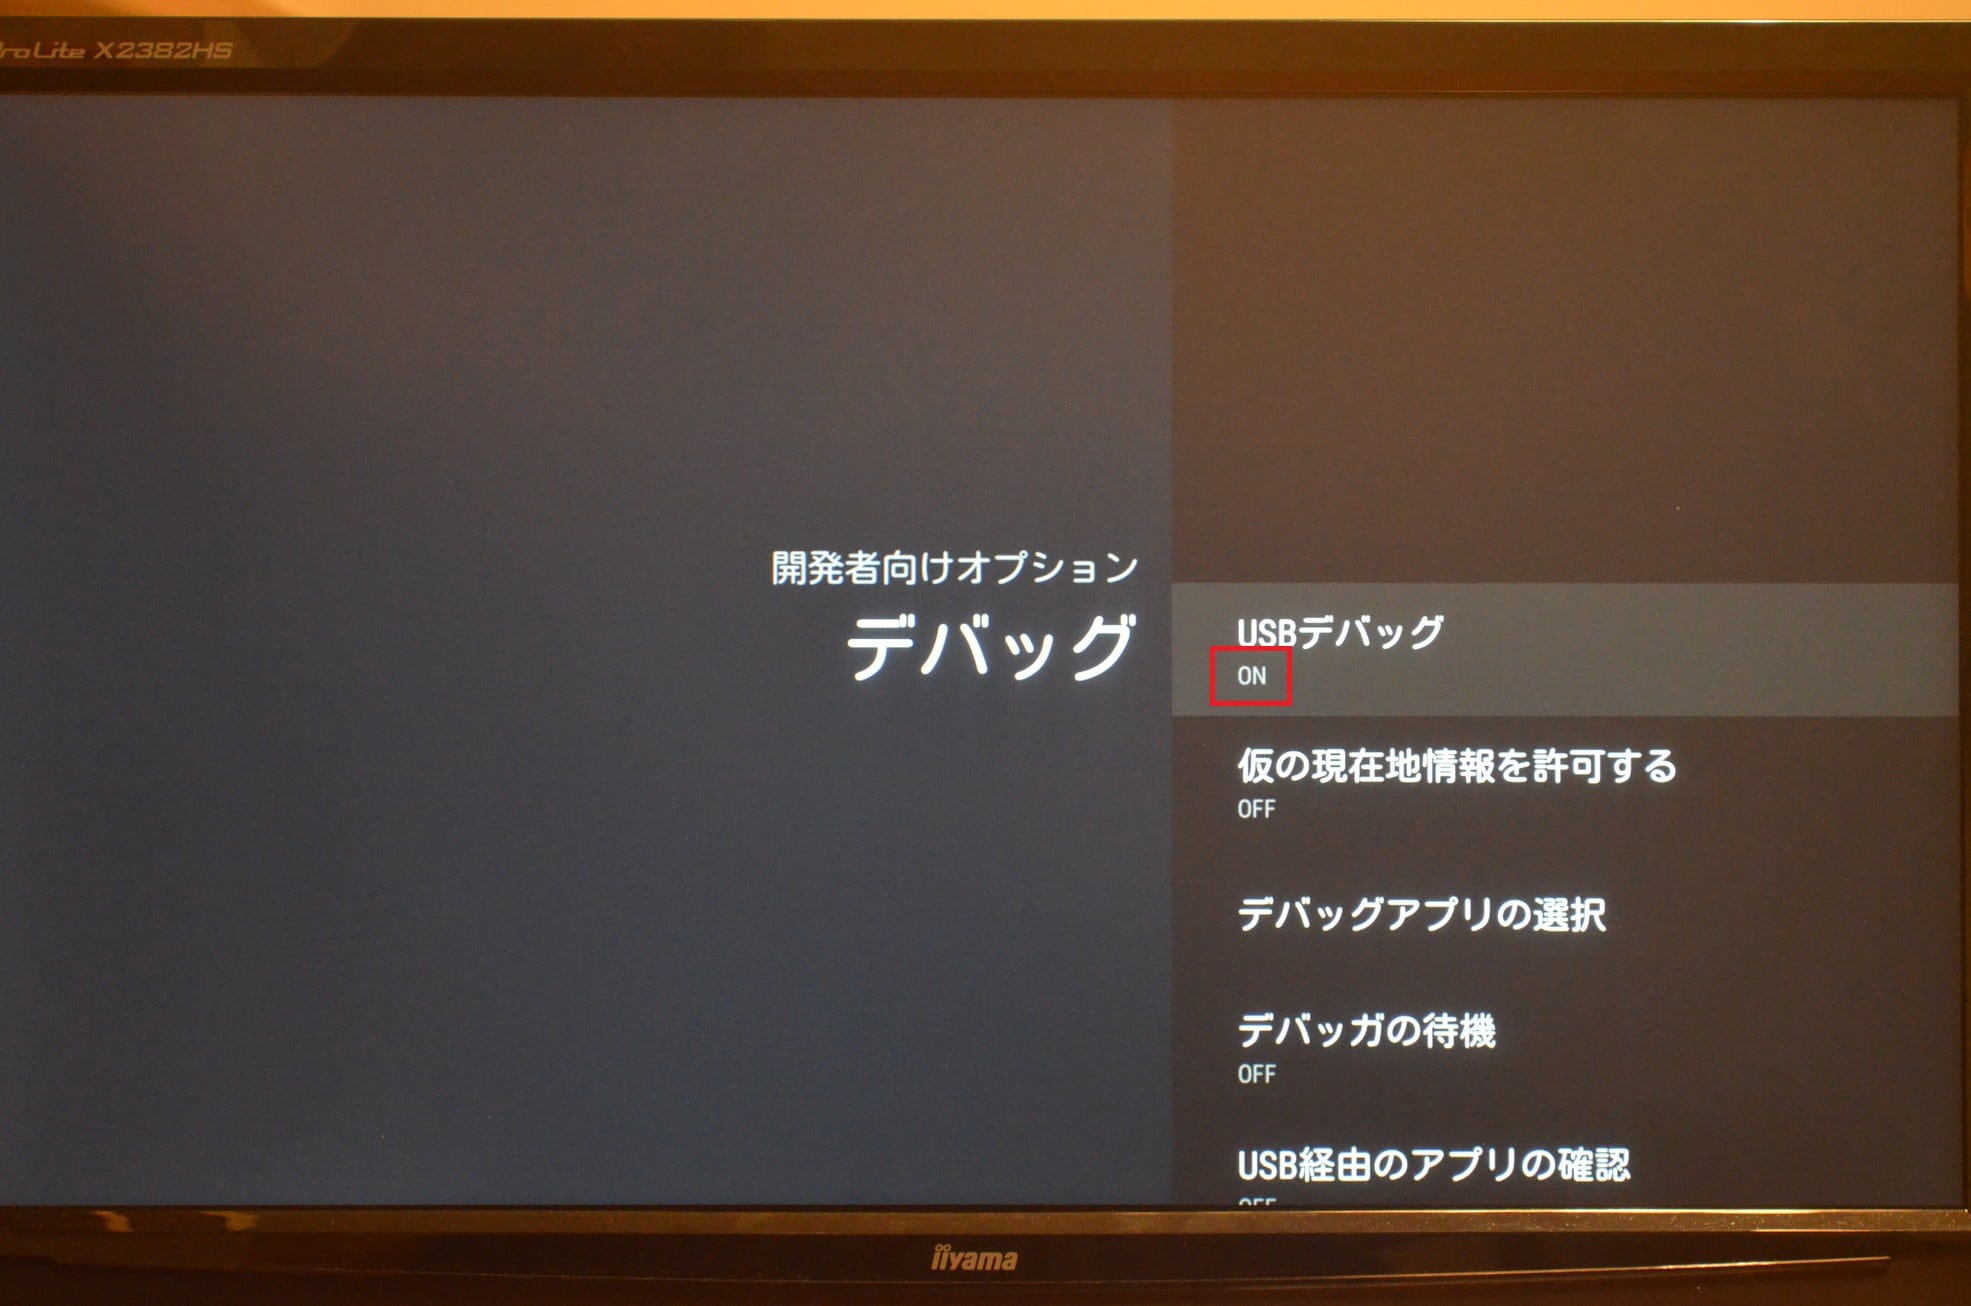
「ON」を選んで決定ボタンを押します。
USBデバッグのステータスが「ON」になりました。
Nexus Playerの開発者向けオプションの表示方法は、Android 4.2以降から非表示になった開発者向けオプションを表示させる方法と同じですね。
Nexus Playerの開発者向けオプションを表示させてUSBデバッグをオンにする方法は以上です。